Earlier this week, I spoke with a customer who had seen some of my previous guides on home lab builds of OKD and OCP. He mentioned another guide from fellow Redhatter cgruver. He explained how the idea of using an Intel NUC, some travel routers, and a Raspberry Pi was more attractive for a home lab than using a full-size rack-mount server. His perspective challenged me to create a simplified version of an OpenShift single node cluster for lab or home lab use. Challenge accepted Cristian!
Cluster Architecture:
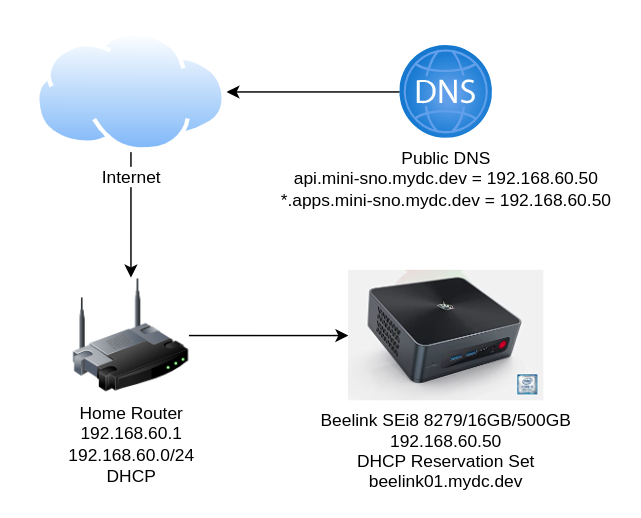
Comprehensive list of hardware and DNS requirements:
- MiniPC — (Assisted Installer minimum SNO requirements: 8 vCPU cores, 15GB RAM, and 120GB Disk)
- USB Flash Drive — 2GB or larger
- Personal Domain Name — (Example: I purchased mydc.dev from NameCheap)
That’s it. Really.
The Mini PC
A search for the cheapest MiniPC that met the above requirements ensued shortly after my conversation with the customer. The device I settled on is the Beelink SEi8 8279U with 16GB of RAM and a 512GB NVMe drive. I was lucky enough to purchase a brand new sealed one from EBay for $400.30, including shipping (MSRP $539). Only the 8279U CPU met the minimum requirements and the 16GB of RAM version.
The Beelink SEi8 8279U is expandable up to 32GB of RAM (2x RAM Slots — 1x 16GB RAM populated) and also has an empty 2.5″ disk bay ready for adding an additional drive/SSD.
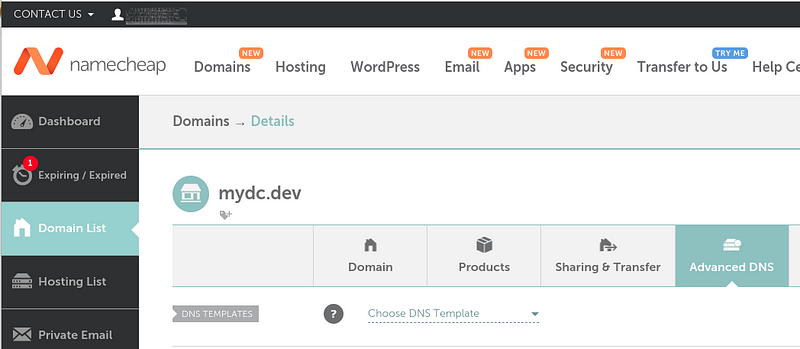
Personal Domain Name
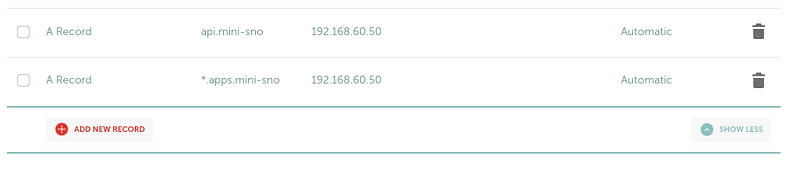
A while back, I purchased mydc.dev for use with my home lab specifically for use with the Assisted Installer. I created two DNS A records using a public domain: api.mini-sno.mydc.dev and *.apps.mini-sno.mydc.dev.
Creating the Cluster
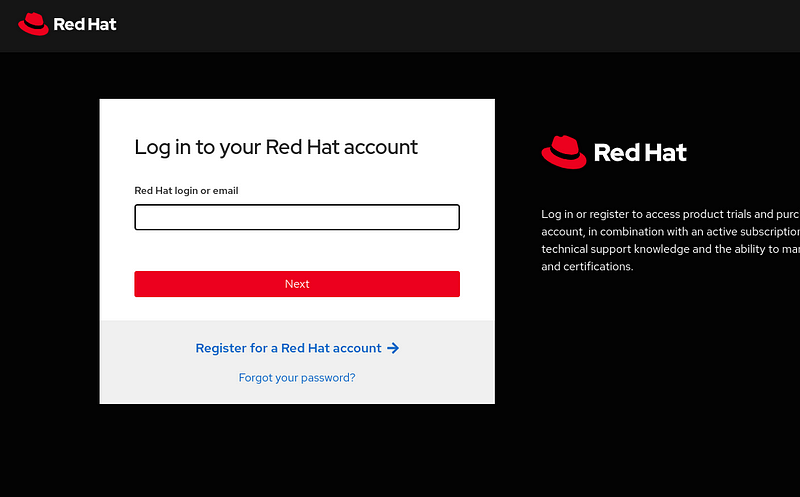
Use the Assisted Installer on the Red Hat Hybrid Cloud Console.
Visit https://console.redhat.com in your web browser.
Login with your no-cost Red Hat Developer Subscription for Individuals:
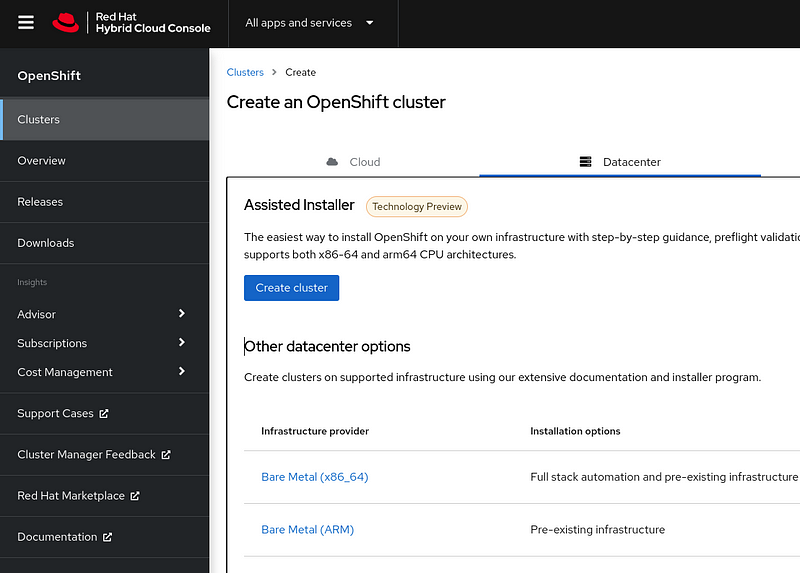
Click on OpenShift, Create Cluster, Datacenter, and Create Cluster.
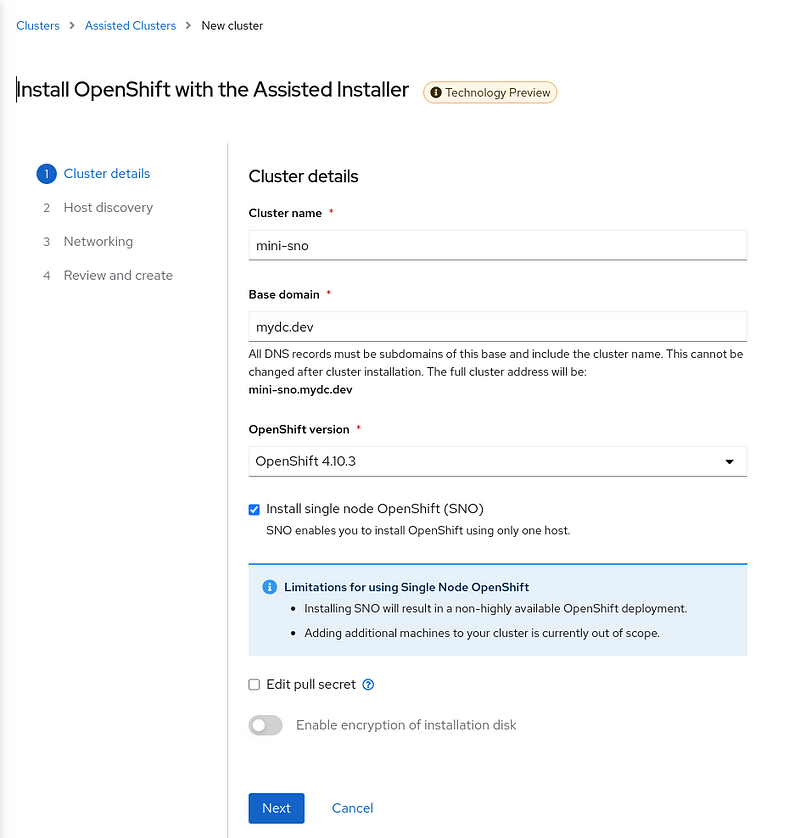
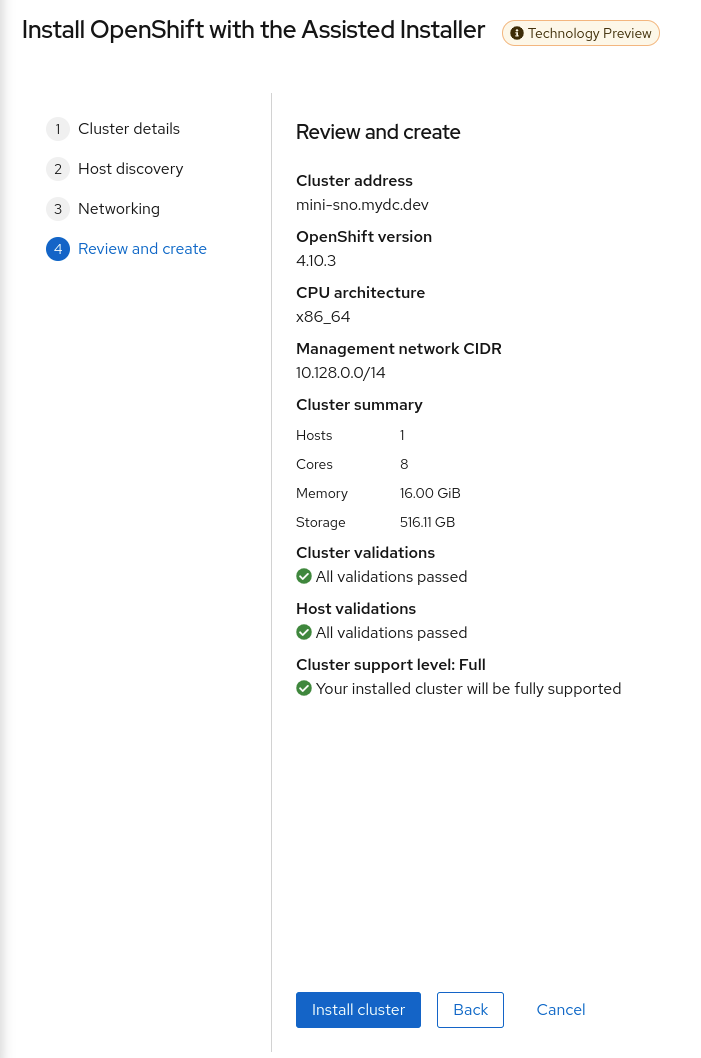
Type in your Cluster Name, Base Domain, Select the OpenShift version, check the box for “Install single node OpenShift (SNO), and click Next.
Next click on Add Hosts.
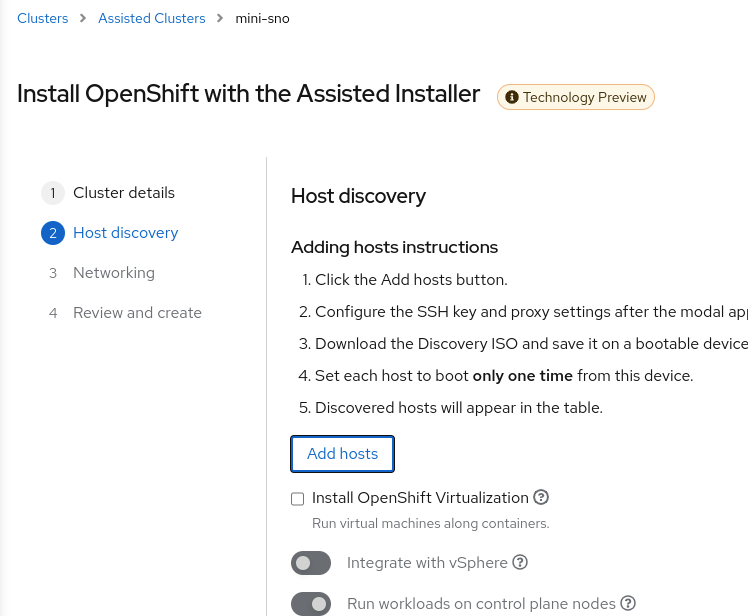
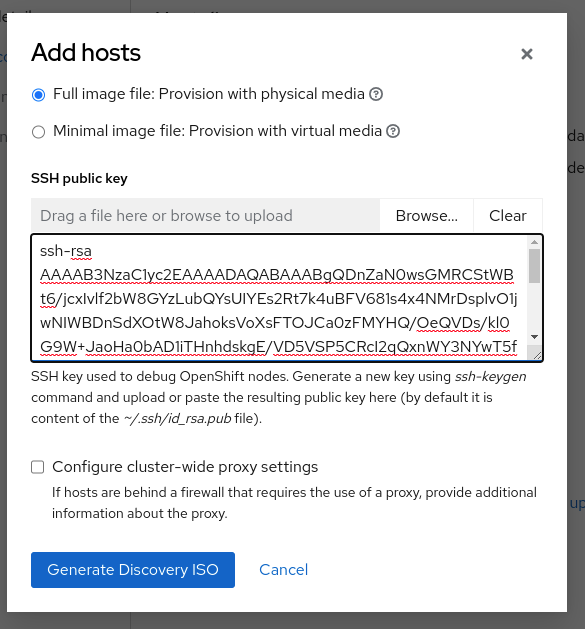
Select an image file, insert your public ssh key, and click “Generate Discovery ISO”. Using your SSH key will allow you to directly access the node if needed in the future.
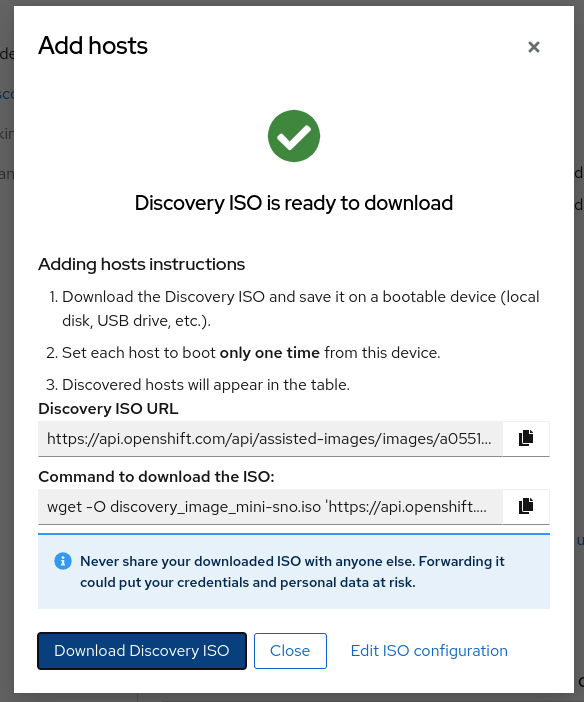
Click Download Discovery ISO.
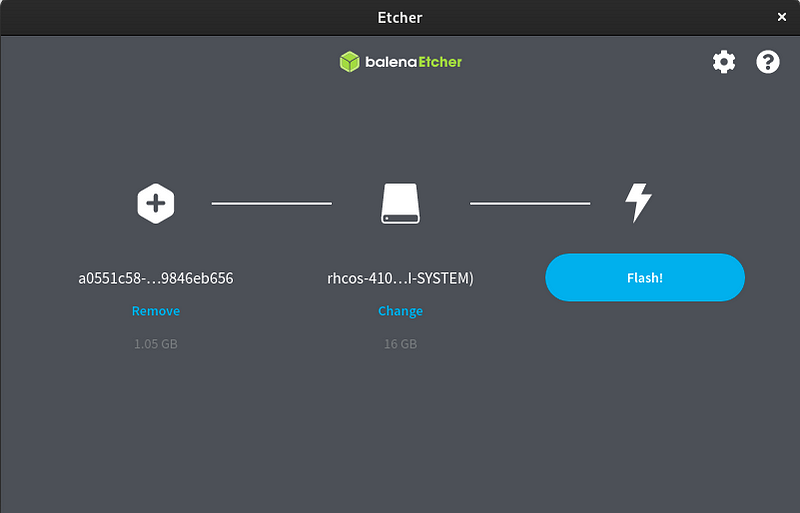
Download balenaEtcher from https://www.balena.io/etcher/ (Windows/Linux/MAC):
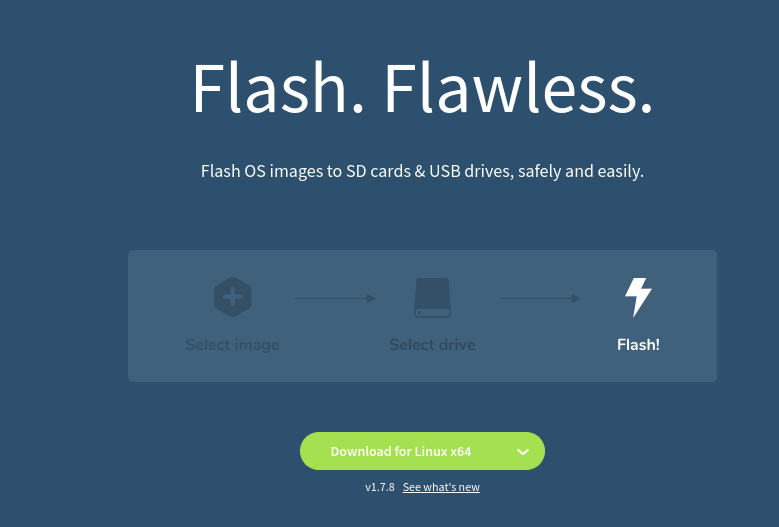
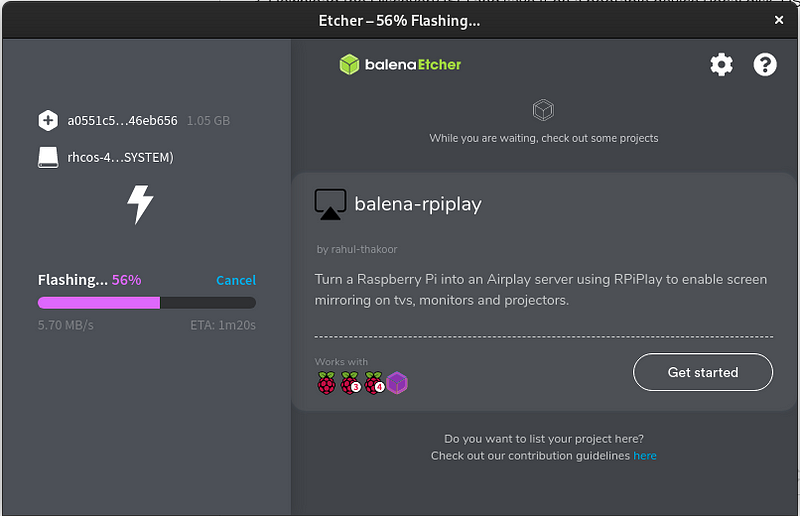
Insert your USB flash drive. Open balenaEtcher, Click “Flash from file”, ensure you have the correct USB drive select, and click Flash.
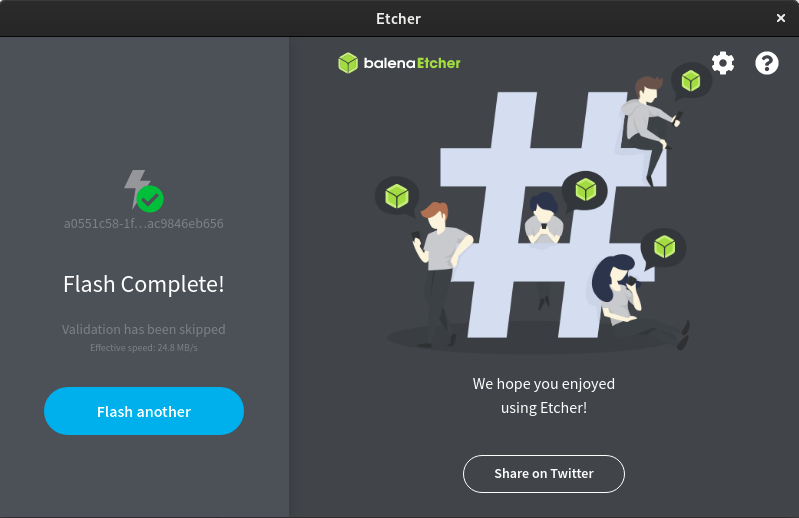
After your ISO has completed writing to the USB flash drive, close Etcher. Safely Eject your USB flash drive from your computer.
Connect the power, monitor, keyboard, and USB flash drive to your MiniPC.
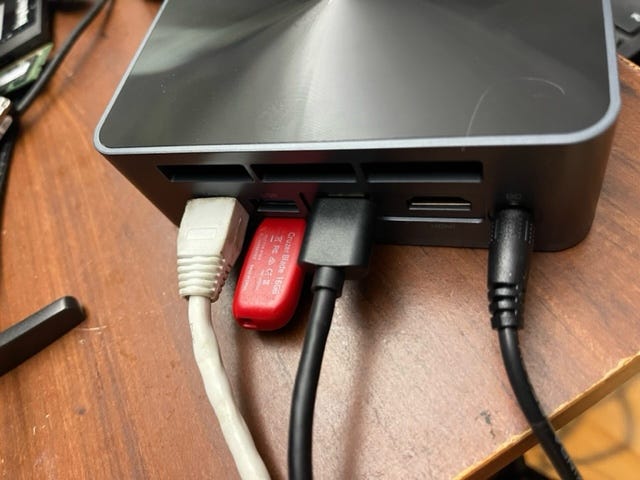
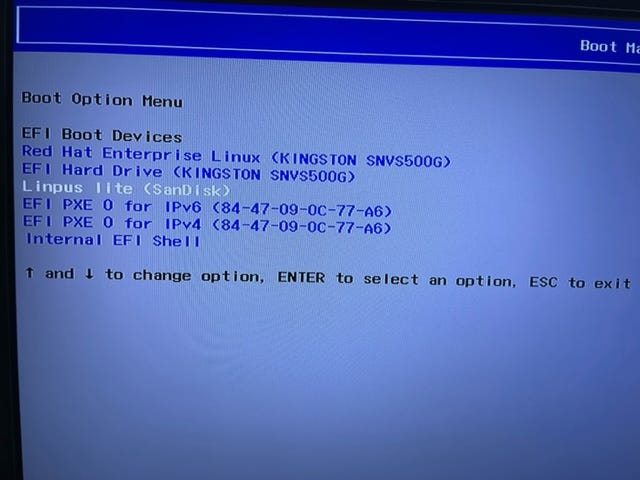
Power on the device and press F7 to select the Boot menu.

Select the USB Flash drive and press Enter.
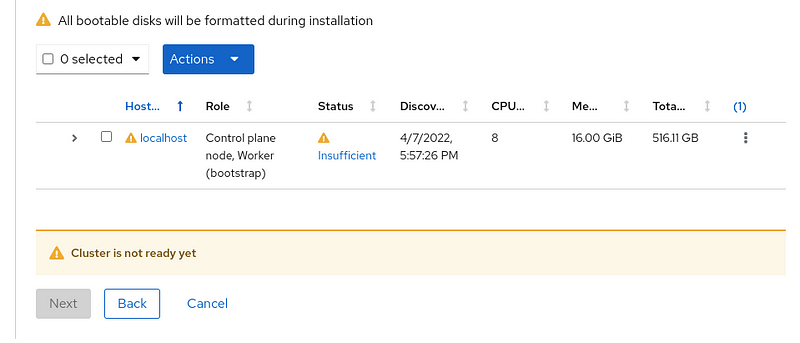
While the system boots, go back to the Red Hat Cloud Console page, and localhost should appear after a minute or two.
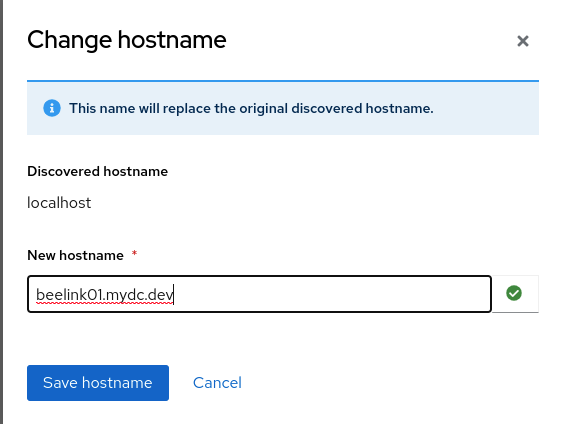
Click “localhost” and then “Change hostname”

Type in a new hostname and click “Save hostname”
Next, Click the > beside your host and note the MAC address:
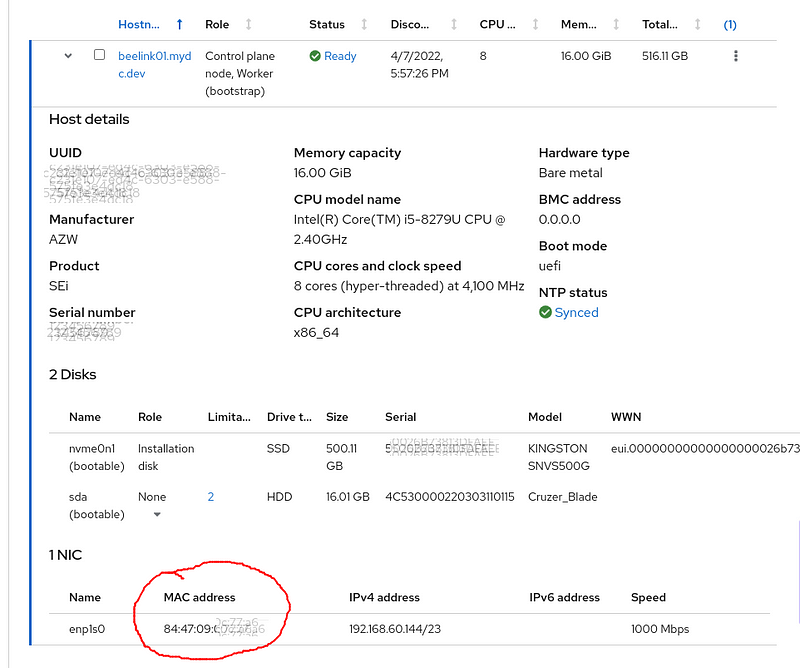
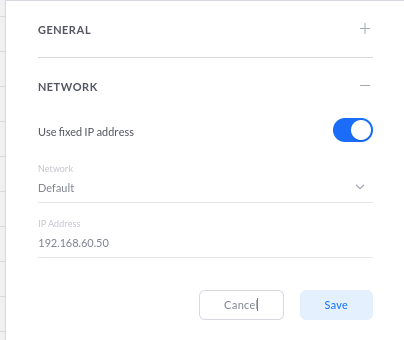
Set a DHCP Reservation for the Mac Address to an unused IP:
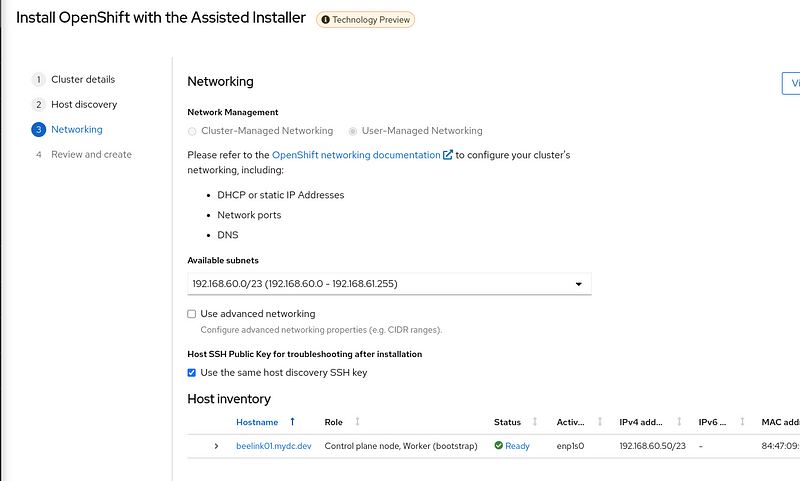
After setting up your DHCP reservation, unplug the NIC for 10 seconds, and reconnect. Wait an additional 10 seconds, and the IP you used for the Reservation will display. Click Next

Setup a DNS A record for the api and ingress using your domain.
Click Next on the Red Hat console and if the Status is Ready, click Next.
Finally click, “Install Cluster”
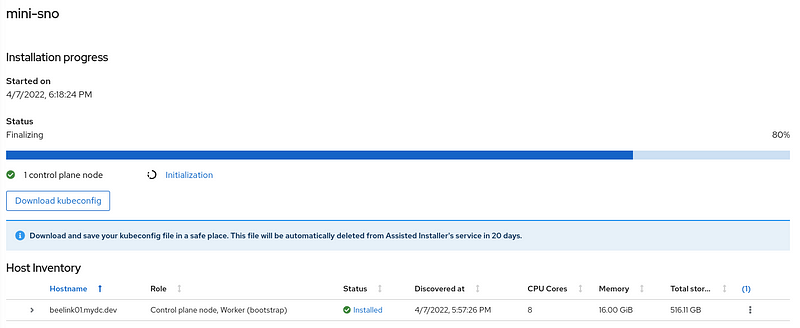
Next, we wait for the installation to complete.
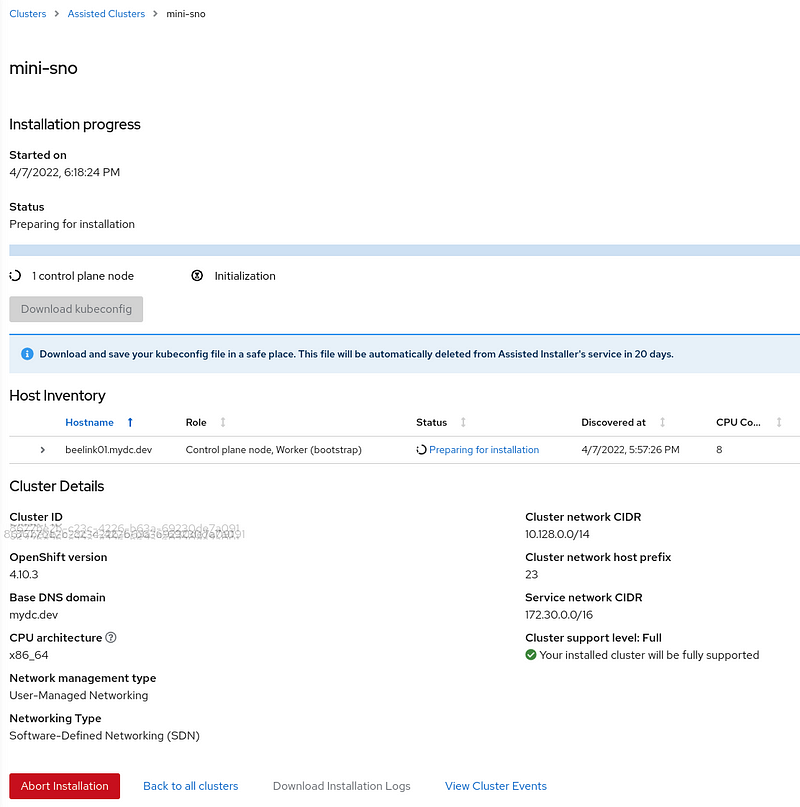
As the installation progresses, the MiniPC will reboot twice.
Once the installation is complete, download the kubeconfig and note the kubeadmin password. Then click on the “Web Console URL”.
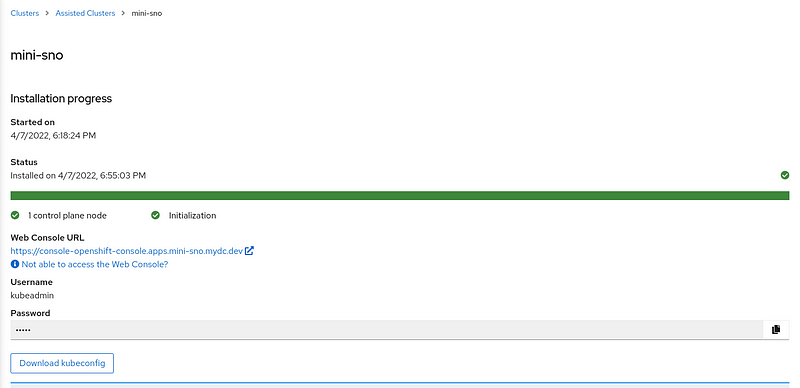
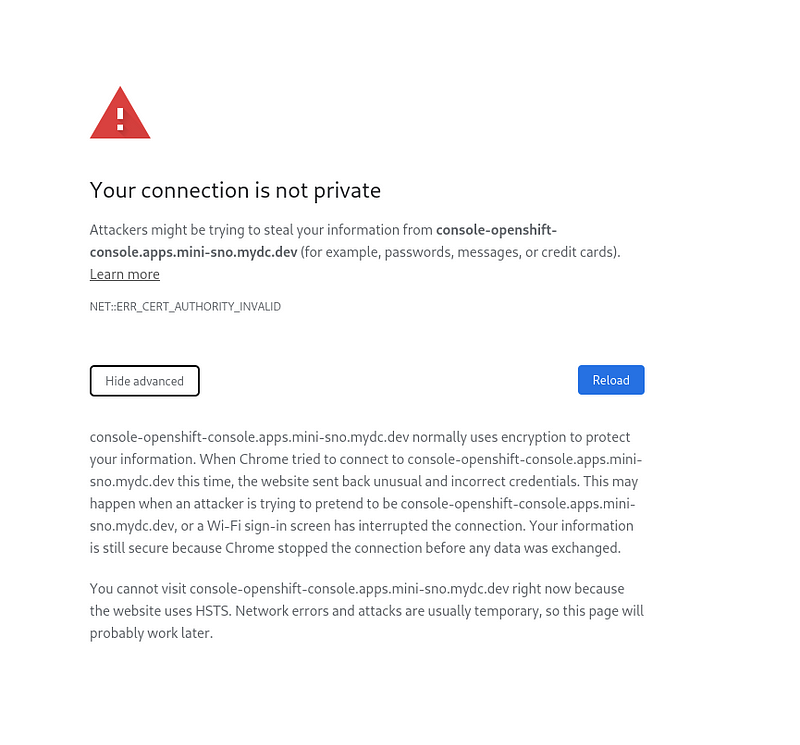
Because you are using self-signed certificates, this error will appear, twice. To bypass this error in Chrome, without clicking anywhere, type on your keyboard “thisisunsafe” (without quotations).
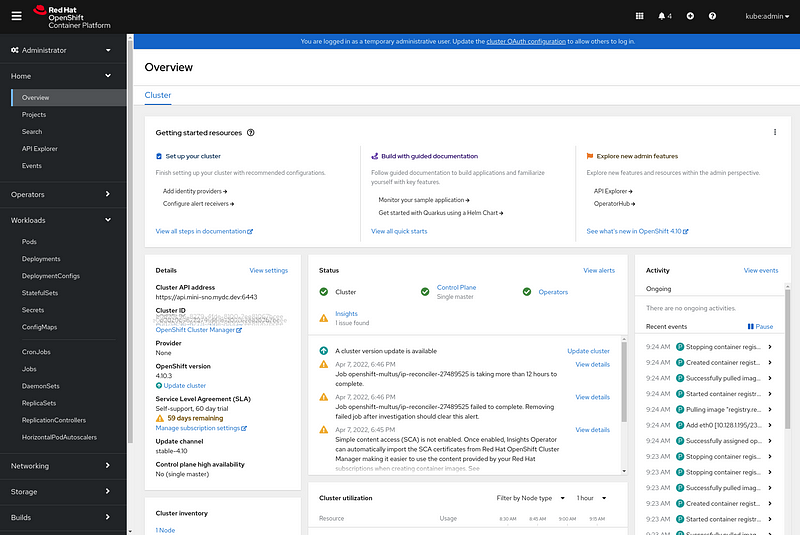
Login to your cluster with kubeadmin and the password.

Your dashboard should look similar to this:
At this point, you can update the cluster to the latest version by clicking “Update cluster” under Status.
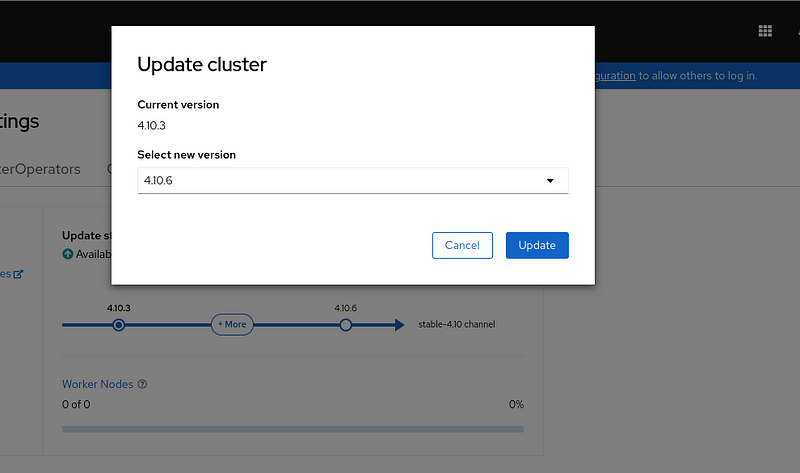
Updating the cluster from 4.10.3 to 4.10.6 took around 45 minutes.
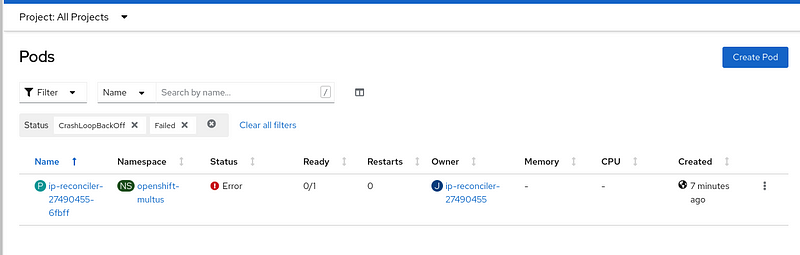
There is a bug with the ip-reconciler cron job that does garbage collection on IP addresses. It sometimes fails but will eventually succeed. It has been patched in the 4.11 nightly builds and will likely be backported to 4.10.
Next Steps
Now that the cluster is up and running, what next? You can follow Part 2 of a previous guide that will walk you through the following:
- Download and configure the oc client
- Setup an authentication provider using htpasswd
- Configure the registry (non-production)
- Create an ephemeral Drupal project.
https://craig-robinson.medium.com/guide-install-openshift-4-the-easy-way-part-2-ca0258fd1204
Summary
I enjoyed working on this project and hope it will help others get started.
The Beelink MiniPC only has a single-use at this point as my single node cluster. I have not run any intensive workloads on this cluster and cannot provide an opinion on the long-term stability of this device.
Instead of this MiniPC, my recommendation would be to purchase a used server (check r/homelab and r/homelabsales for recommendations) for use with a home lab and your hypervisor of choice. For example, you can buy a used R630 with 2x Xeon Processors, 64GB of RAM, and add an SSD for less than $600. With those specs, you could set up multiple VM’s for your home lab.
Good luck on your journey with OpenShift.