If you are starting your journey with OpenShift in a lab environment, I recommend using the Assisted Installer with my two-part guide and the accompanying YouTube videos, instead of this guide.
This guide will cover installing OpenShift 4.10 on bare metal using the IPI installer (installer-provisioned infrastructure). The IPI method can be described as a fully automated install that uses the OpenShift installer program to provision the cluster. In this guide, using the information we provide in the install-config.yaml, the installer program will power on our three bare metal servers via IPMI (Intelligent Platform Management Interface) and complete the cluster installation in a fully automated fashion.
One challenging portion of this guide will be following how my network is designed and then adapting your network to match the cluster requirements. For example, your servers, IP addresses, DNS, DHCP, and MAC addresses will differ from what I use in this guide. About 75% of the issues mentioned in the comments of previous guides are networking-related and typically where you want to look first if you run into problems during the installation. Let’s get started.
Network Layout
Network Hardware
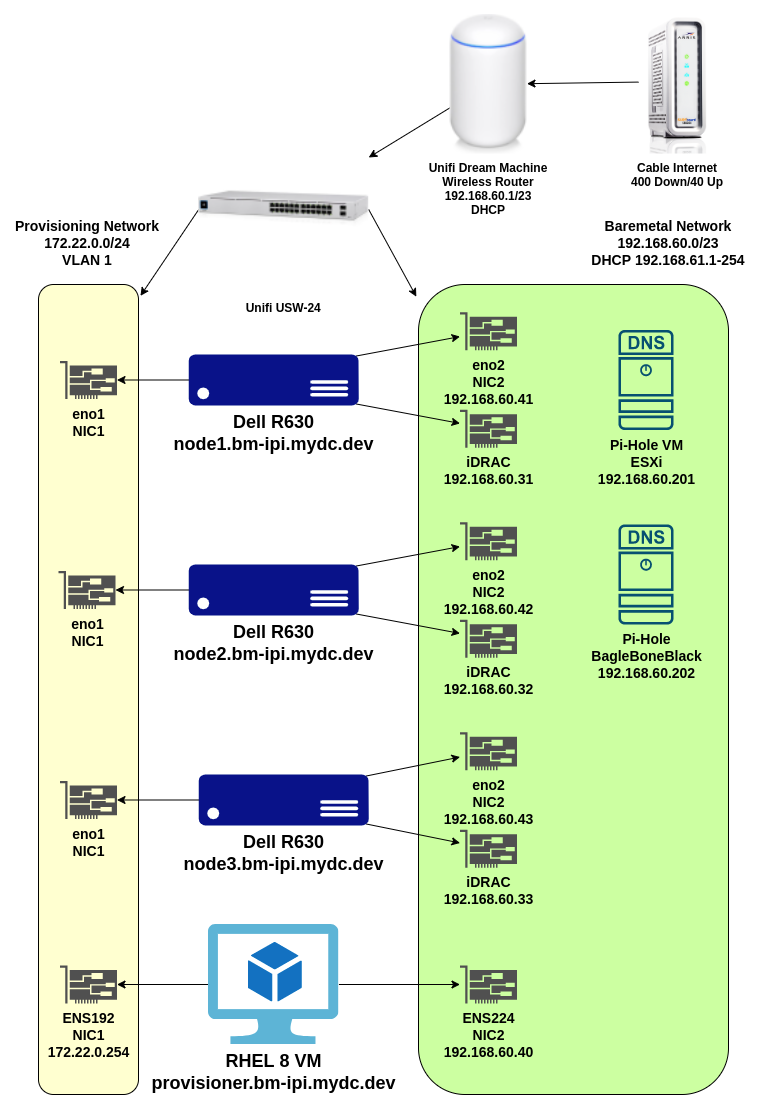
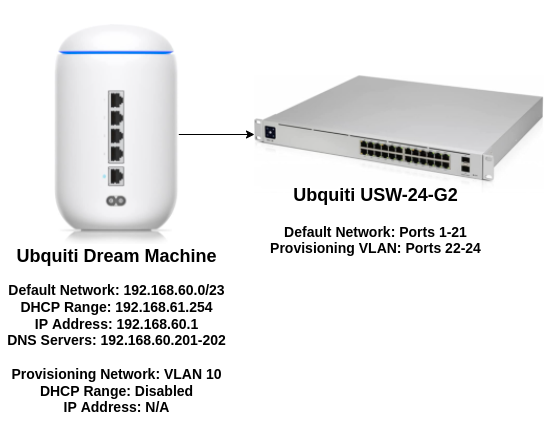
I use a Ubquiti Dream Machine as my router/gateway and a 24-port Ubquiti switch. We need one “baremetal” network for this IPI installation and one “Provisioning” network. Ports for the iDRAC and NIC2 are connected to my “Default Network” profile and are considered the “baremetal” network for this guide. The NIC1 on each server is connected to the “Provisioning Network” on ports 22–24 of the switch and set to VLAN 10.

DNS Setup
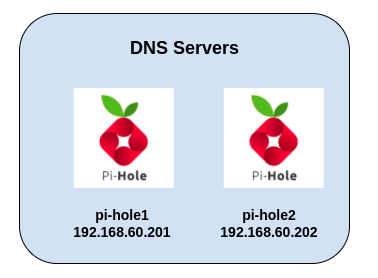
For local DNS, I utilize pi-hole installed on a VM and a BegleBoneBlack.
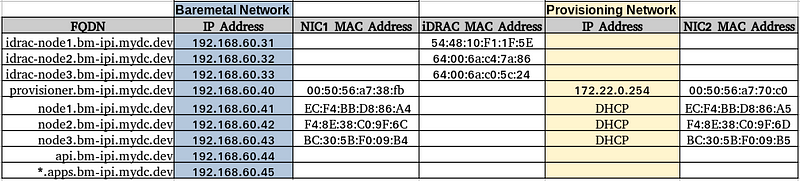
The FQDN records matching the “Bare Metal Network” IP addresses were added through the pi-hole web GUI on the “Local DNS Records” page except for the wildcard address.
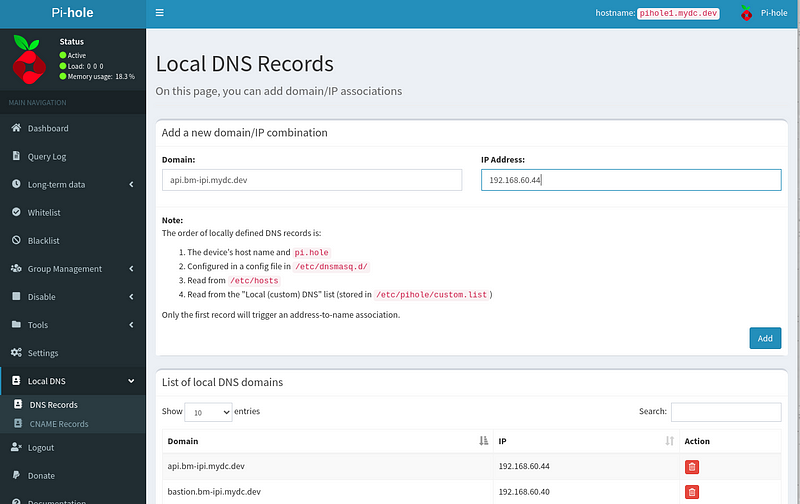
Adding the wildcard DNS record
To add a wildcard on a pi-hole, do the following:
SSH into your pi-hole and create a conf file under /etc/dnsmasq.d/:
$ sudo vi /etc/dnsmasq.d/99-openshift.conf
The contents of the 99-openshift.conf should look like this:
address=/.apps.bm-ipi.mydc.dev/192.168.60.45
After saving the 99-openshift.conf file, restart DNS on the pi-hole:
$ pihole restartdns
Finally, test your wildcard address to ensure it works:
$ dig +short test.apps.bm-ipi.mydc.dev
192.168.60.45
DHCP Reservations
Using DHCP reservations is my preferred method to set up any permanent device. DHCP reservations were set up via the Unifi GUI, matching the IP addresses listed under the “Bare Metal Network” to the NIC1 and iDRAC MAC addresses:
Prepare the bare metal servers
Server hardware
For this project, I purchased three used Dell PowerEdge R630’s on EBay and r/homelabsales, with dissimilar components. *Red Hat recommends using “similar nodes.”

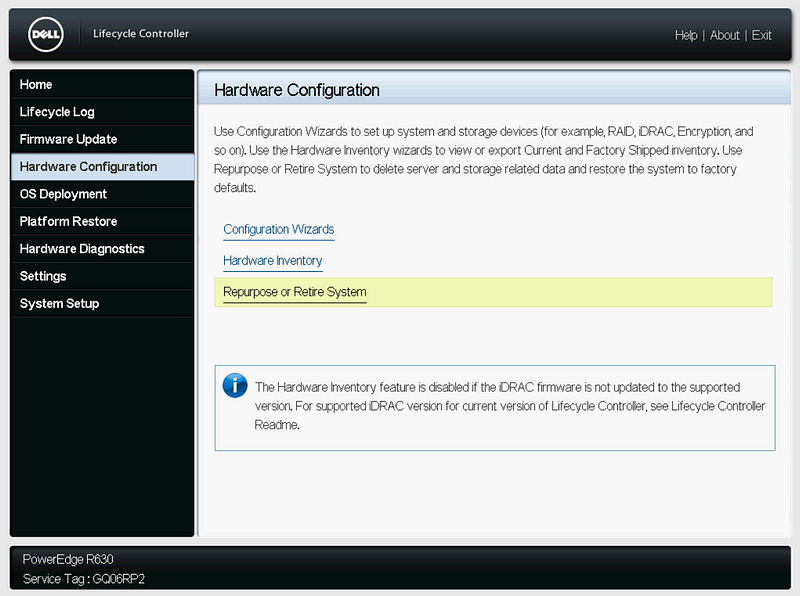
Reset to Factory Defaults
After cabling the power, iDRAC, and NIC1, the first step is to reset the system to factory defaults.
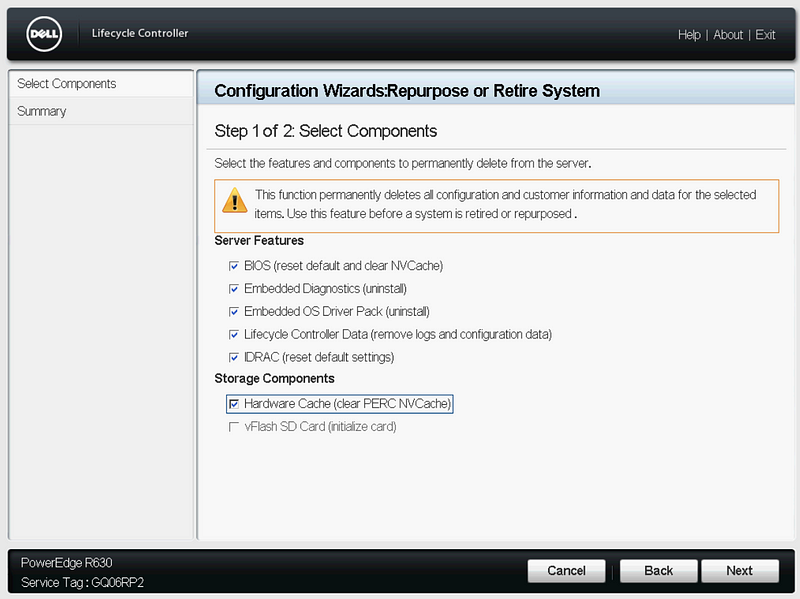
Press F10 Boot to the Lifecycle Controller. Select “Hardware Configuration” then “Repurpose or Retire System.”

Select all the components, and click “Next”, then “Finish.”
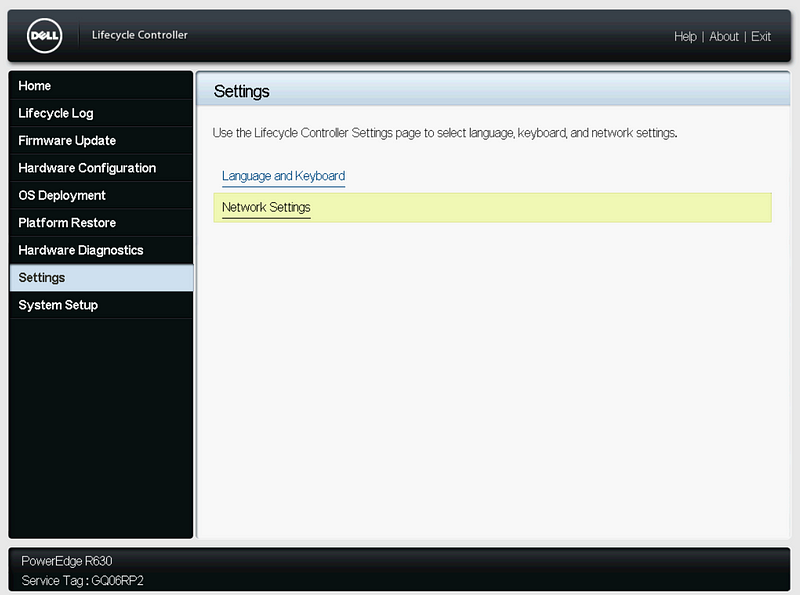
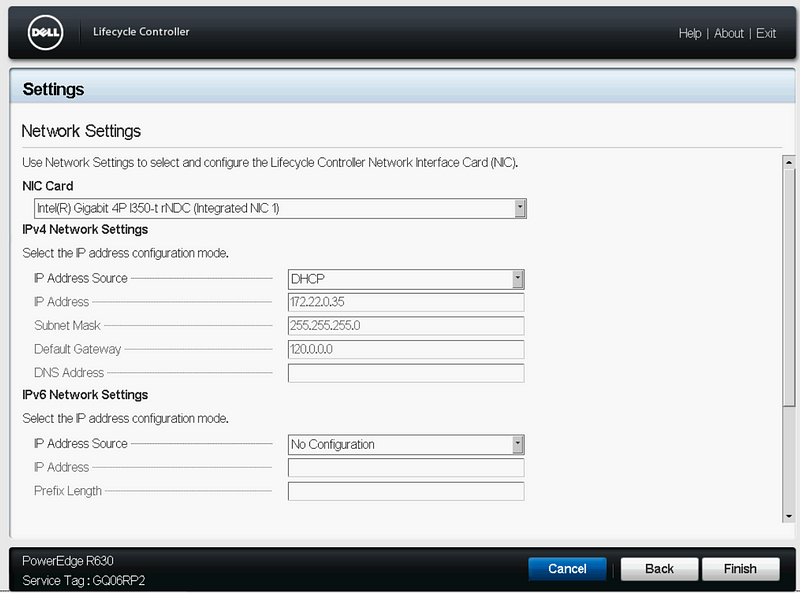
Configure the Lifecycle Network Settings
After the system resets to the default settings, follow the wizard and configure NIC1 on the Lifecycle Controller for network connectivity with internet access.
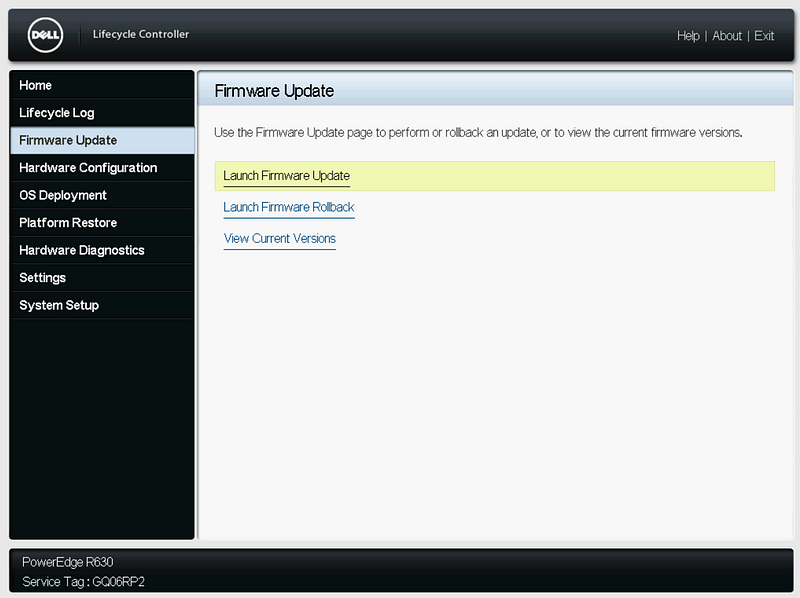
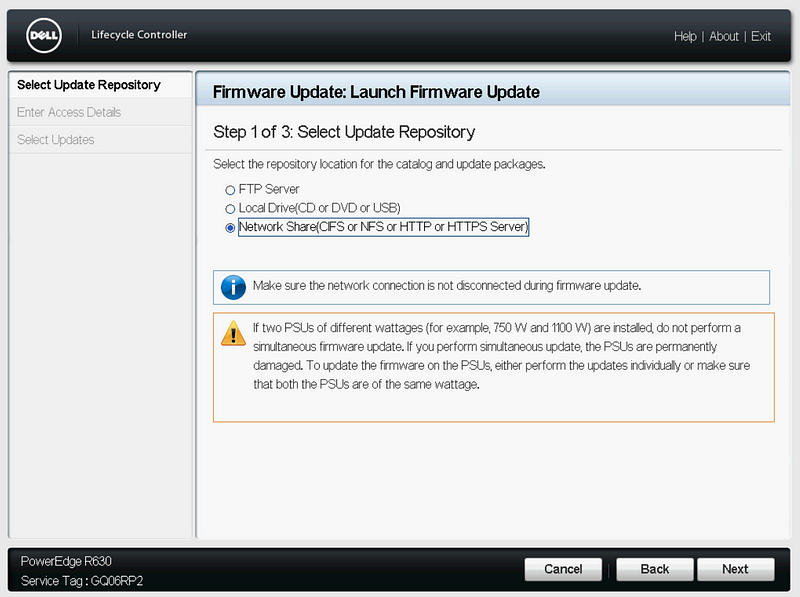
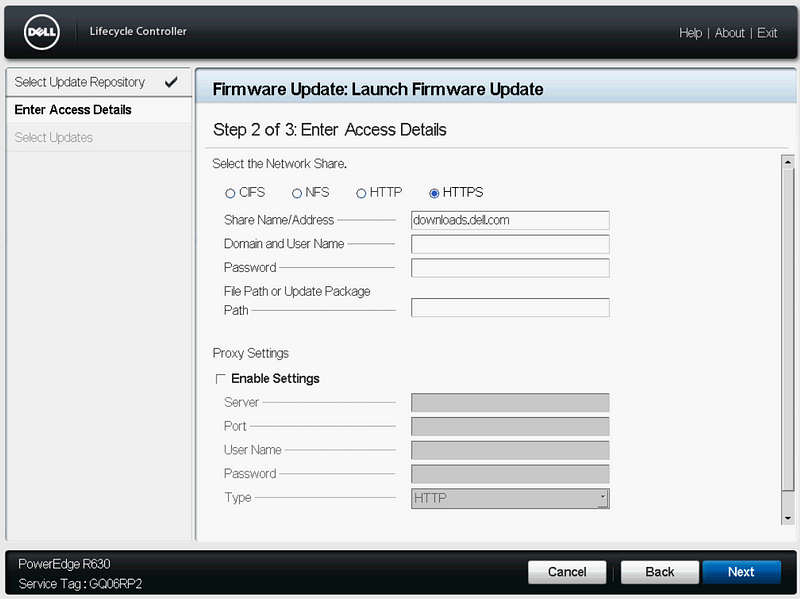
Update the Firmware
Select “Launch Firmware Update”, “Network Share”, “HTTPS”, click Next.
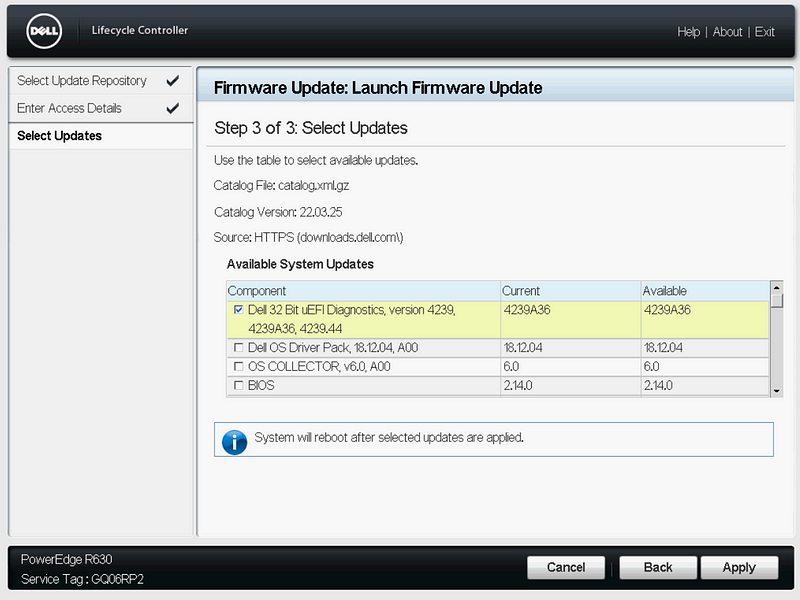
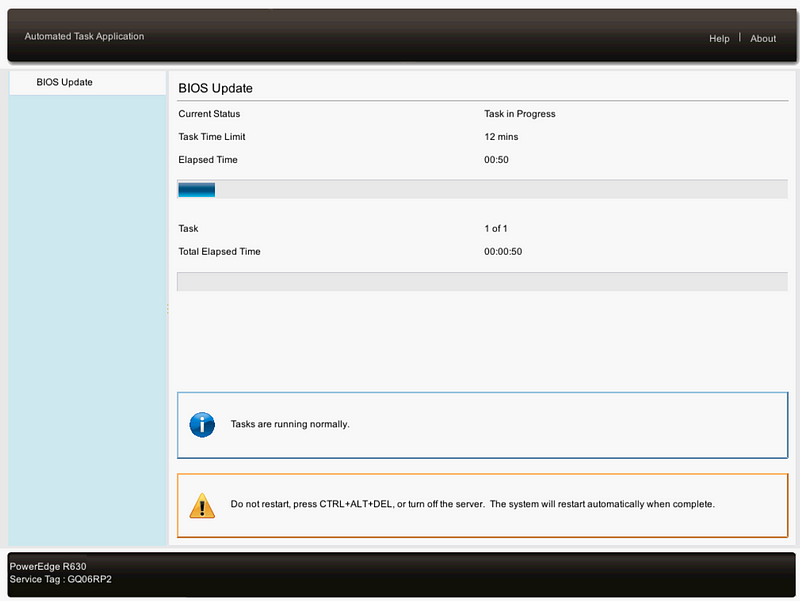
Select the updates with a newer Available version, then click Apply and install the updates.
Setup iDRAC Networking
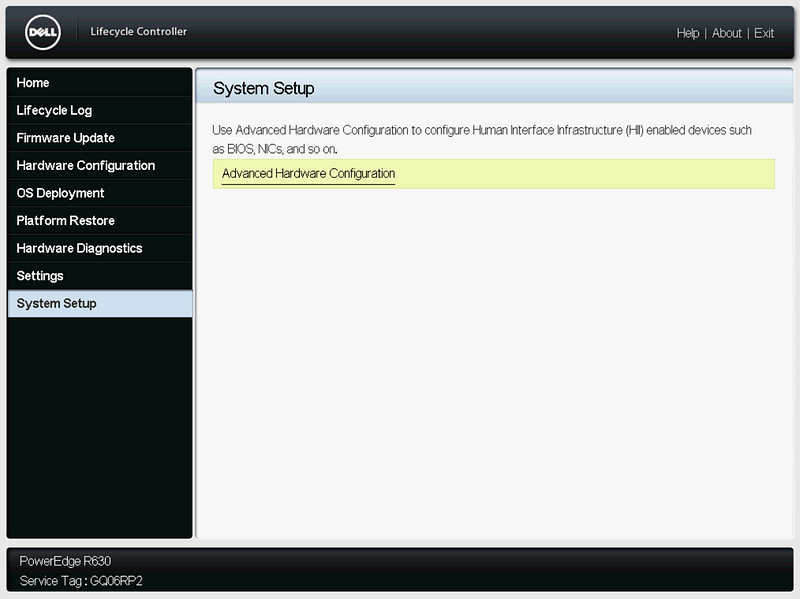
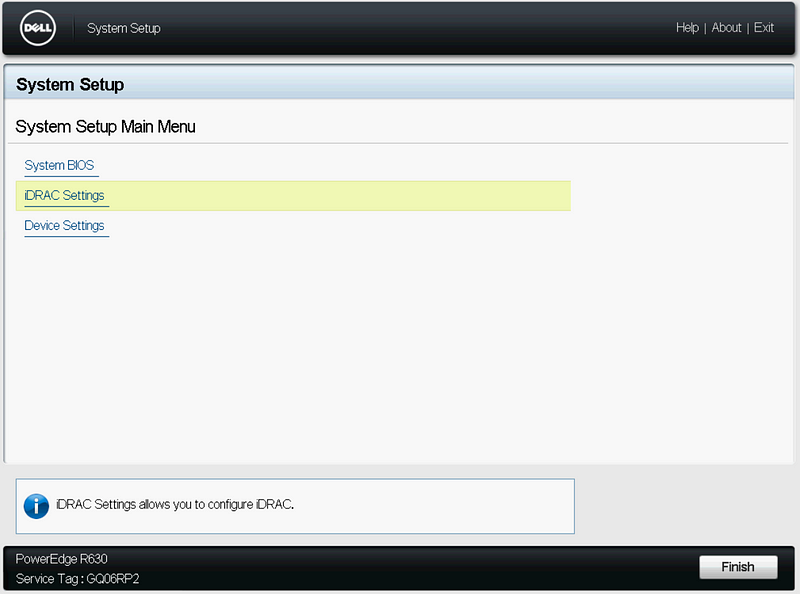
After installing the updates, boot to the Lifecycle Controller. Click “System Setup” and “Advanced Hardware Configuration”.
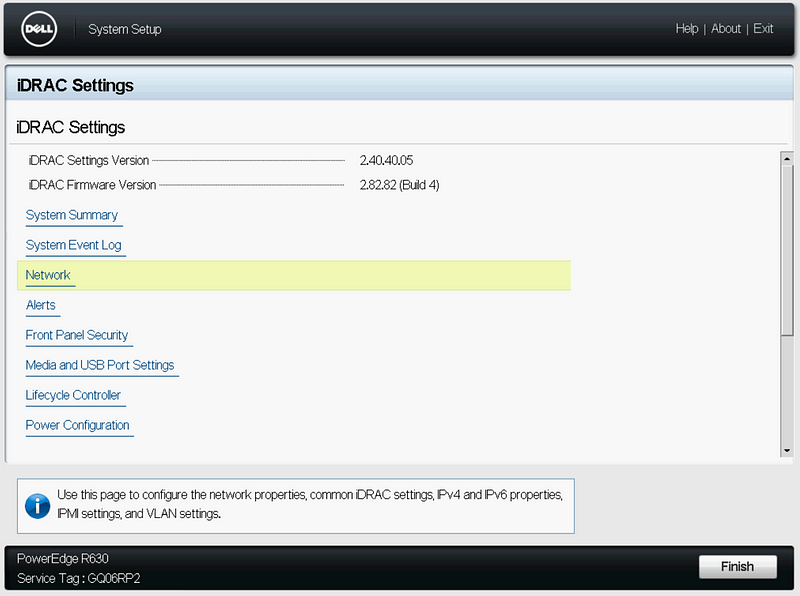
Click “iDRAC Settings” then “Network”.
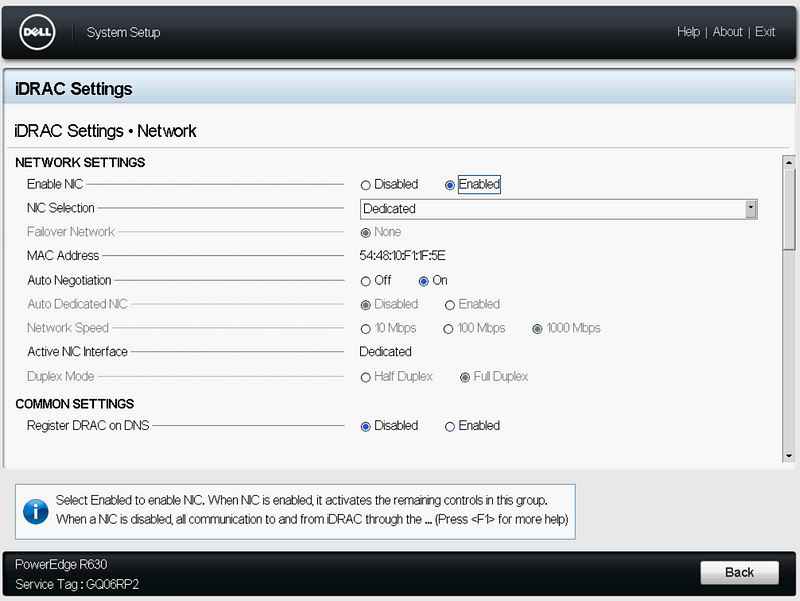
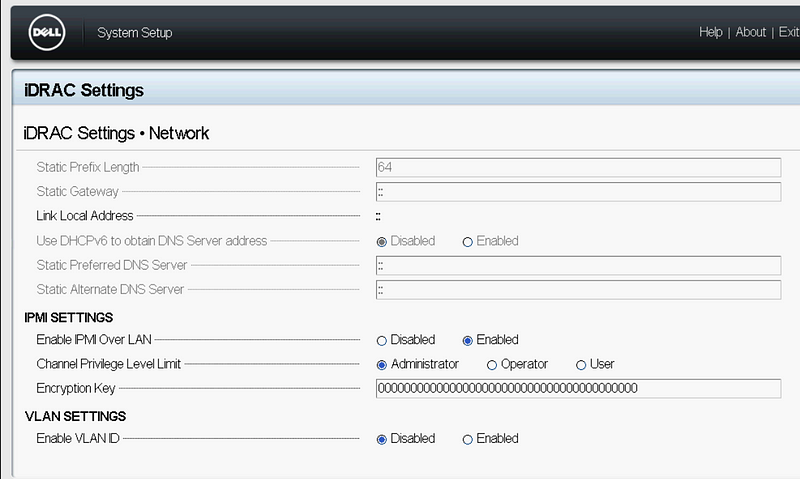
Configure your iDRAC Network Settings and “Enable IPMI Over LAN”
Set RAID Controller to HBA Mode (Optional)
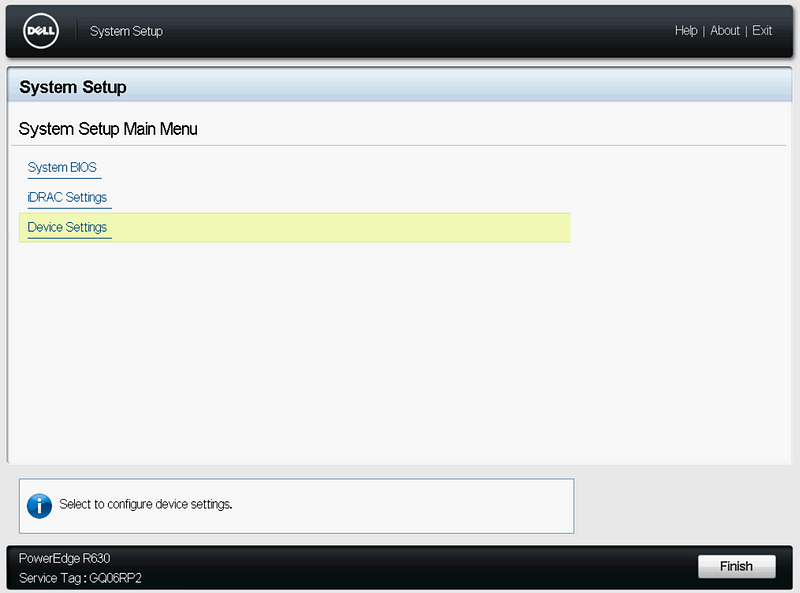
Since we are in the System Setup, you can change your RAID controller to HBA mode if desired.
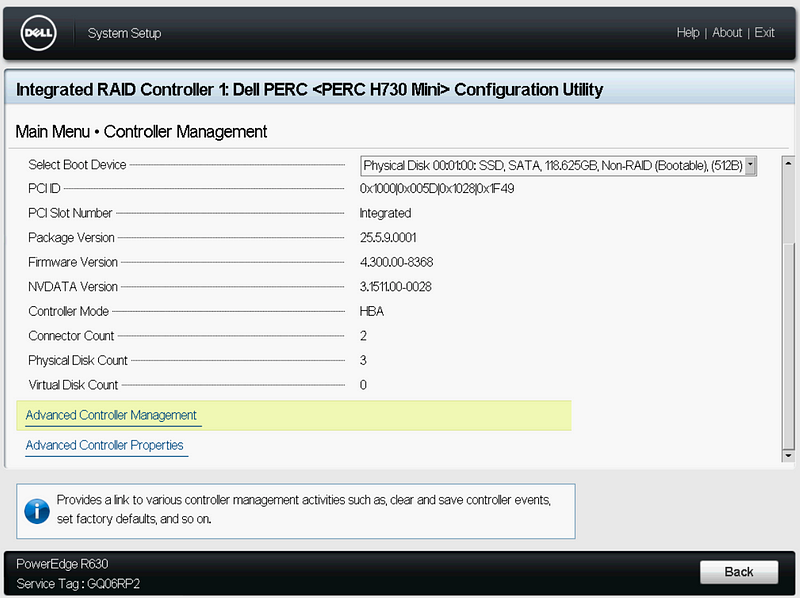
Click “Device Settings”, “Integrated RAID Controller”, and “Controller Management”.

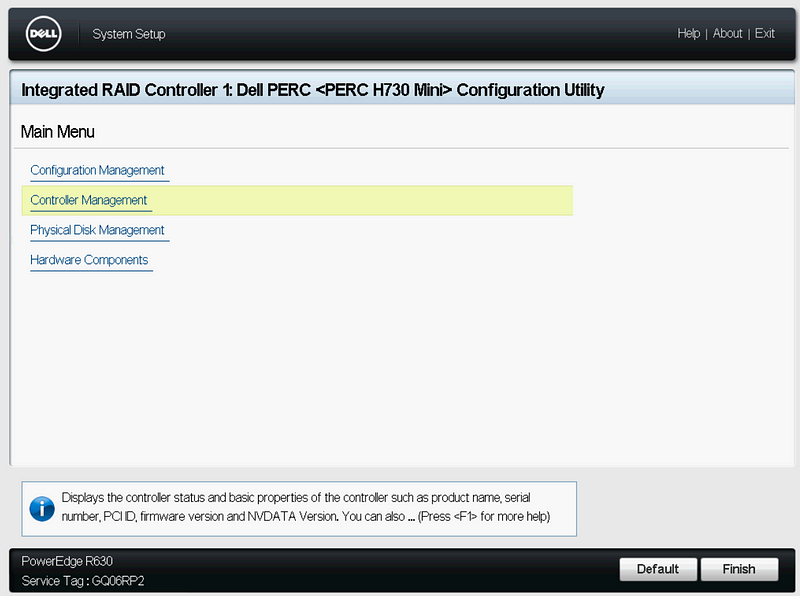
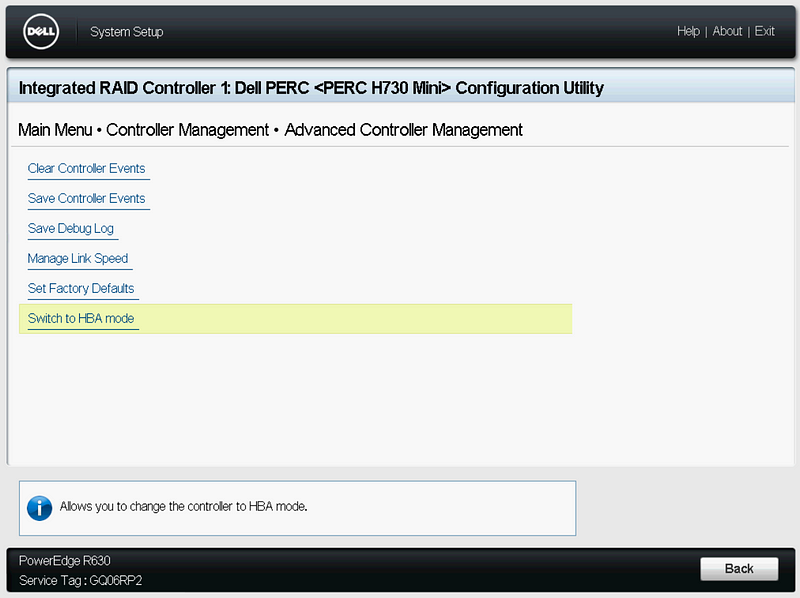
On Controller Management, scroll to the bottom, and click “Advanced Controller Management”, then “Switch to HBA Mode”. Click Ok, and Restart.
Setup iDRAC User
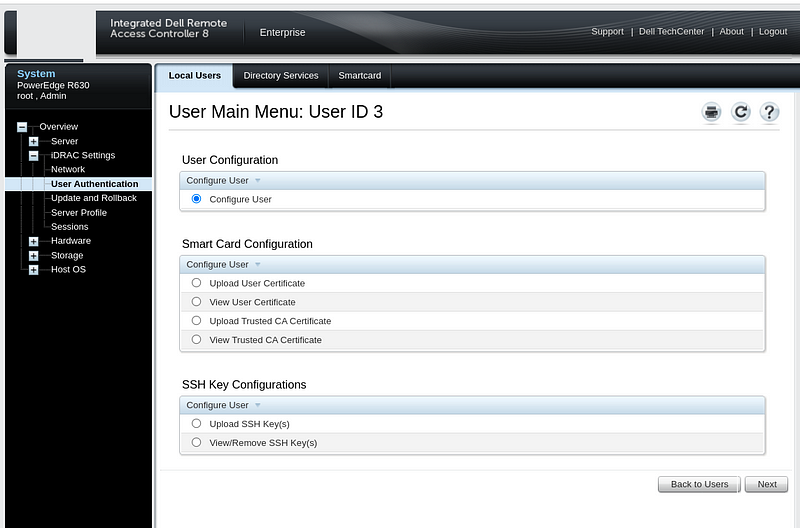
Login to the iDRAC web console using the IP address or hostanme. Click on “iDRAC Settings”, “User Authentication”, and select a “User ID” number to create a new user.
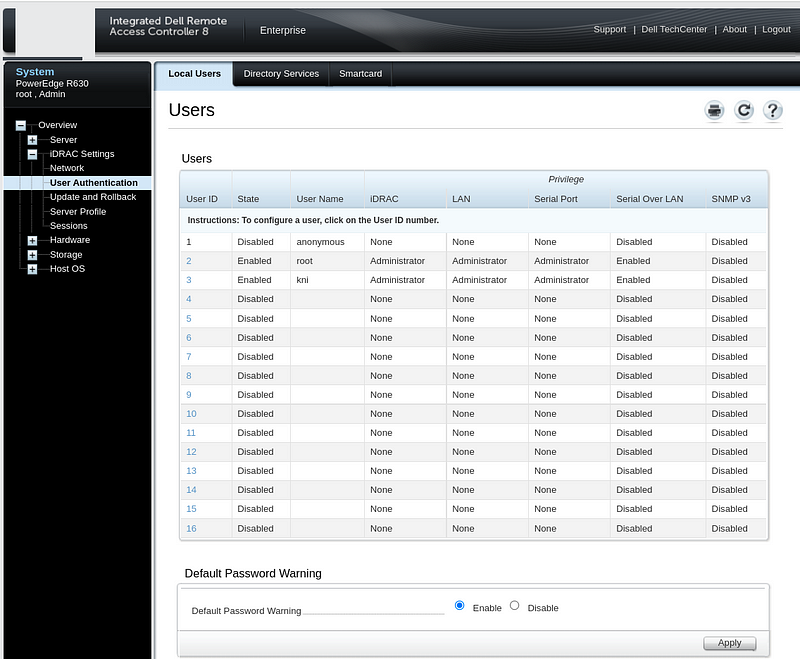
Click “Configure User” and set a username (kni) and password (openshift). Set IPMI and iDRAC Role Privileges to “Administrator”. Click Apply.

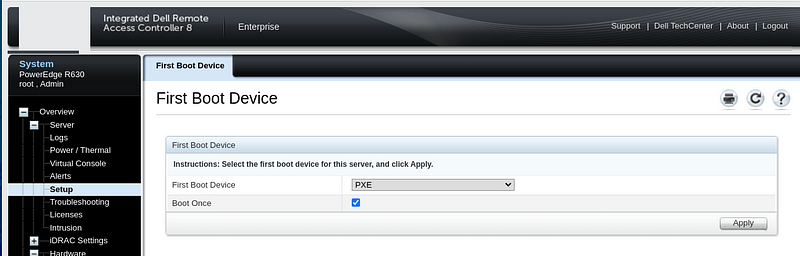
Set each server to boot to PXE for the First Boot Device:
IDRAC->Server->Setup->First Boot Device-> PXE
Prepare the provisioner node
The provisioner node in my environment is a virtual machine hosted on an ESXi host but you could also use an additional bare metal server instead.
There is a no-cost offering of the Red Hat Developer program that includes access to RHEL including the subscriptions in addition to other Red Hat products. You can join the Red Hat Developer program at developers.redhat.com/register. Joining the program is free.
Download RHEL 8
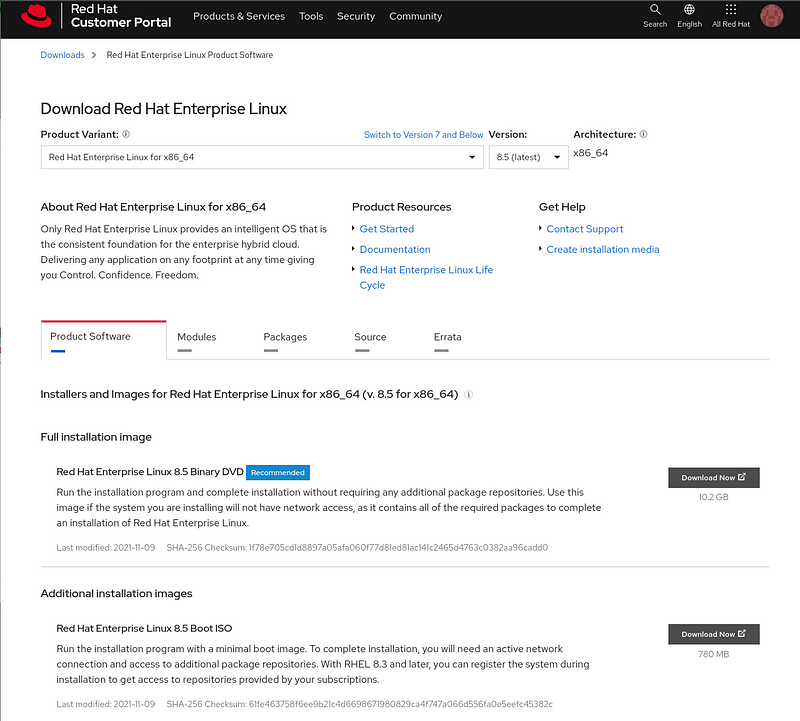
Once you have created your free Developer account, in a web browser, go to https://access.redhat.com/downloads
Beside “Red Hat Enterprise Linux 8” click the down arrow and then “Download Latest”.

Login with your developer account if you have not already done so.
Download the “Red Hat Enterprise Linux 8.x Boot ISO” that is around 800MB.
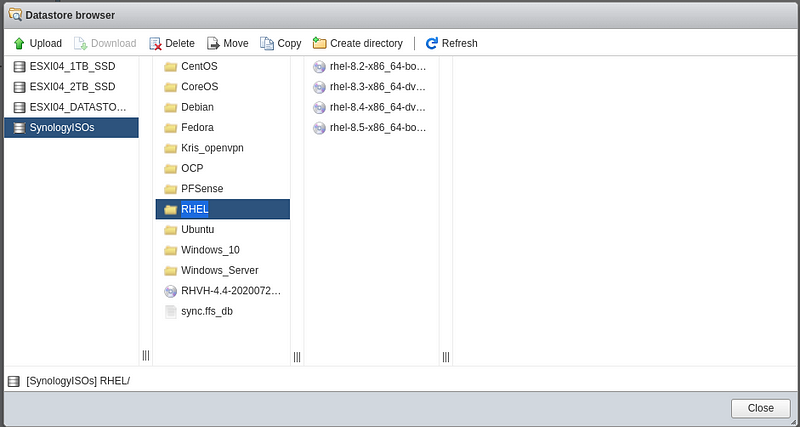
Using the Datastore browser or SCP, upload the ISO to a location your ESXi host can access:
Setup the ESXi Newtork
If you are using ESXi for your provisioner node, follow these steps:
Login to your ESXi host:
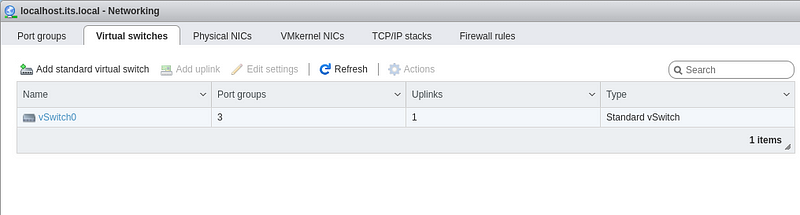
Select “Networking” then click the “Virtual switches” tab, and finally click on “vSwitch0”.
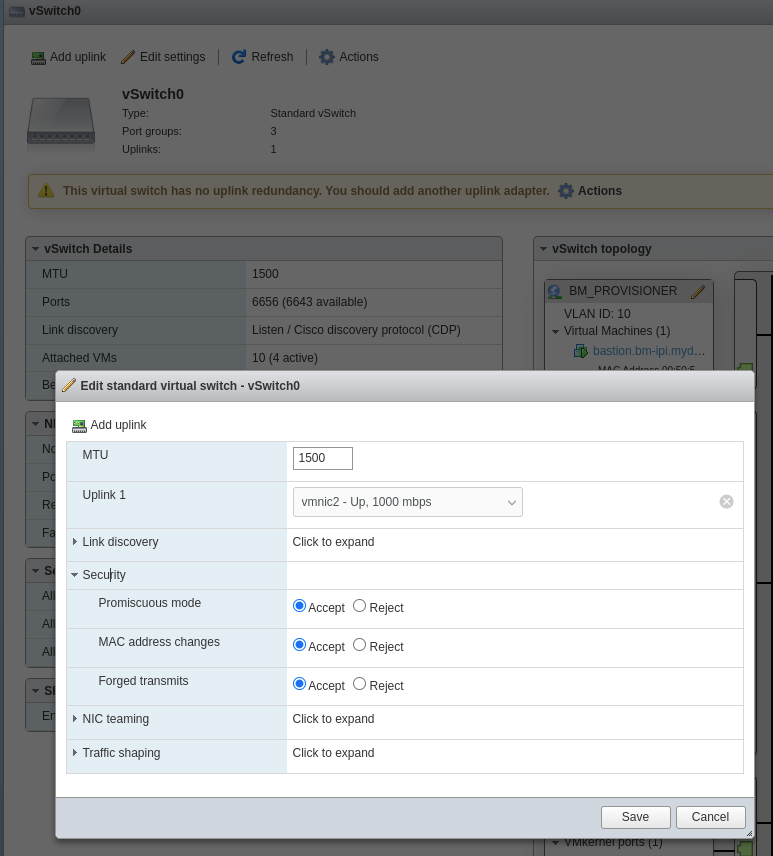
Click “Edit settings”, “Security”, set all three to “Accept”, and click “Save”
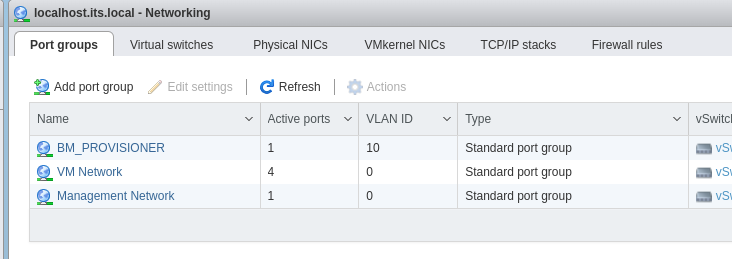
Click on “Networking”, then the “Port groups” tab, and “Add port group” to setup a network for provisioning.
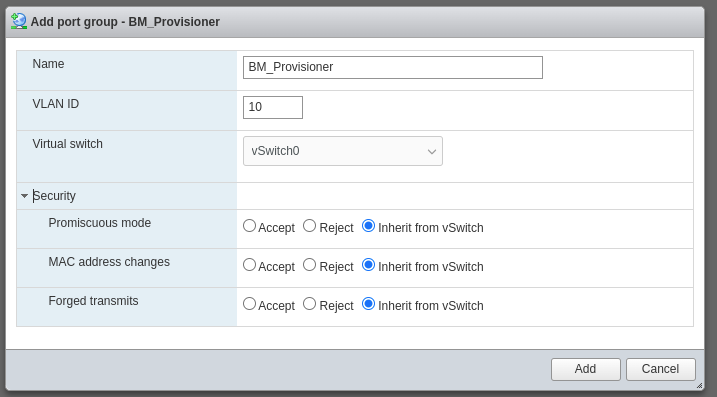
Type in a Name, VLAN ID, select the correct Virtual switch, and click “Add”.
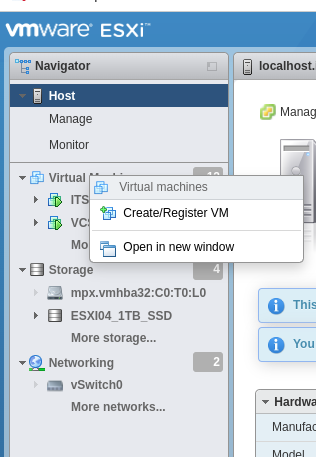
Create the VM
Right-click “Virtual Machines, click “Create/Register VM”:
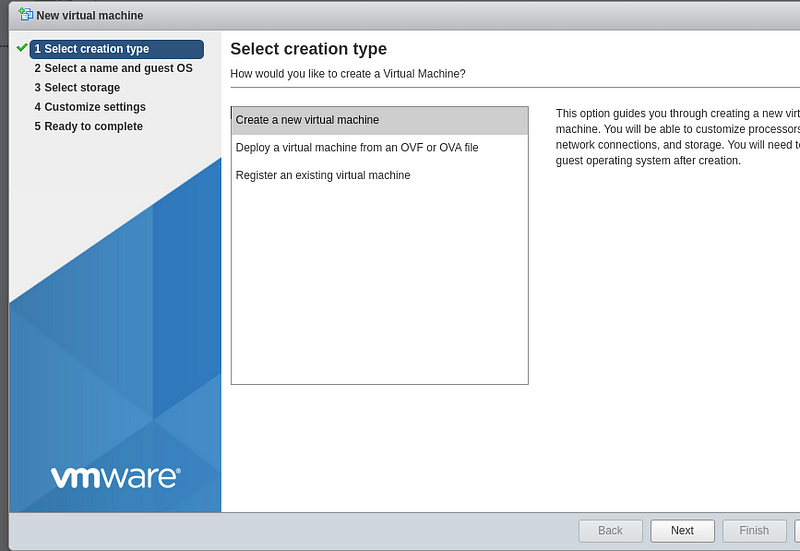
Select “Create a new virtual machine” and click “Next”:
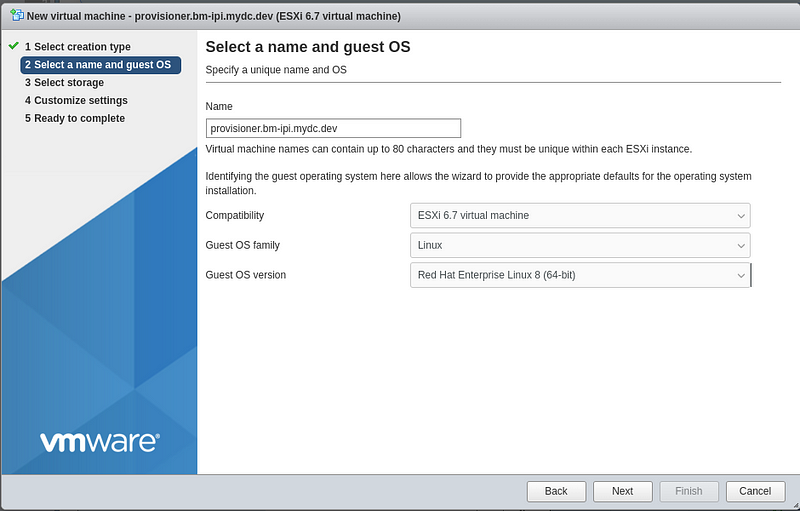
Type in a name for the virtual machine, Select “Linux” for the guest OS family, and “Red Hat Enterprise Linux 8” for the OS version.
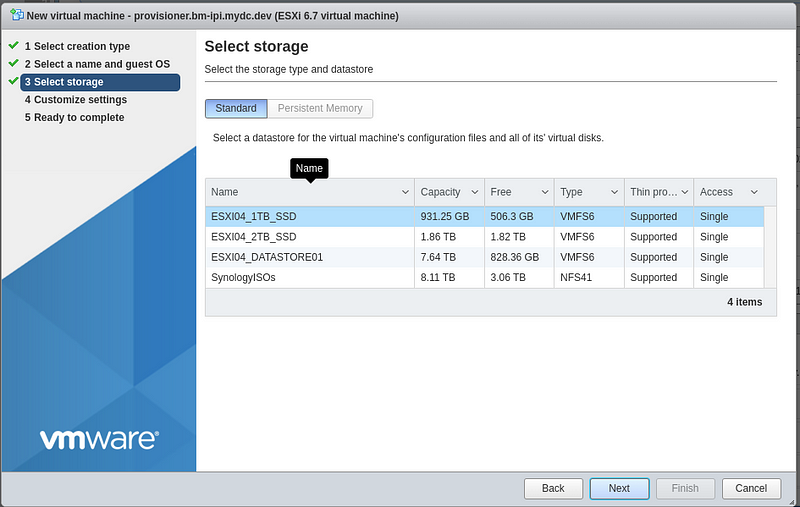
Select the storage device you would like to use for the virtual machine:
Change the number of CPUs to “8” and enable “Hardware virtualization” along with “Performance counters”.
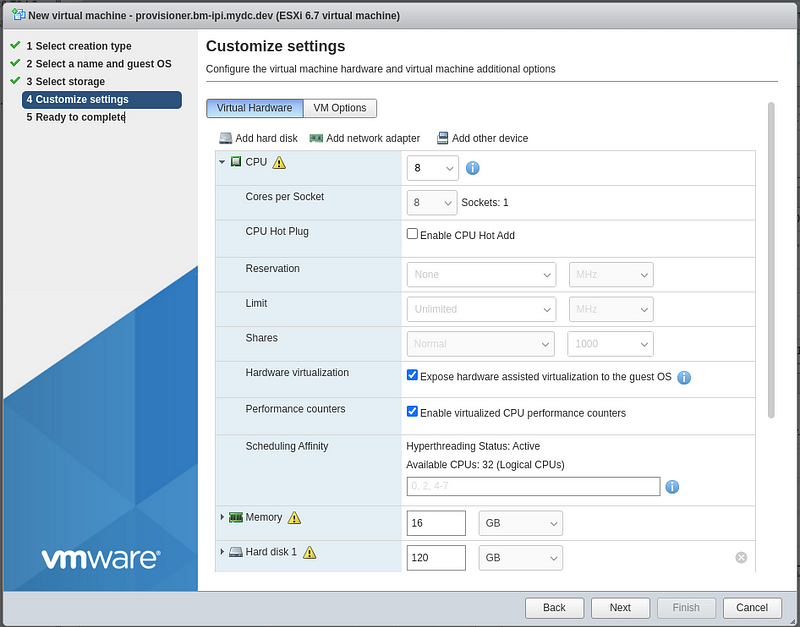
Change the memory to “16” GB and Hard disk 1 to “120” GB.
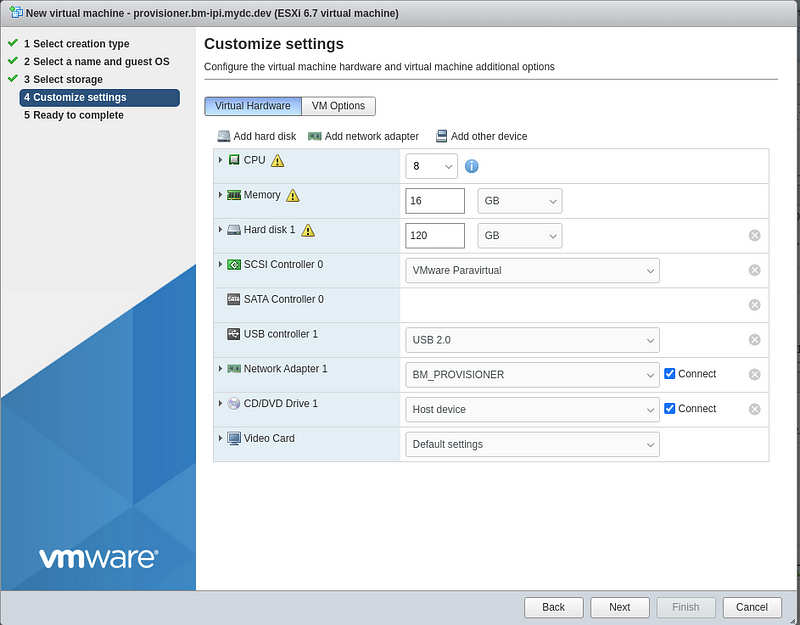
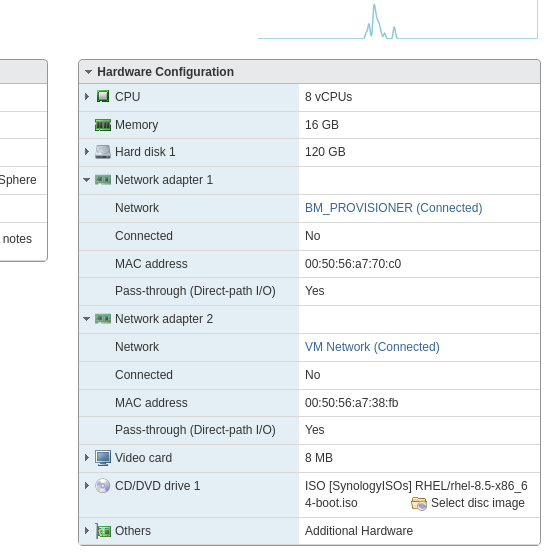
Click “Add network adapter” and ensure NIC1 is set to the “BM_PROVISIONER” network and the new NIC is set to “VM Network”.
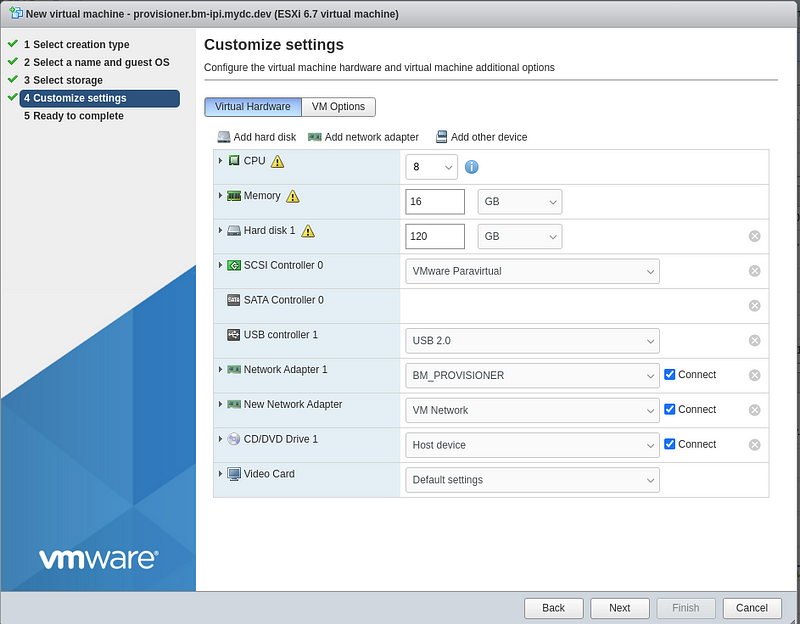
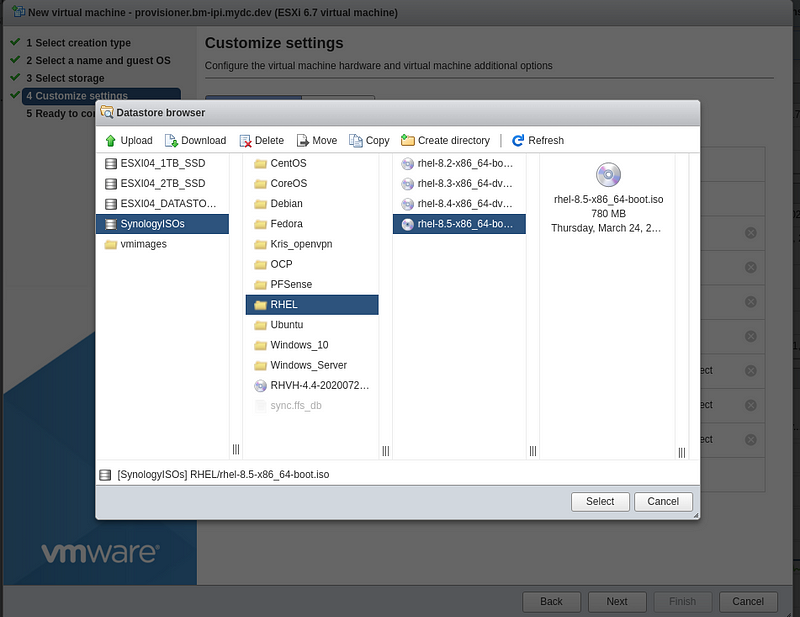
Change the CD/DVD Drive to “Datastore ISO file” and select your “rhel-8.5-x86_64-boot.iso” file. Then click “Select”, and “Next”.
Check your settings and then click “Finish”:
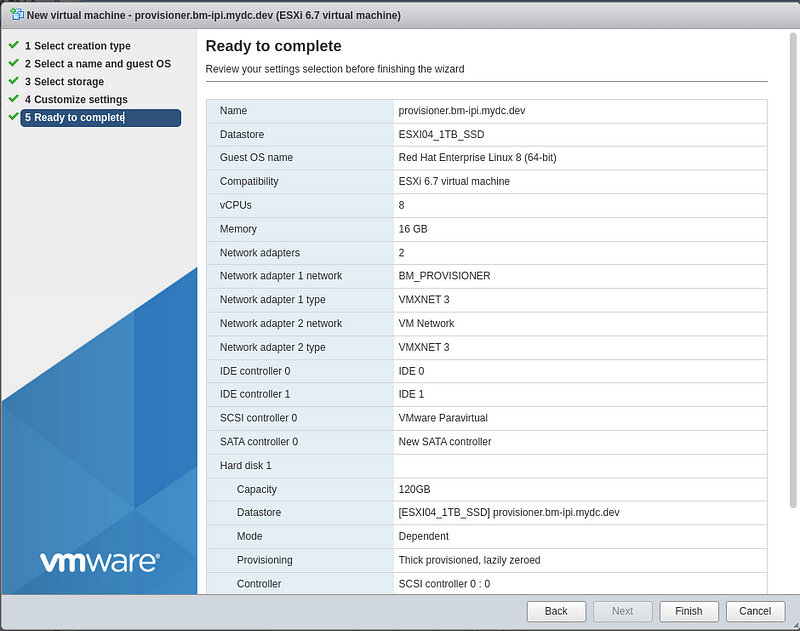
Click “Power on” to start the VM.
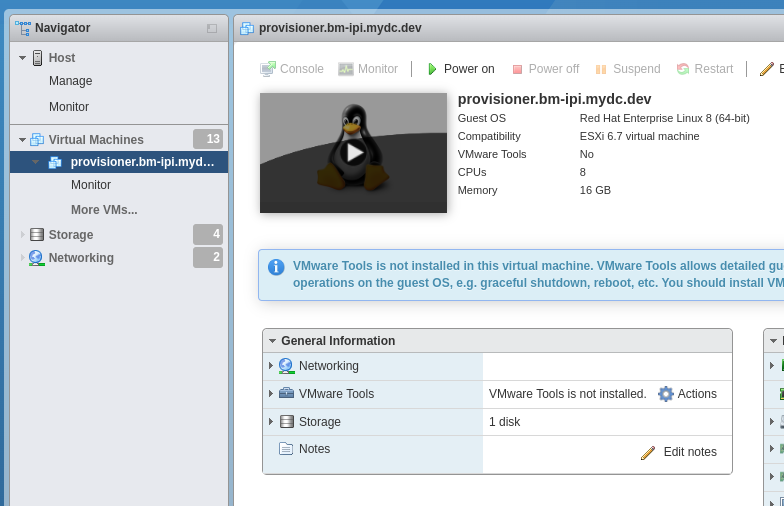
After powering on the node, setup your DHCP reservation for the “VM Network/Bare Metal” using the using the MAC address listed for “Network Adapter 2”.
Install RHEL
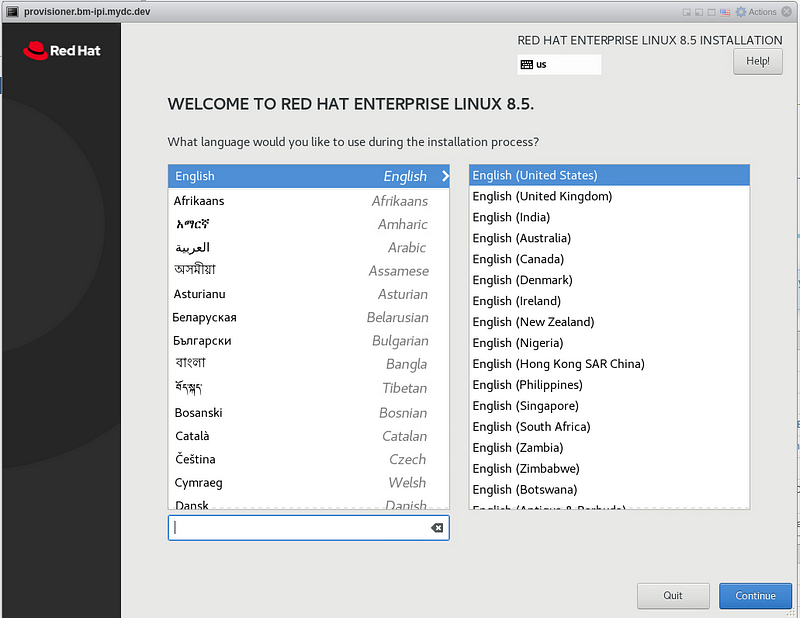
Click on the console, and select “Install Red Hat Enterprise Linux 8.5”:

Select your language and click “Continue”:
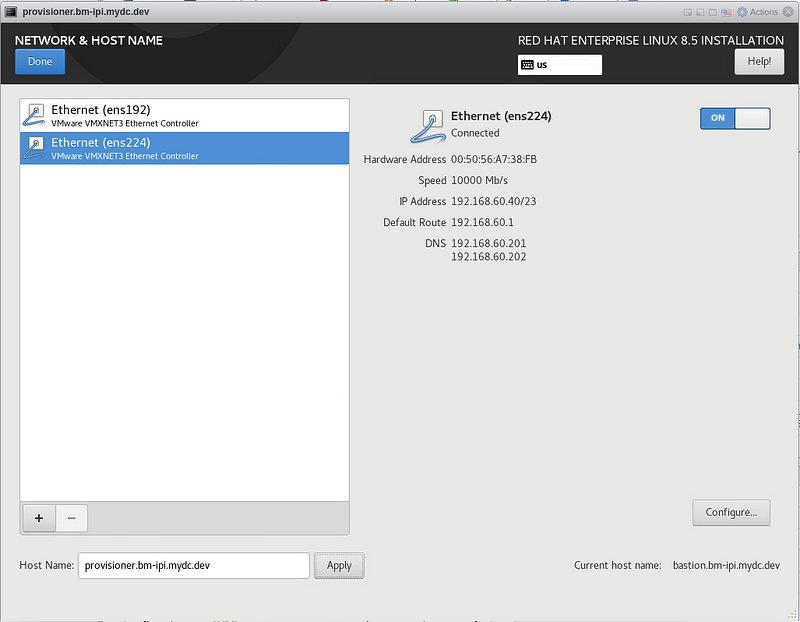
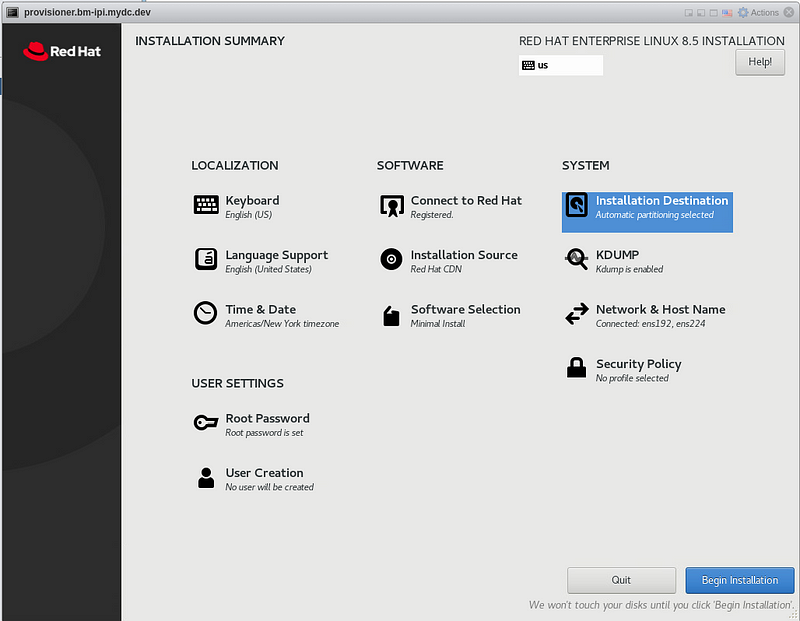
Click on “Network & Hostname”:
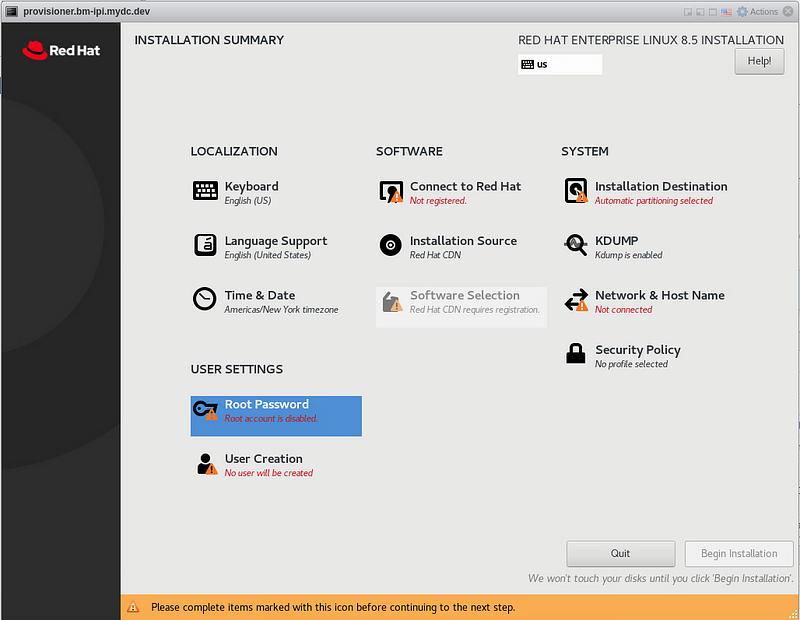
Type in the host name and click “Apply”. Enable ens192 and ens224. Click “Done”:
Click on “Connect to Red Hat”. Fill in your developer account username and password, then click “Register”. After the system is subscribed, click “Done”.

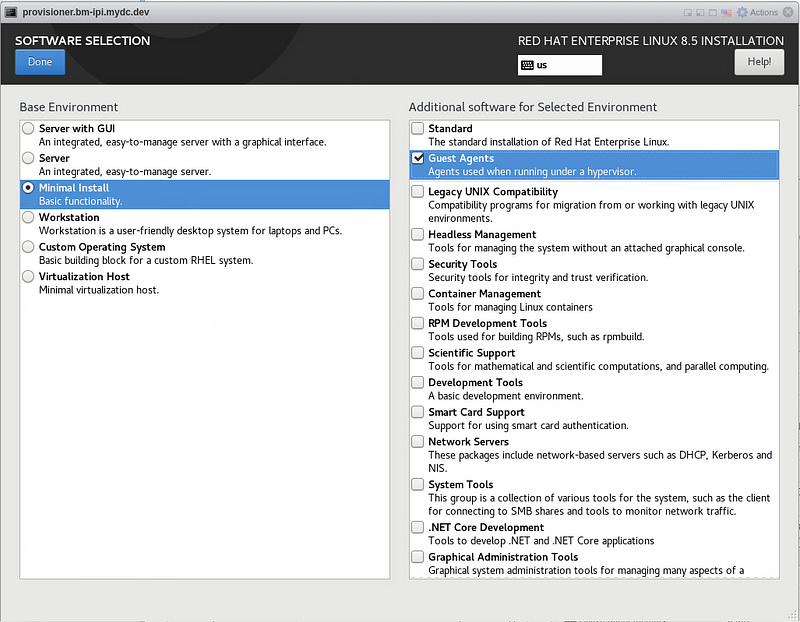
Click “Software Selection”, “Minimal Install”, “Guest Agents”, then “Done”:
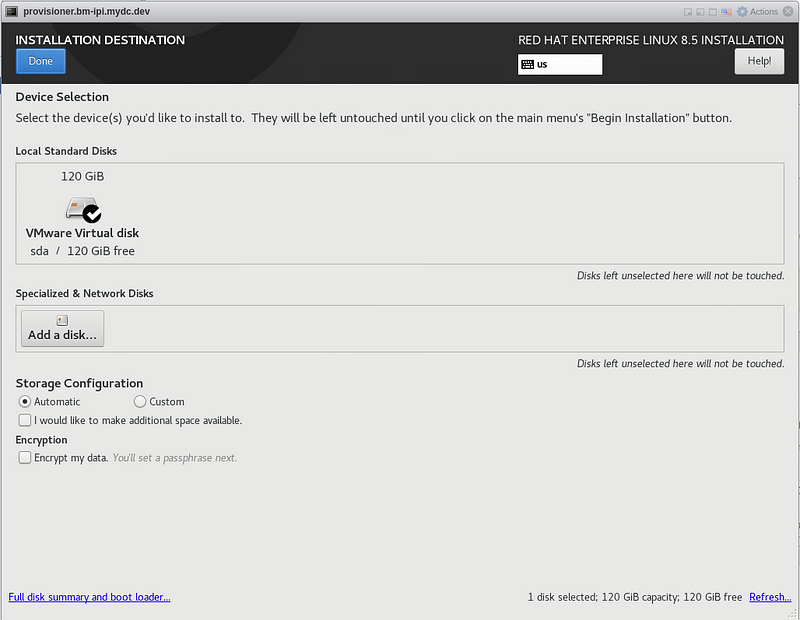
Click “Installation Destination” then “Done”.
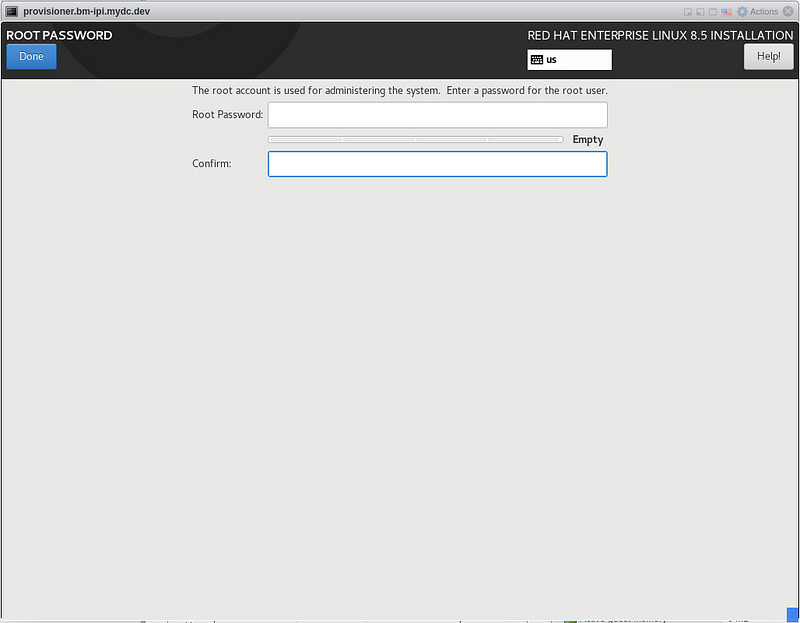
Click “Root Password”, type in the password twice, and click “Done”
Click “Being Installation”
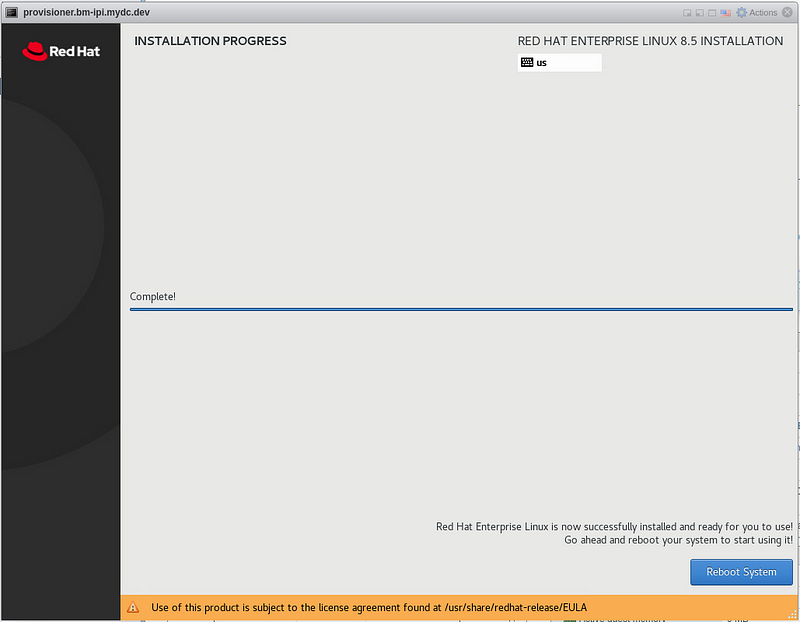
After installation has completed, click “Reboot System”
Configure the OS
SSH into the provisioner node as root:
$ ssh [email protected]
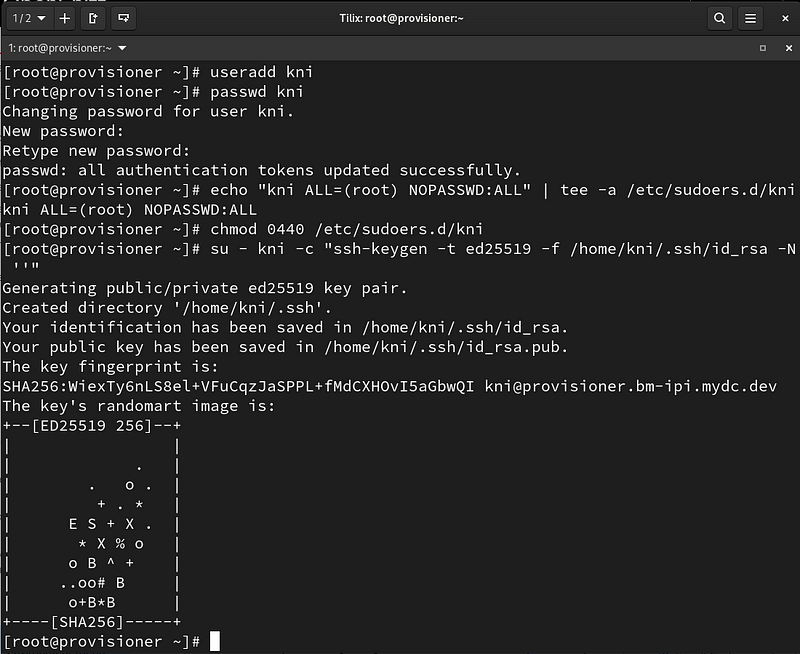
Create the kni user:
# useradd kni
# passwd kni
Provide sudo privileges to the kni user and create an ssh key:
# echo "kni ALL=(root) NOPASSWD:ALL" | tee -a /etc/sudoers.d/kni
# chmod 0440 /etc/sudoers.d/kni
# su - kni -c "ssh-keygen -t ed25519 -f /home/kni/.ssh/id_rsa -N ''"
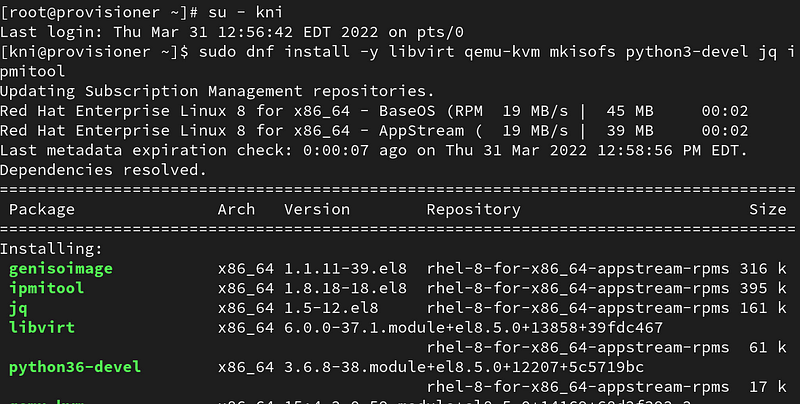
Login as the kni user and install the following packages:
# su - kni
$ sudo dnf install -y libvirt qemu-kvm mkisofs python3-devel jq ipmitool dhclient tmux
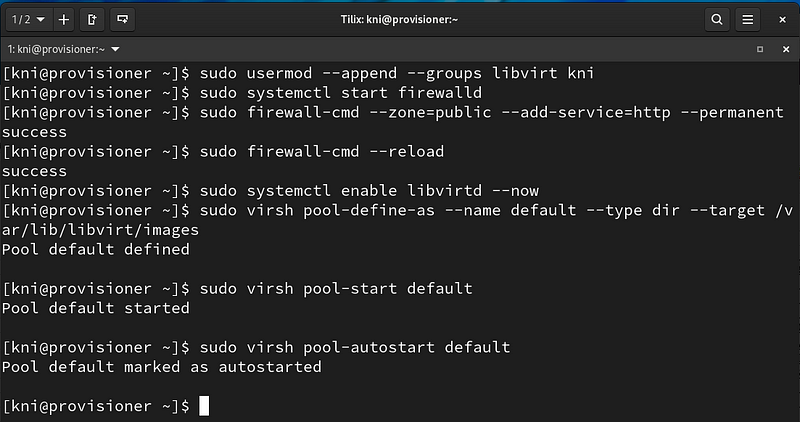
Add the kni user to the libvirt group, allow the http service on firewalld, enable libvirtd, and create the default storage pool:
$ sudo usermod --append --groups libvirt kni
$ sudo systemctl start firewalld
$ sudo firewall-cmd --zone=public --add-service=http --permanent
$ sudo firewall-cmd --reload
$ sudo systemctl enable libvirtd --now
$ sudo virsh pool-define-as --name default --type dir --target /var/lib/libvirt/images
$ sudo virsh pool-start default
$ sudo virsh pool-autostart default
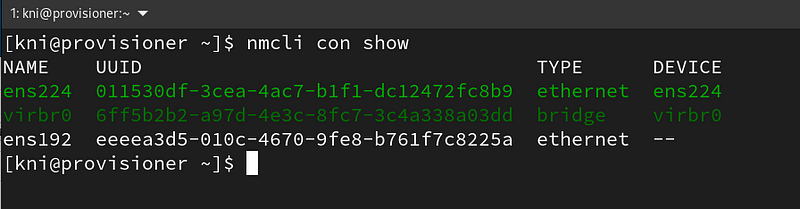
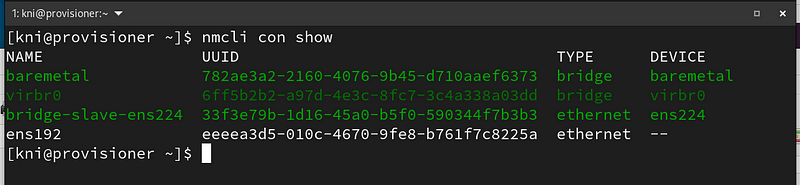
Configure the baremetal network adapter:
Show the existing network connections:
$ nmcli con show
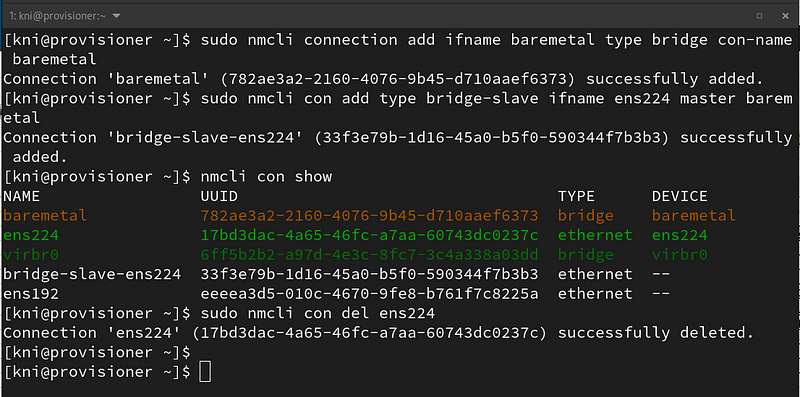
Configure the baremetal bridge, show connections, and delete ens224 (ssh will reconnect after 30 seconds):
$ sudo nmcli connection add ifname baremetal type bridge con-name baremetal
$ sudo nmcli con add type bridge-slave ifname ens224 master baremetal
$ nmcli con show
$ sudo nmcli con del ens224
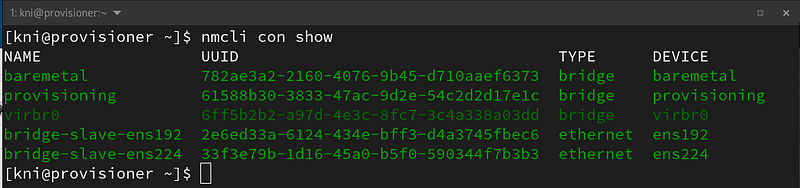
Configure the provisioning network adapter:
Show the existing network connections:
$ nmcli con show
Configure the provisioning bridge:
$ sudo nmcli connection add ifname provisioning type bridge con-name provisioning
$ sudo nmcli con add type bridge-slave ifname ens192 master provisioning
$ sudo nmcli connection modify provisioning ipv6.addresses fd00:1101::1/64 ipv6.method manual
$ sudo nmcli connection modify provisioning ipv4.addresses 172.22.0.254/24 ipv4.method manual
$ sudo nmcli con del ens192

Show the existing network connections:
$ nmcli con show
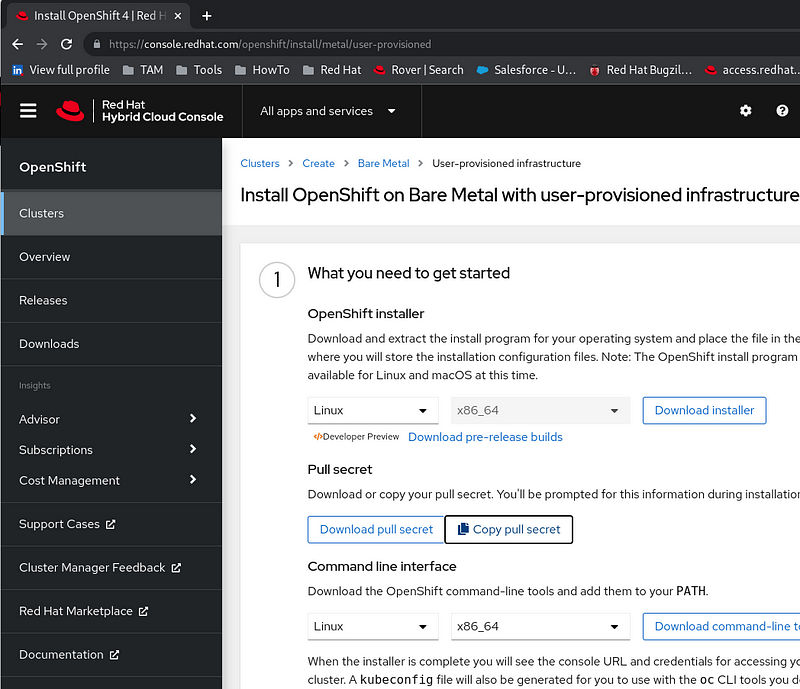
Download your pull secret
Download your pull secret via web browser from https://console.redhat.com/openshift/install/metal/user-provisioned by clicking on “Copy pull secret”.
Create a pull-secret.txt file on your provisioner and paste in the pull secret:
$ vi pull-secret.txt
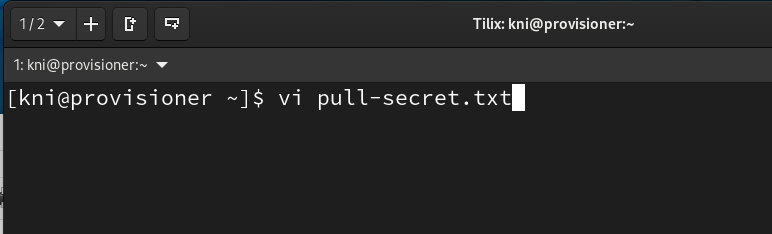
Press the “i” key to switch to insert mode, paste in your key, and press “:wq” to save the file:
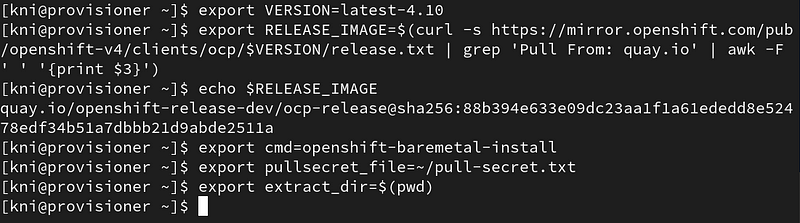
Download the installer
Specify the version you want to install and set some environment variables:
$ export VERSION=latest-4.10
$ export RELEASE_IMAGE=$(curl -s https://mirror.openshift.com/pub/openshift-v4/clients/ocp/$VERSION/release.txt | grep 'Pull From: quay.io' | awk -F ' ' '{print $3}')
$ export cmd=openshift-baremetal-install
$ export pullsecret_file=~/pull-secret.txt
$ export extract_dir=$(pwd)
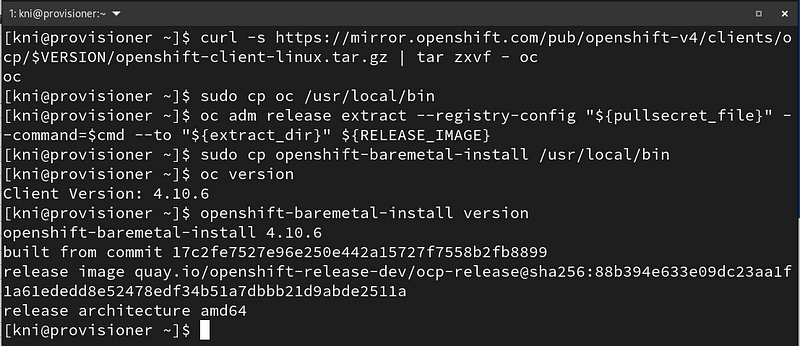
Download the oc binary and openshift-baremetal-install programs:
$ curl -s https://mirror.openshift.com/pub/openshift-v4/clients/ocp/$VERSION/openshift-client-linux.tar.gz | tar zxvf - oc
$ sudo cp oc /usr/local/bin
$ oc adm release extract --registry-config "${pullsecret_file}" --command=$cmd --to "${extract_dir}" ${RELEASE_IMAGE}
$ sudo cp openshift-baremetal-install /usr/local/bin
$ oc version
$ openshift-baremetal-install version
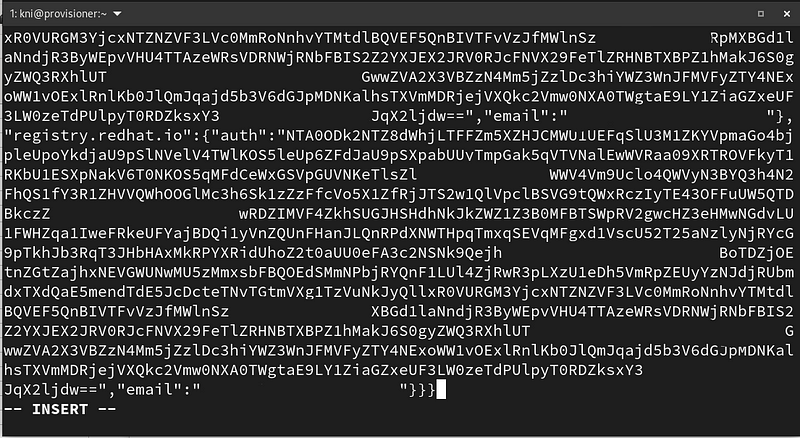
Configure the install-config.yaml
Create the install-config.yaml using vi and paste in the template below:
$ vi install-config.yaml
apiVersion: v1
baseDomain: mydc.dev
metadata:
  name: bm-ipi
networking:
  machineNetwork:
  - cidr: 192.168.60.0/23
  networkType: OpenShiftSDN
compute:
- name: worker
  replicas: 0
controlPlane:
  name: master
  replicas: 3
  platform:
    baremetal: {}
platform:
  baremetal:
    apiVIP: 192.168.60.44
    ingressVIP: 192.168.60.45
    provisioningNetworkCIDR: 172.22.0.0/24
    provisioningNetworkInterface: eno1
    provisioningDHCPRange: 172.22.0.20,172.22.0.80
    hosts:
      - name: node1
        role: master
        bmc:
          address: ipmi://idrac-node1.bm-ipi.mydc.dev
          username: "kni"
          password: "openshift"
        bootMACAddress: "EC:F4:BB:D8:86:A4"
        rootDeviceHints:
          deviceName: "/dev/sda"
      - name: node2
        role: master
        bmc:
          address: ipmi://idrac-node2.bm-ipi.mydc.dev
          username: "kni"
          password: "openshift"
        bootMACAddress: "F4:8E:38:C0:9F:6C"
        rootDeviceHints:
          deviceName: "/dev/sda"
      - name: node3
        role: master
        bmc:
          address: ipmi://idrac-node3.bm-ipi.mydc.dev
          username: "kni"
          password: "openshift"
        bootMACAddress: "BC:30:5B:F0:09:B4"
        rootDeviceHints:
          deviceName: "/dev/sda"
pullSecret: ''
sshKey: 'ssh-ed25519 AAAAC3NzaC1lZDI1NTE5AAAAIFeRpudbdWCZL7DUljTdTQiDptKK85mJ7nbHr1A4uHjB [email protected]-ipi.mydc.dev'
Extract your ssh key generated earlier and paste in place of the sshKey used above:
$ cat .ssh/id_rsa.pub

Create a clusterconfigs directory and copy in your install-config.yaml:

Pre-launch checklist/scripts
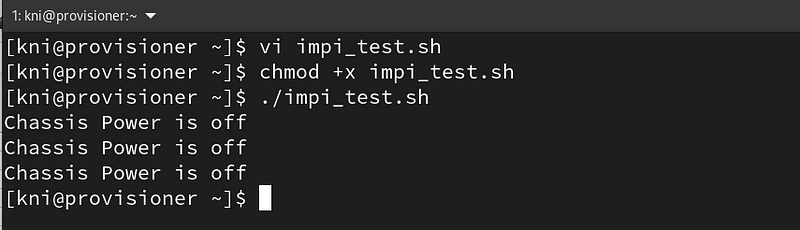
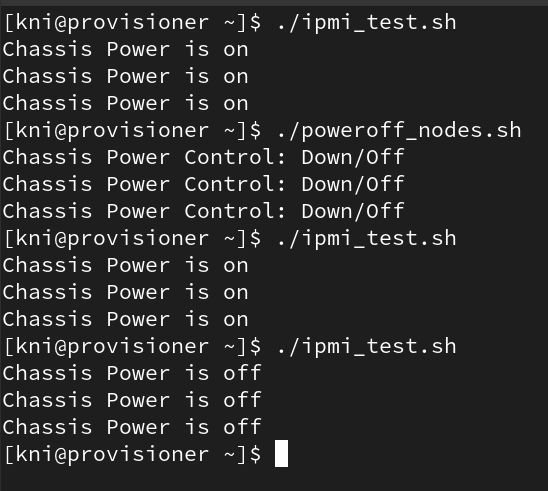
Create a ipmi_test.sh and run to see the power status on your nodes. Edit the username, password, and host to match your environment.
$ vi ipmi_test.sh
#!/bin/bash
ipmitool -I lanplus -U kni -P openshift -H idrac-node1.bm-ipi.mydc.dev power status
ipmitool -I lanplus -U kni -P openshift -H idrac-node2.bm-ipi.mydc.dev power status
ipmitool -I lanplus -U kni -P openshift -H idrac-node3.bm-ipi.mydc.dev power status
Make the ipmi_test.sh executable:
$ chmod +x ipmi_test.sh
Run the ipmi_test.sh to see the power status:
$ ./ipmi_test.sh
Remove old bootstrap resources from previous deployment attempts:
Create a clean_node.sh file.
$ vi clean_node.sh
#!/bin/bash
for i in $(sudo virsh list | tail -n +3 | grep bootstrap | awk {'print $2'});
do
  sudo virsh destroy $i;
  sudo virsh undefine $i;
  sudo virsh vol-delete $i --pool default;
  sudo virsh vol-delete $i.ign --pool default;
done
sudo rm -rf /var/lib/libvirt/openshift-images/*
Make the clean_node.sh file executable:
$ chmod +x clean_node.sh
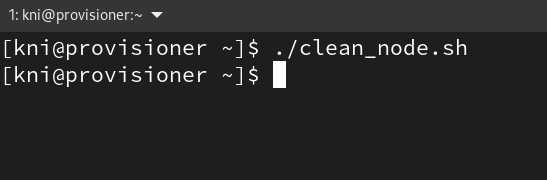
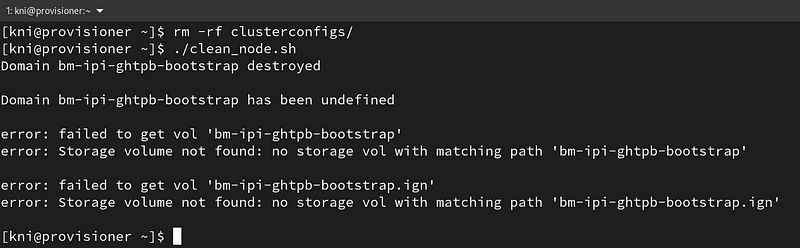
Run the clean_node.sh to clean any previous deployments
$ ./clean_node.sh
Deploy the cluster
Creating the manifests before creating the cluster will allow you to make custom changes to those manifests for alternative installation options. In this guide creating the manifests is optional.
Create the manifests (optional):
$ ./openshift-baremetal-install --dir ~/clusterconfigs create manifests

Start the install:
$ time ./openshift-baremetal-install --dir ~/clusterconfigs --log-level debug create cluster
The install took about 50 minutes to complete.

Troubleshooting During the Install
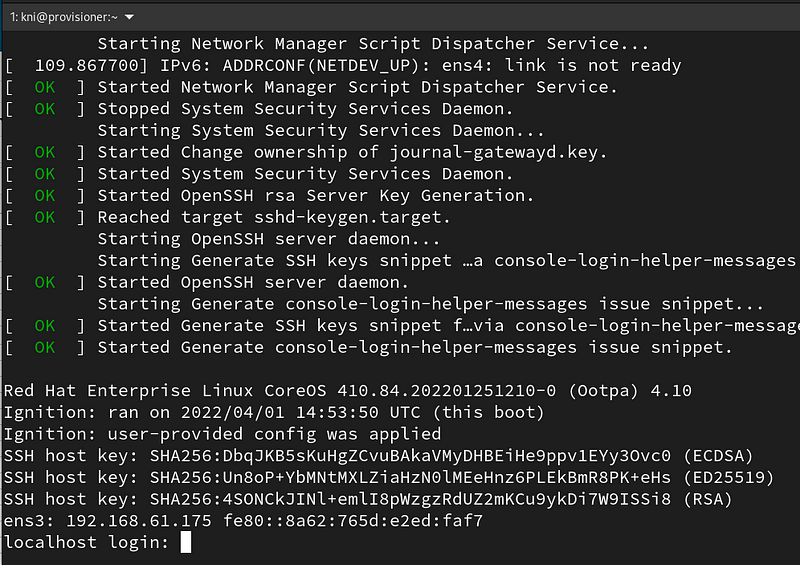
After kicking off the installation, the openshift-baremetal-installer will create a bootstrap VM on the provisioning node. At the 2 minute mark the bootstrap node was created in my environment:

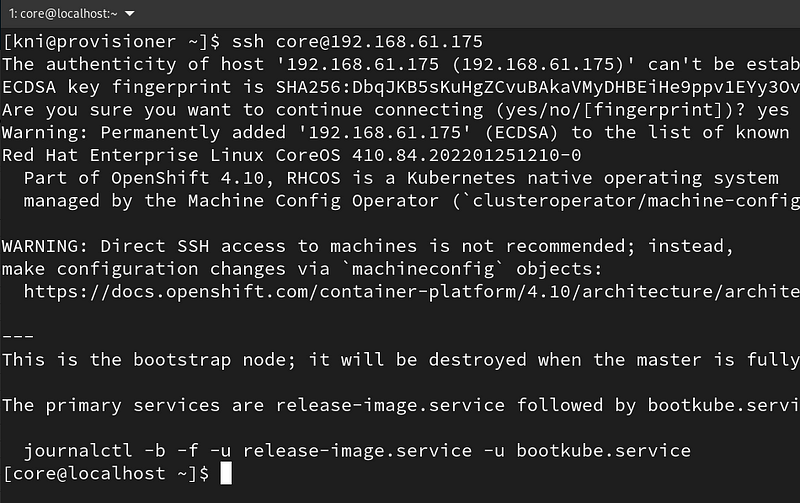
You can verify your bootstrap node was created by running virsh list and connect to the console of the VM.
$ sudo virsh list
$ sudo virsh list console bm-ipi-ghtpb-bootstrap

After connecting to the console find the DHCP address of the bootstrap node and connect to it via SSH.
ssh [email protected]
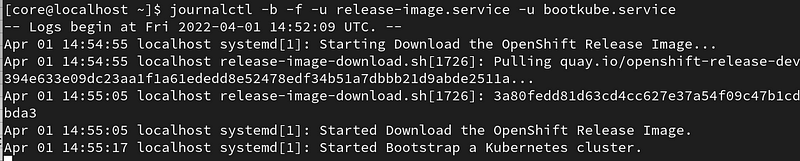
After connecting as the core user run the journalctl command below to watch the bootstrapping:
$ journalctl -b -f -u release-image.service -u bootkube.service
Restarting the Install
If your initial install fails, do not panic. Read the error and correct your install-config.yaml or network/hardware. As an example, about 20 minutes into one of the installs, it failed trying to verify uefi on /dev/sda:
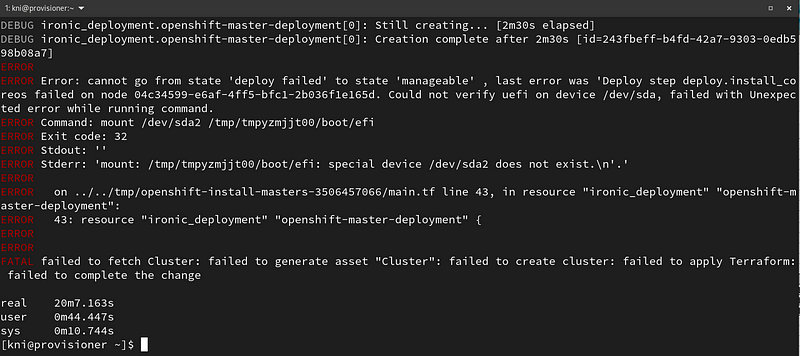
I forgot to set all the nodes to boot to PXE as the first boot device:
IDRAC->Server->Setup->First Boot Device-> PXE
Two of the nodes did come online after the failure but I want to start over.
Starting Over ….
Starting the installation over again is not unusual. This is the method I use:
Power off all your nodes. Use this bash script if it helps:
#!/bin/bash
ipmitool -I lanplus -U kni -P openshift -H idrac-node1.bm-ipi.mydc.dev power off
ipmitool -I lanplus -U kni -P openshift -H idrac-node2.bm-ipi.mydc.dev power off
ipmitool -I lanplus -U kni -P openshift -H idrac-node3.bm-ipi.mydc.dev power off
Run poweroff_nodes.sh
./poweroff_nodes.sh
Delete the clusterconfigs directory and clean the bootstrap storage:
$ rm -rf clusterconfigs
$ ./clean_node.sh
Create the clusterconfigs directory, copy the install-config.yaml, and start again:
$ mkdir clusterconfigs
$ cp install-config.yaml clusterconfigs/
$ time ./openshift-baremetal-install --dir ~/clusterconfigs --log-level debug create cluster

Post Installation
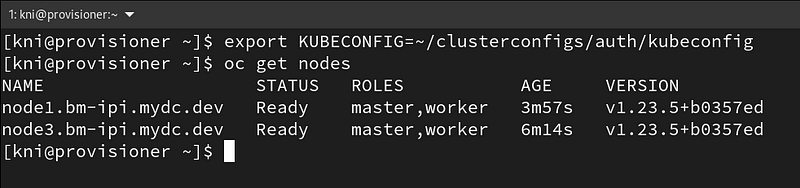
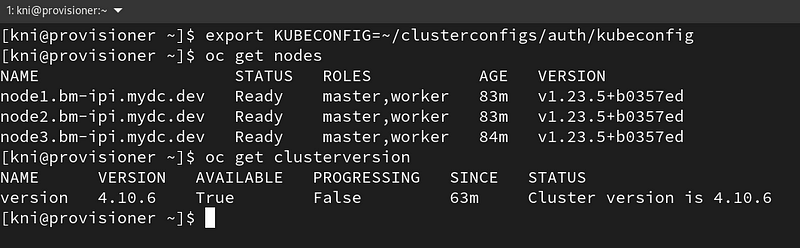
Login to your cluster from the provisioning node by exporting the kubeconfig:
$ export KUBECONFIG=~/clusterconfigs/auth/kubeconfig
$ oc get nodes
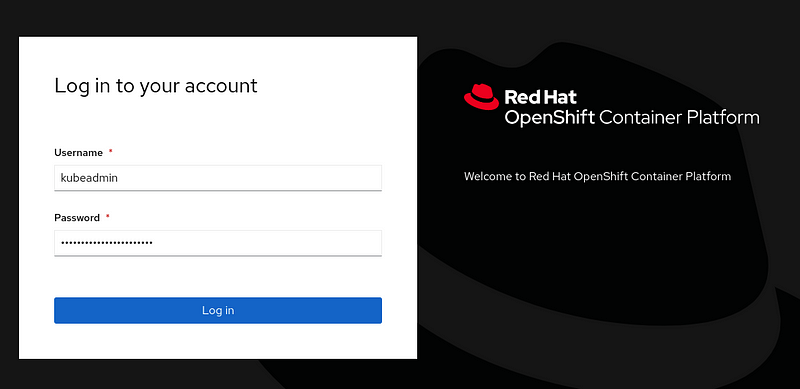
Find your kubeadmin password:
$ cat clusterconfigs/auth/kubeadmin-password

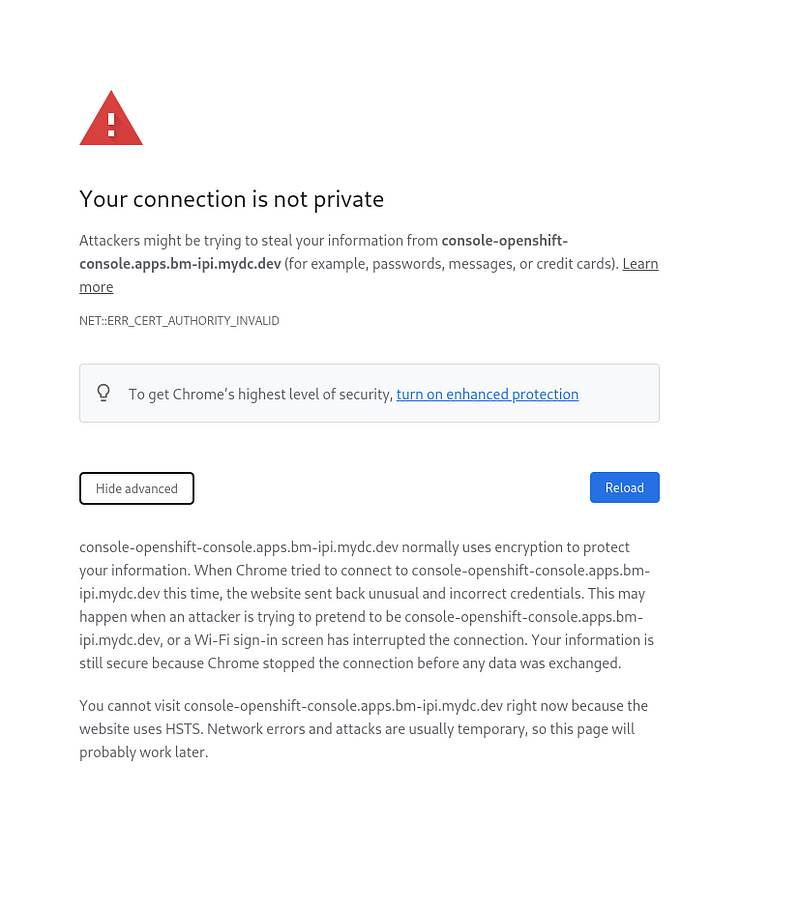
Login to the web console: https://console-openshift-console.apps.bm-ipi.mydc.dev/
When you get the “Your connection is not private” screen type in “thisisunsafe” on the keyboard without clicking in the address bar. A second “Your connection is not private” will appear for the oauth page. Again type in “thisisunsafe” on the keyboard.
Login to the web console using the kubeadmin password:
Welcome to the Overview of your new cluster.
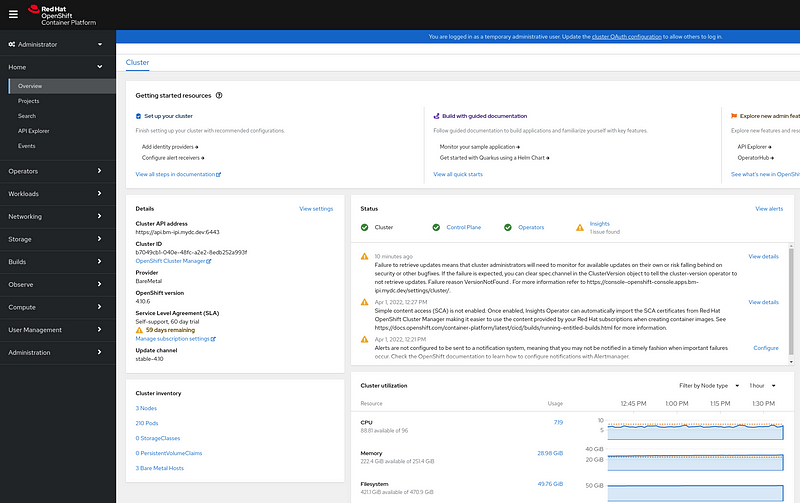
The base cluster setup and installation is now complete. Congratulations!
For additional installation steps, please follow part 2 of a previous guide where you will:
- Download and configure the oc client
- Setup an authentication provider using htpasswd
- Configure the registry (non-production)
- Create an ephemeral Drupal project.