Installing Prism Central
This guide explains how to install Prism Central on Nutanix CE 2.0 and is referenced by the guides on installing a single and three-node Nutanix CE 2.0 cluster.
The official documentation for installing Prism Central is located on the Nutanix Portal.
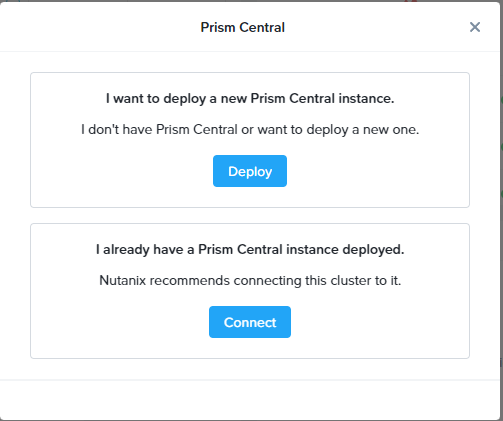
To install Prism Central from the Nutanix Dashboard click Register or create new list in the Prism Central pane.
Click Deploy.
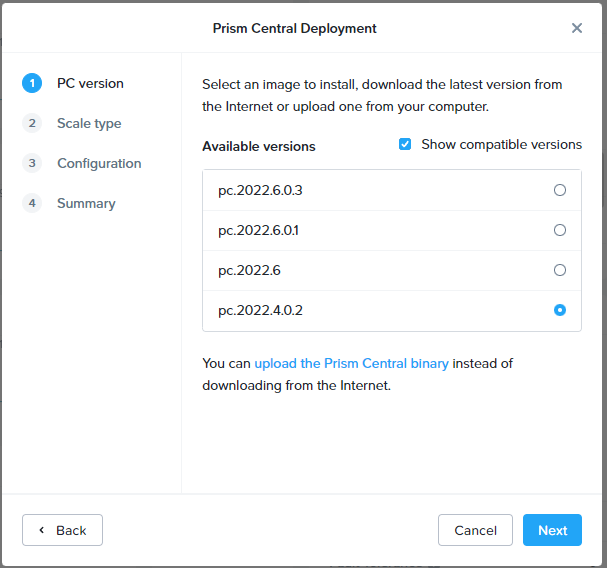
Select your desired Prism Central version from the list. Then click Next.
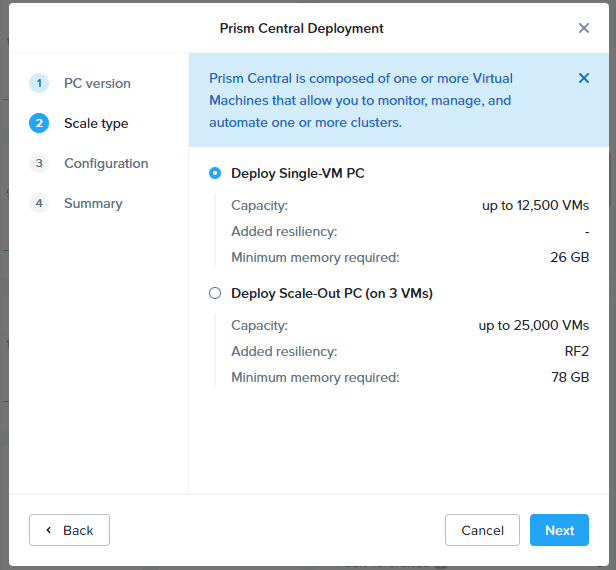
Select your Scale Type, then click Next.
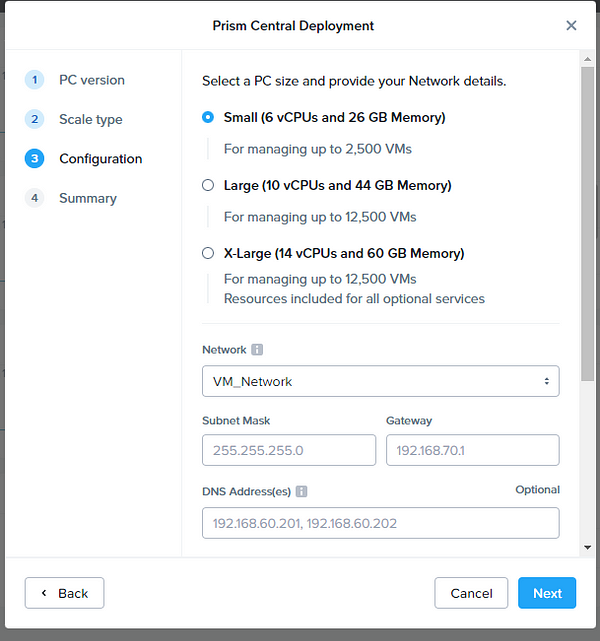
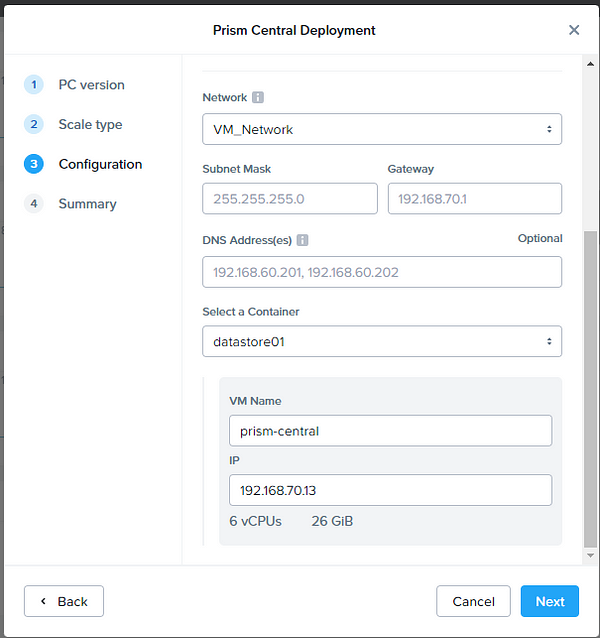
Select your Configuration, Network, and Storage Container. Enter the desired VM Name and IP address. Then click Next.
Verify the Prism Central Deployment details are correct and click Deploy.

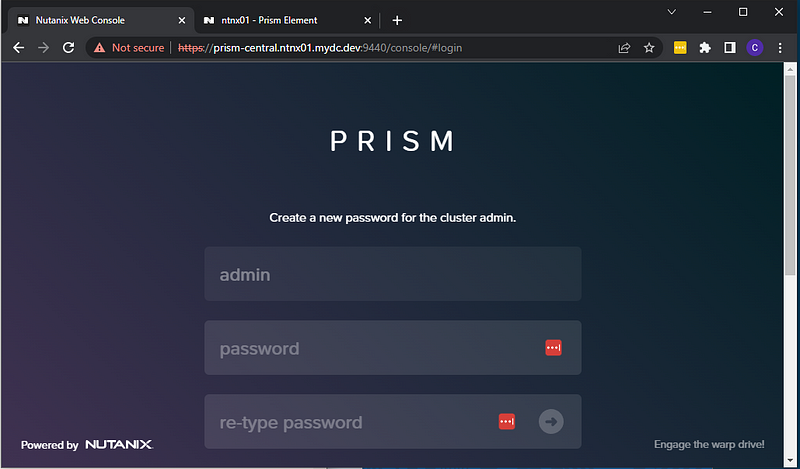
After completing the deployment, login to Prism Central using a web browser with the default username as admin and the password as Nutanix/4u to set a new password.
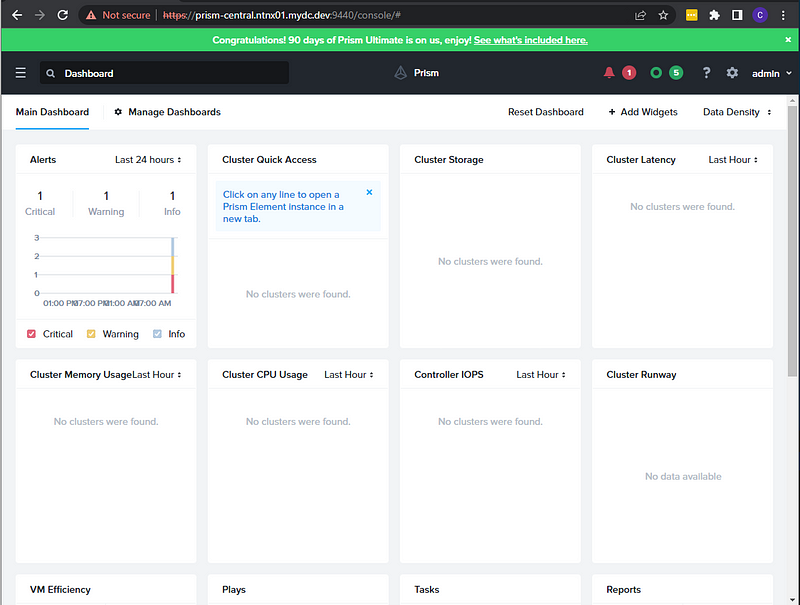
Login with your new credentials, and read the Terms of Service.
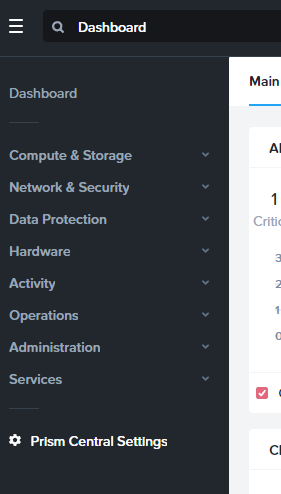
Click the Menu and select Prism Central Settings
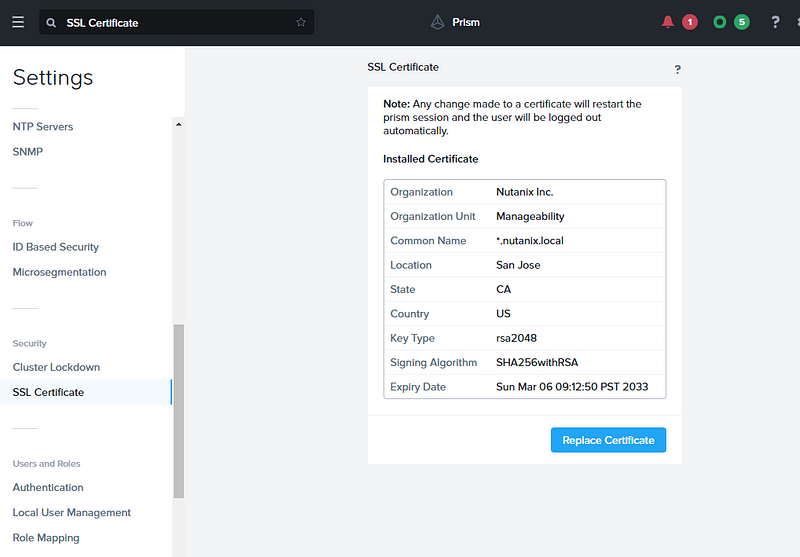
Select SSL Certifiate and click Replace Certifiate.
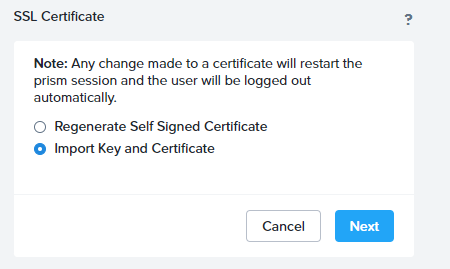
Select Import Key and Certificate, then click Next.
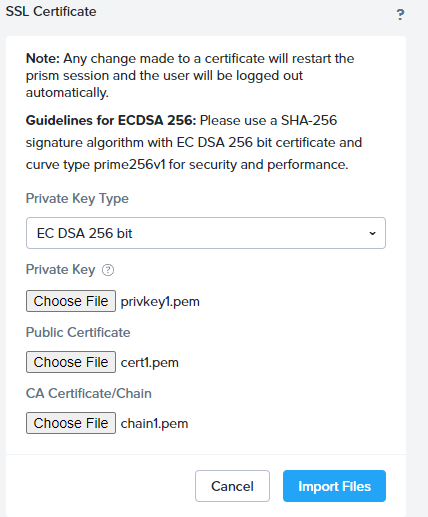
Select the Private Key Type, Private Key, Public Certificate, and CA Cert/Chain. Then click Import Files.
Open a new web browser and go to https://prism-central.<domain_name>:9440 to verify your valid SSL certificate.
Change the URL to https://prism.<domain_name>:9440 view the Prism Dashboard.
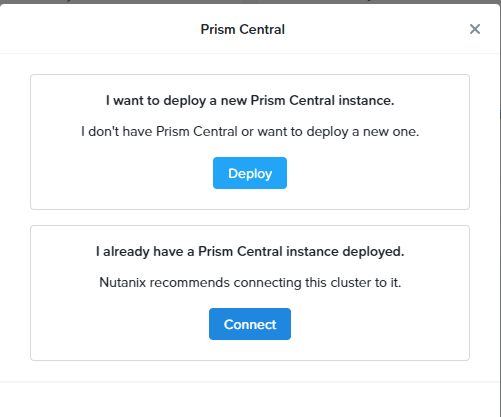
Click Register or create new under the Prism Central pane.

Click Connect under I already have a Prism Central instance deployed.
Fill in the Prism Central IP/FQDN, Port, Username (admin), and Password. Click Next.

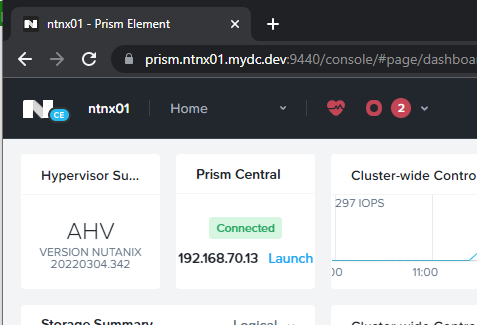
Prism Central should be listed as Connected on the Prism Dashboard.
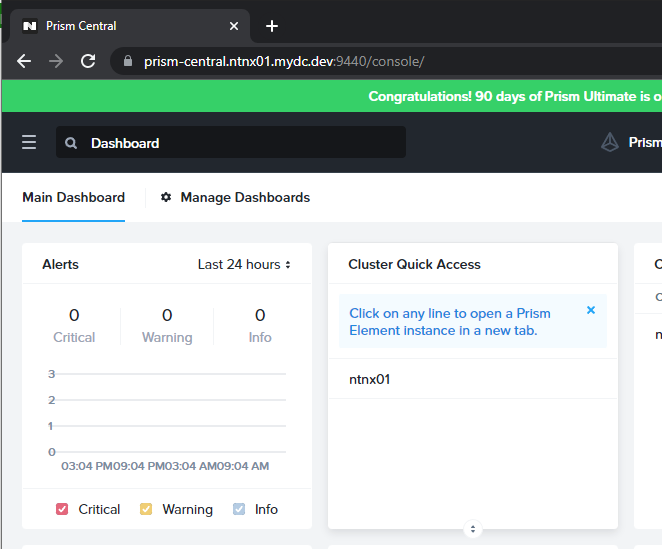
On the Prism Central Dashboard the cluster should be listed under Cluster Quick Access.
That completes the installation of Prism Central and connecting PC to a cluster. Good luck!
Hi,
Thanks for your tuto !
However, when i do that, i obtain an error like : “Error in extracting tarball, could not extract the image”.
Have you any ideas ?
Thanks in advance,
Regards
I ran into the same issue and do not recall exactly how I resolved it. I believe my download was being corrupted. Try selecting the pc.2022.4.0.2 version if you have not already done so.
Are you installing PC on a three-node or single-node cluster? Are the disks all SSD or do you have some HDD’s mixed in? If you are using a three-node cluster are the nodes connected via 1Gbit or higher? Just curious.
Thanks for your reply.
I work on a three-node cluster with one SSD and three HDD for a server.
I have maybe found a solution. I’m currently try it.
I found the memory of my servers is to low. In fact, I have only 32Go. Of this 32Gb, Nutanix needs 20Gb for his system and the PC ask for 26Gb (small version). I do the installation on a new server with more capacities.