This guide will show by example how to install a three-node OCP 4.7 cluster using the assisted installer. All three nodes are assigned both the master and worker roles. This install method removes the need for a local DNS server, load balancer, and dedicated bootstrap node. Instead, we will use public DNS, VRRP, while the installer re-provisions the bootstrap node into our third master node.
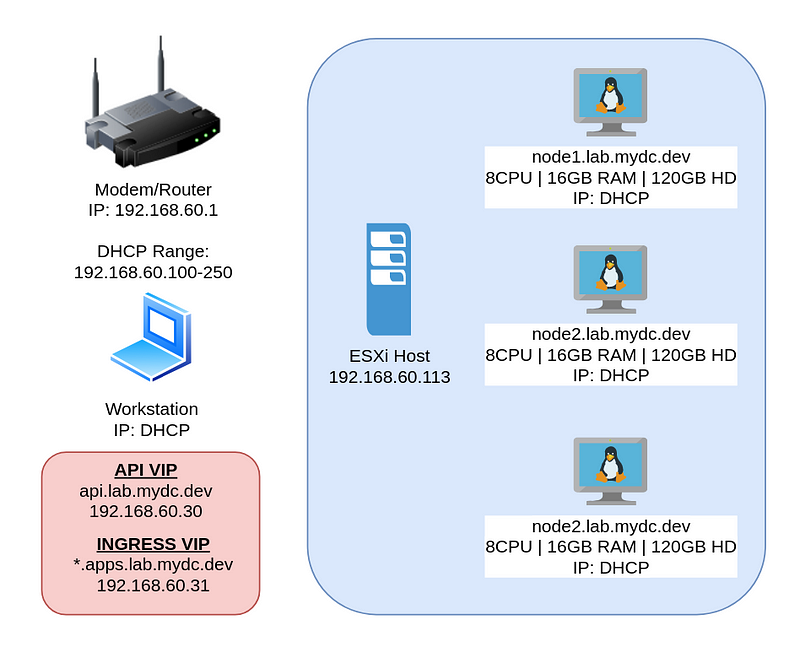
Network Layout:
Setup DNS:
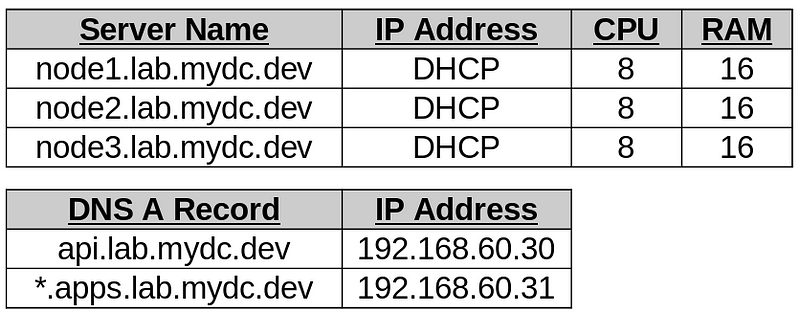
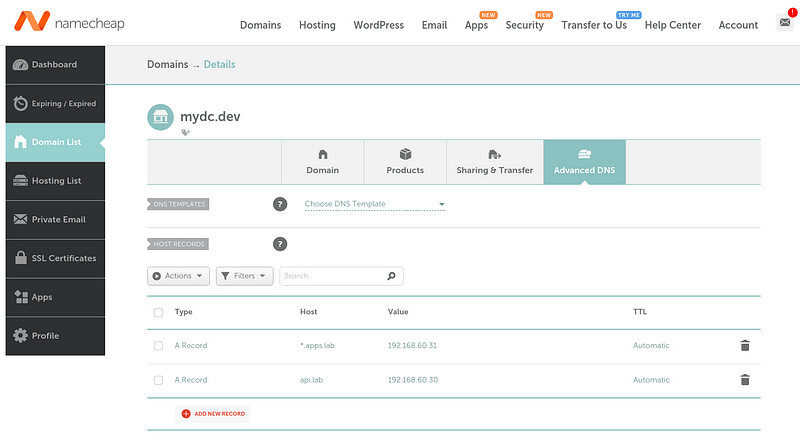
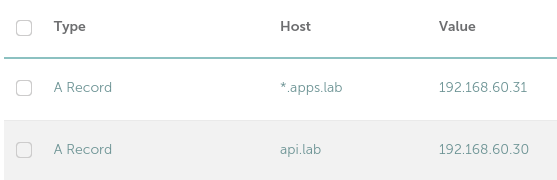
Instead of using or setting up a local DNS server this guide will use public DNS. The domain in this example mydc.dev and the DNS records are modified through the NameCheap dashboard. The two IP addresses chosen for the virtual IPs are out of the DHCP range and not currently in use in my network (192.168.60.30 and .31). The cluster name is my example is “lab”.
Add “A Records” for both api.<clustername>.<domainname> and *.apps.<clustername>.<domainname>
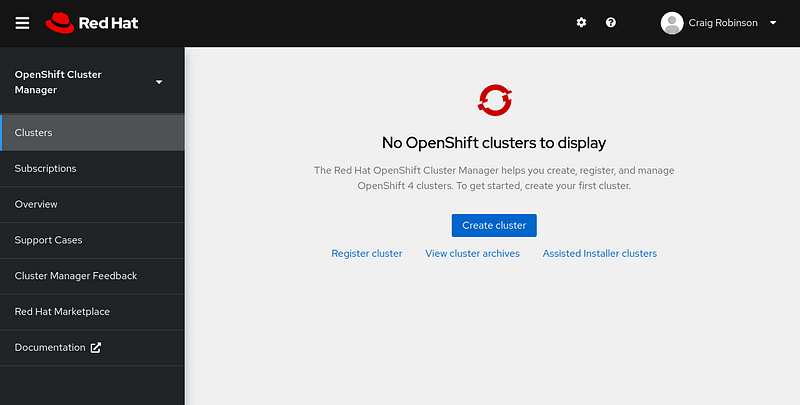
Login to cloud.redhat.com:
Browse to https://cloud.redhat.com, and open the OpenShift Cluster Manager.
If you do not have an account, you can register for a free developer account at https://developers.redhat.com. This will allow you to provision an OCP Cluster for a 60-day trial period.
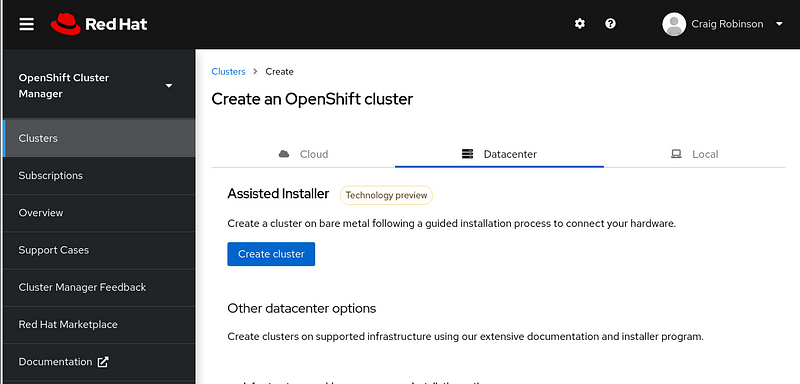
Create the cluster:
Click on Datacenter, and “Create Cluster” below Assisted Installer.
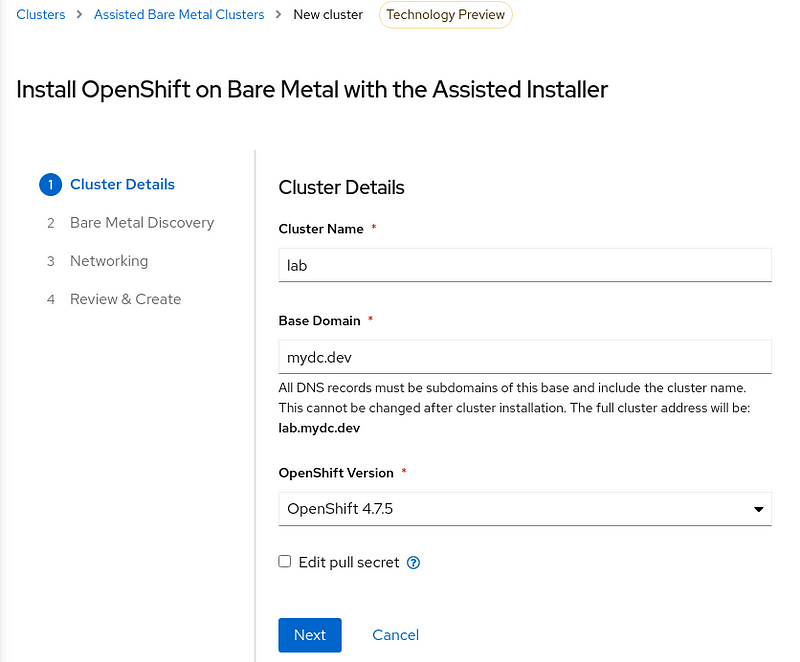
Insert your cluster name, base domain, and select the version of OpenShift. Once complete, click next.
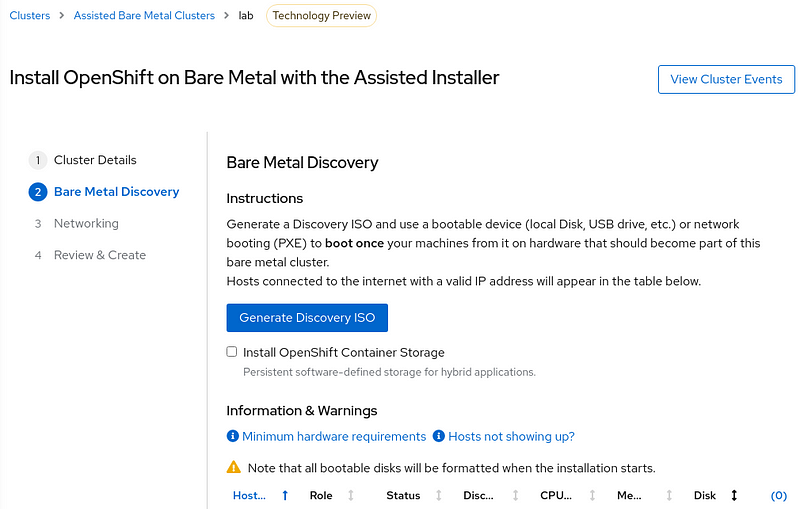
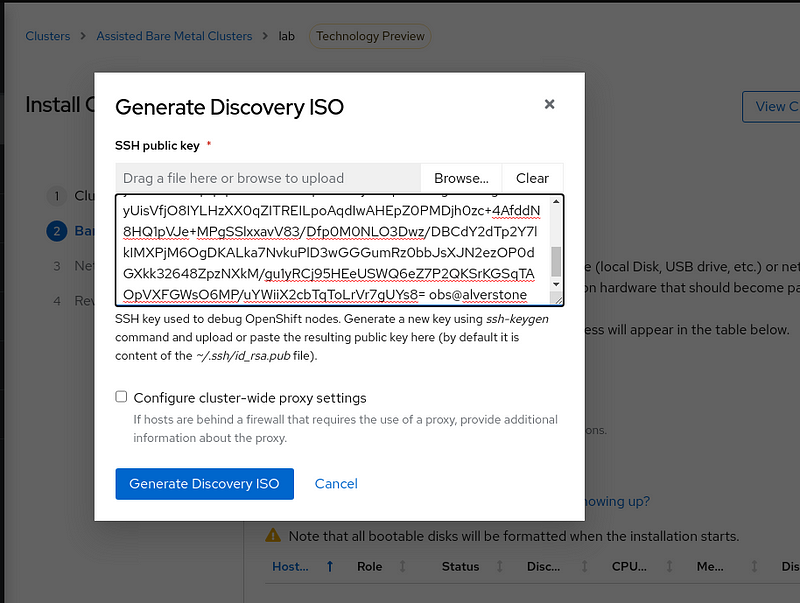
Click “Generate Discovery ISO”.
Paste in your ssh key, then click “Generate Discovery ISO”.
**Follow these instructions for generating an ssh key if needed.**
Download the Discovery ISO.
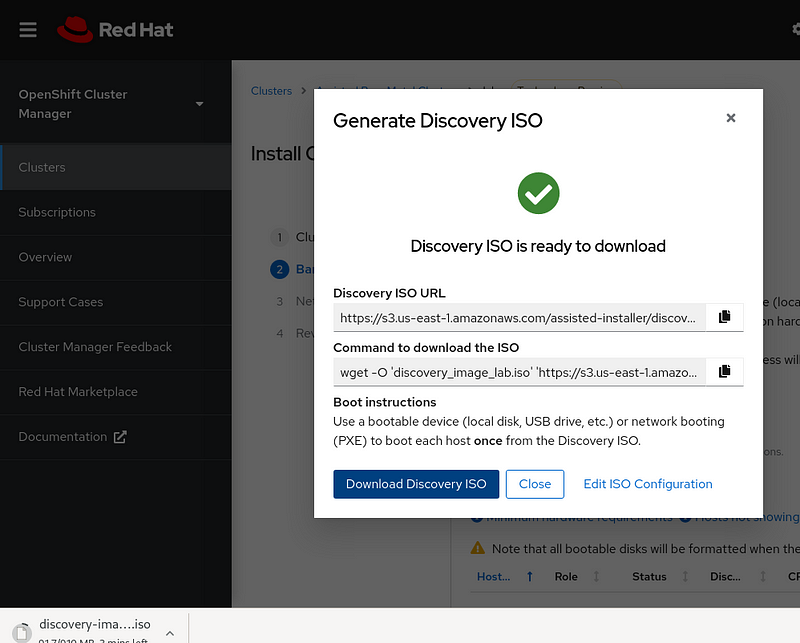
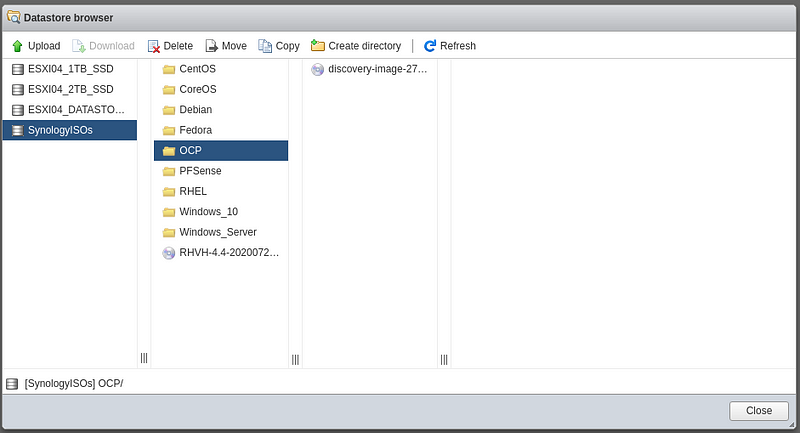
Upload the ISO to your datastore.
Create the VMs:
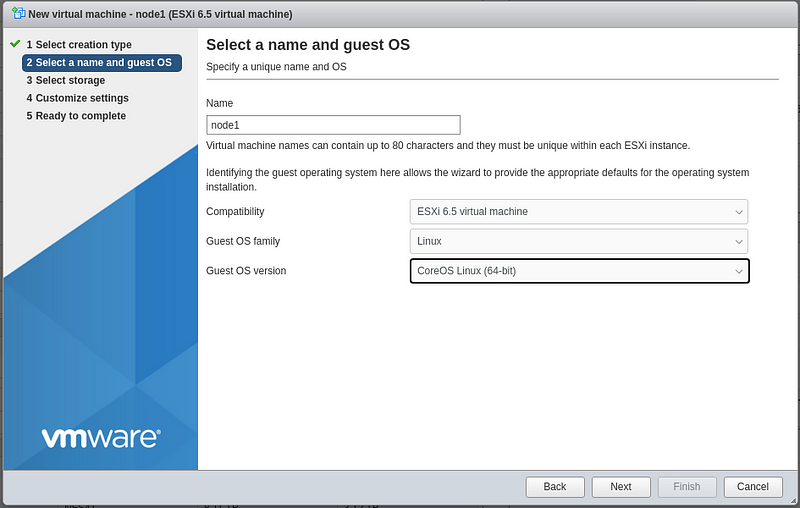
In this guide, I use virtual machines on ESXi, but this can be applied to bare metal servers and probably RHEV, Hyper-V, and proxmox. Regardless of your platform, at this point, you will need to boot each of the three systems to the ISO.
Login to your ESXi or vSphere host can create a new VM.
**Select Compatibility “ESXi 6.5 virtual machine”**

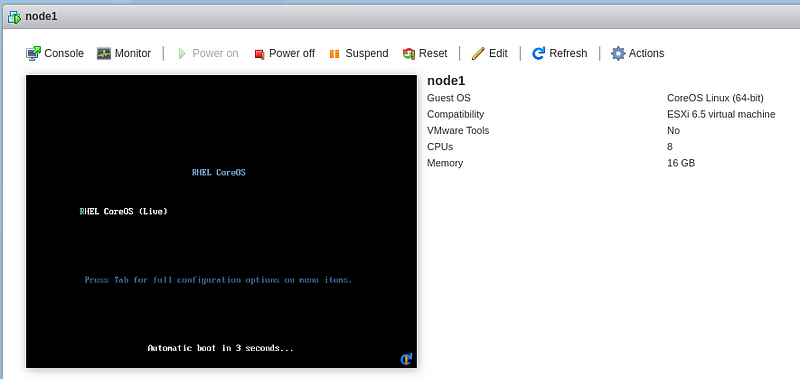
Power on the node.
Create the remaining two nodes using the same steps.
Bare Metal Discovery:
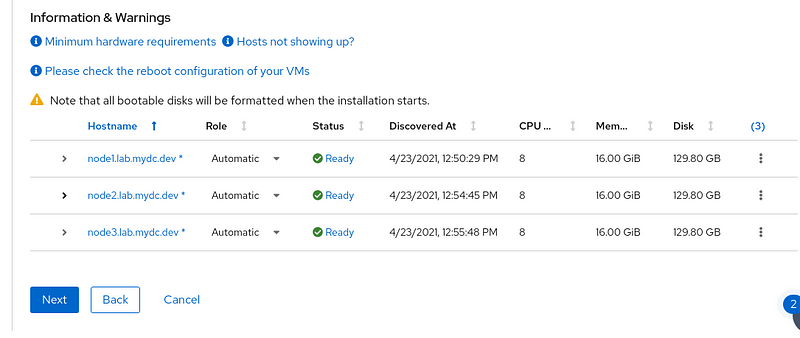
Power on all three nodes and open the cluster manager.
Your nodes should begin to appear on the discovery page.
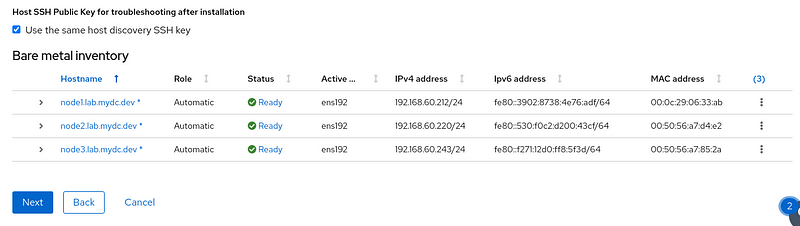
Change the hostname to match the correct VM. Use the IP address shown in the VMWare console and match it to one of the nodes and rename them.
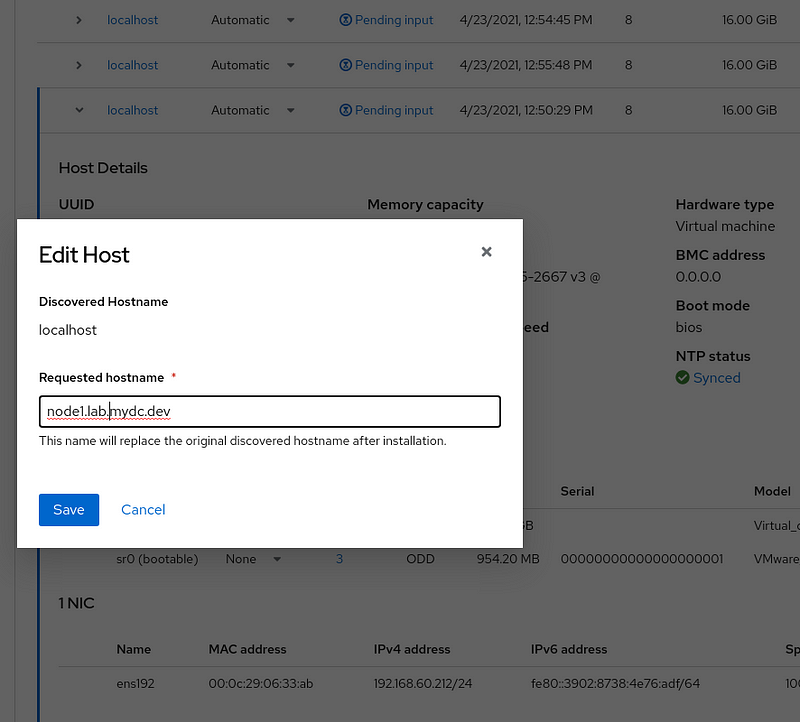
Once the hostnames are correct, click Next.
Networking:
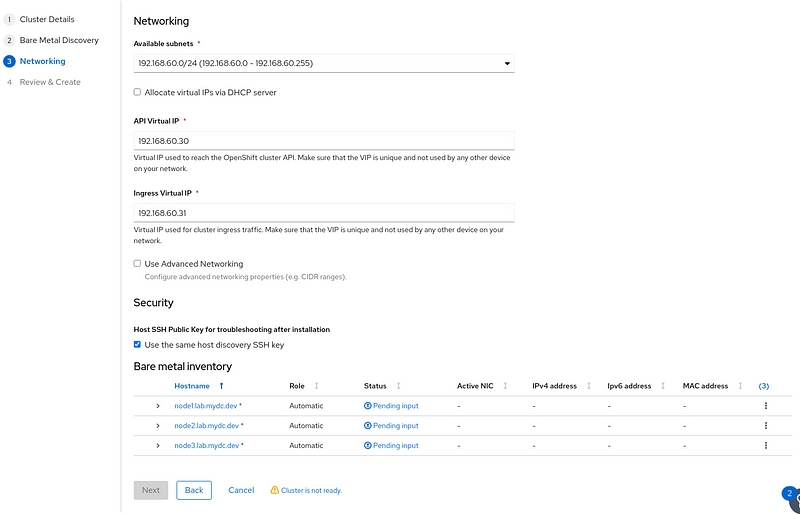
On the networking page, select the correct subnet, manually enter the virtual IPs, and wait for the status to change from “Pending Input” to “Ready”. Then click Next.
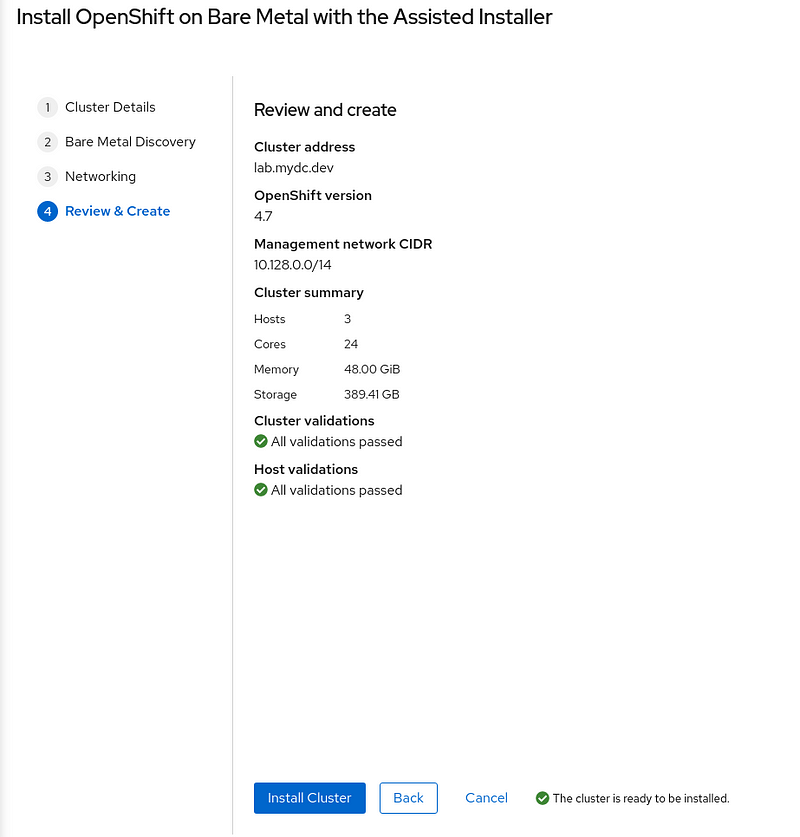
Review & Create
Click “Install Cluster”.
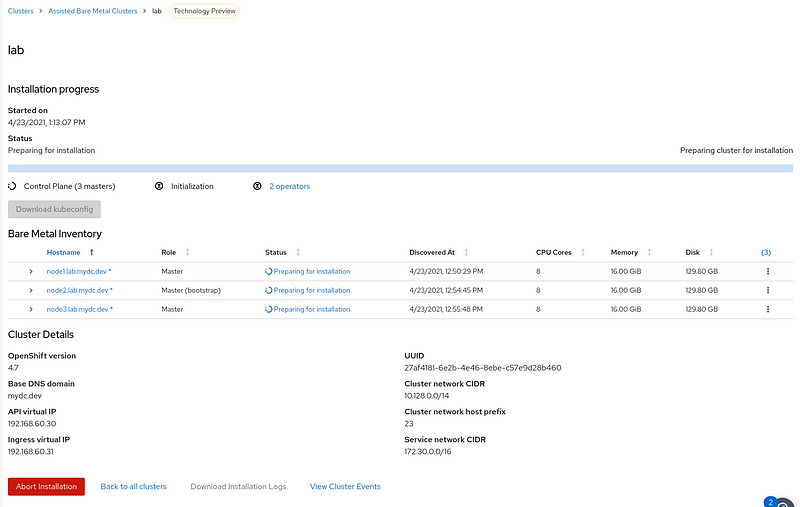
The installation process has averaged around an hour on my system.
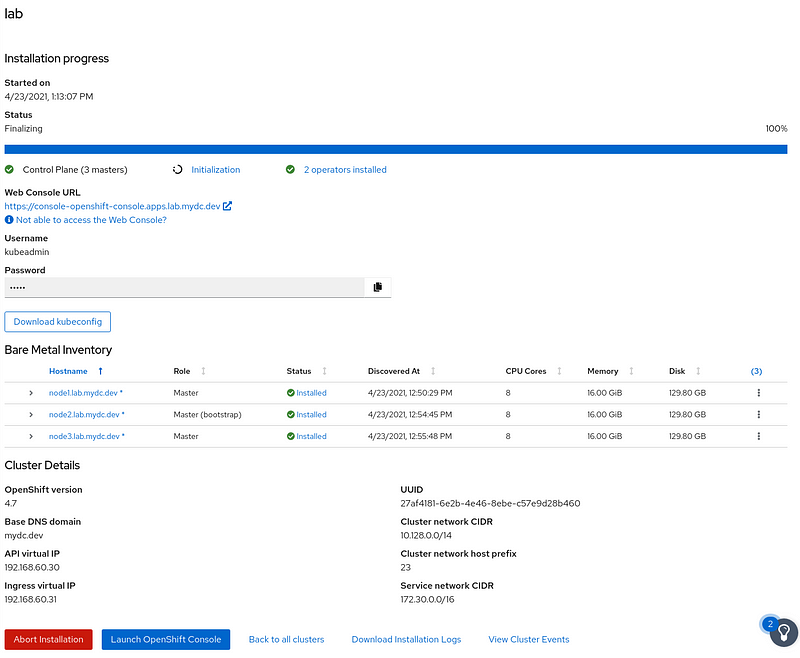
The installation process has completed.
Login to the console:
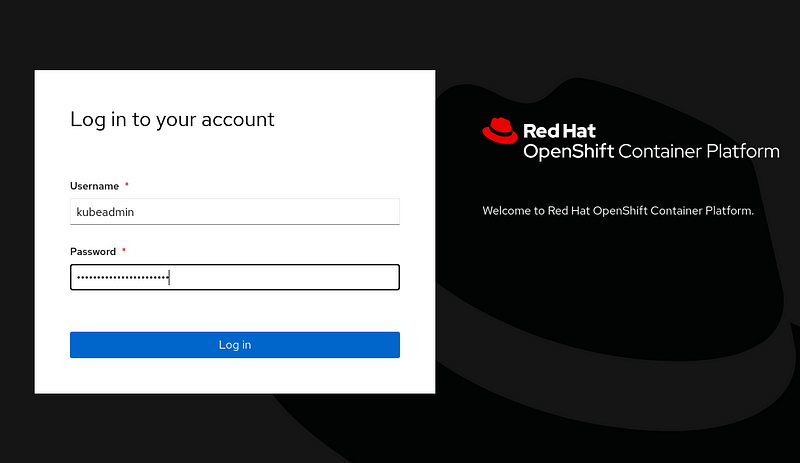
Copy your kubeadmin password to the clipboard and open the web console.
You should get a certificate error.
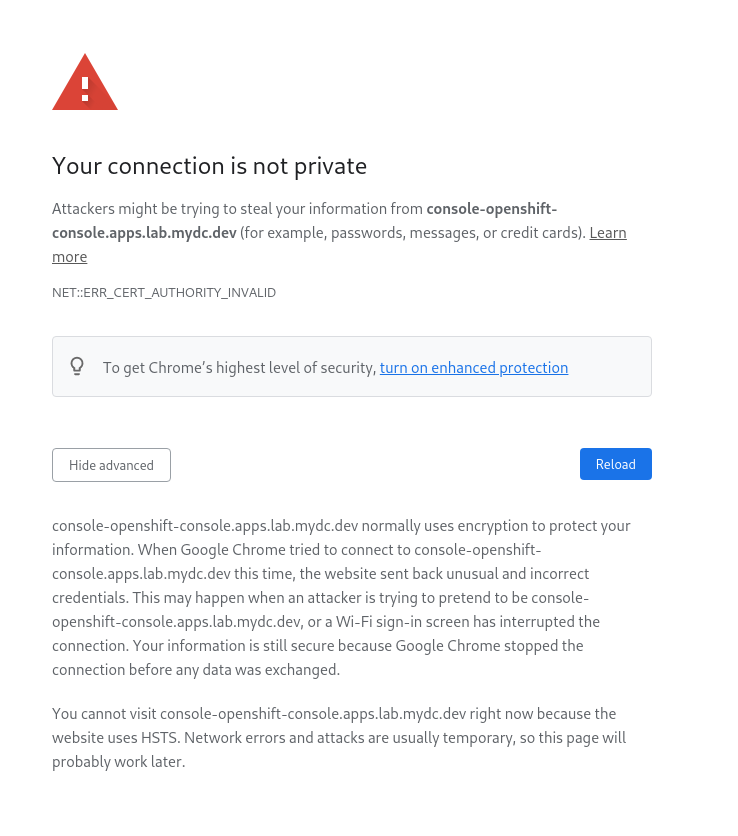
Click on “Not Secure” to view the certificate.
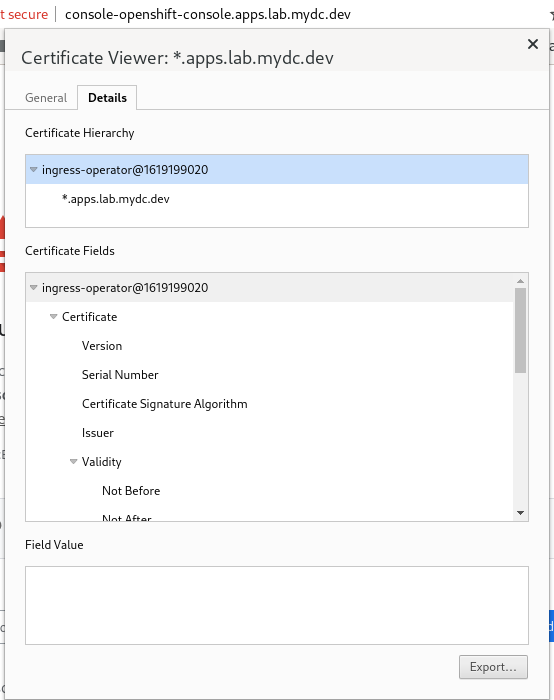
Click Details and select the inregress-operator, then export it.
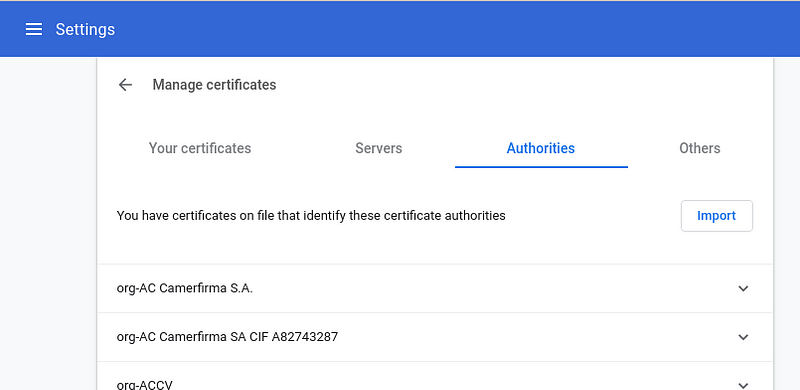
Import the certificate into Chrome by going to Settings > Privacy & Security > Security > Manage Certificates > Authorities > Import
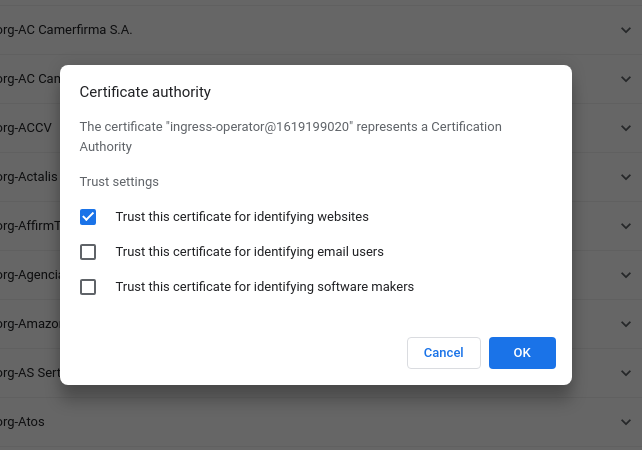
Trust this cert, click ok. Reload the console window.
Login using kubeadmin for username and the password provided on the cluster manager page.
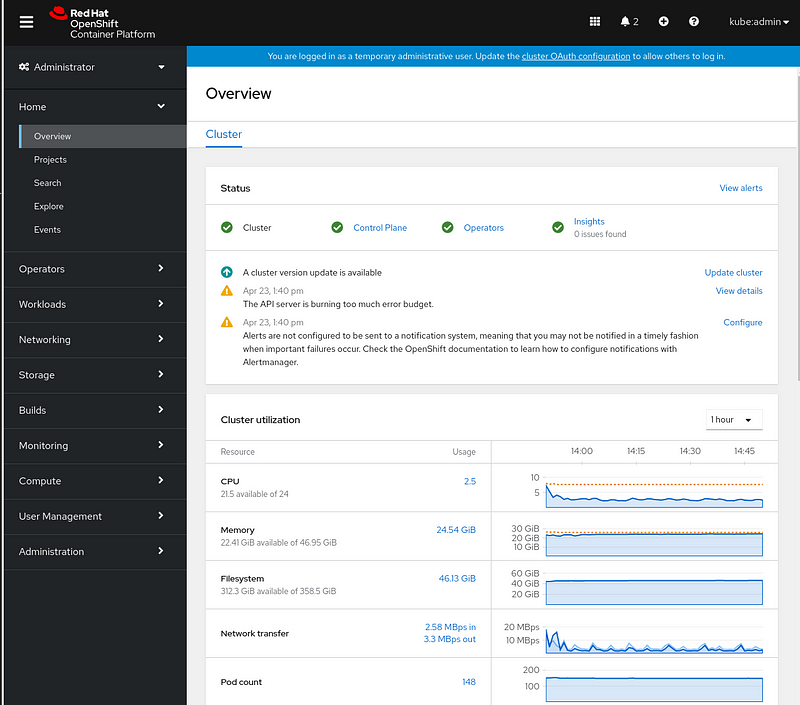
You should be greeted by the OpenShift Administrator Dashboard.
Summary:
Hopefully, this will get you up and running with a three-node OCP cluster.
Good luck!