Updated: 7/29/2020
Who wants to run an OKD 4 SNC on their Windows 10 workstation? Me for one.
This is guide is geared towards people who want to try ODK 4 on an existing workstation (minimum 24GB of RAM) without purchasing additional hardware like a NUC or home lab server.
OpenShift (OCP) has CodeReady Containers where you can set up an OpenShift cluster on your local machine for development and testing purposes. Currently, the OKD version of CodeReady Containers is still in development. This guide will walk you through installing an OKD 4.5 Single Node Cluster on your Windows 10 (Pro, Enterprise, or Education) workstation using Hyper-V.
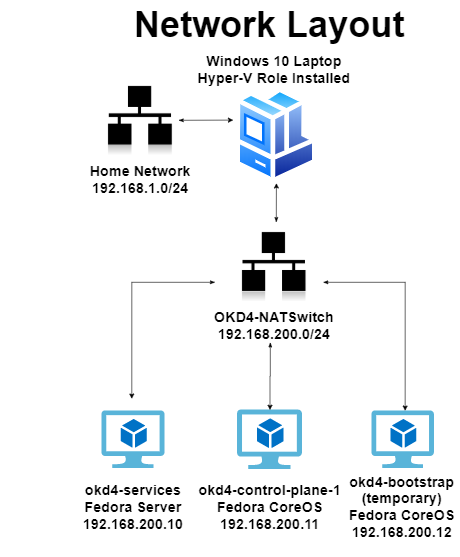
VM Overview:
For this installation, I used a Windows 10 Pro laptop with 32GB RAM. Here is a breakdown of the virtual machines and network layout:

Enable Hyper-V using PowerShell
Open a PowerShell console as Administrator and run the following command:
Enable-WindowsOptionalFeature -Online -FeatureName Microsoft-Hyper-V -All

If the command couldn’t be found, make sure you’re running PowerShell as Administrator.
When the installation has completed, reboot.
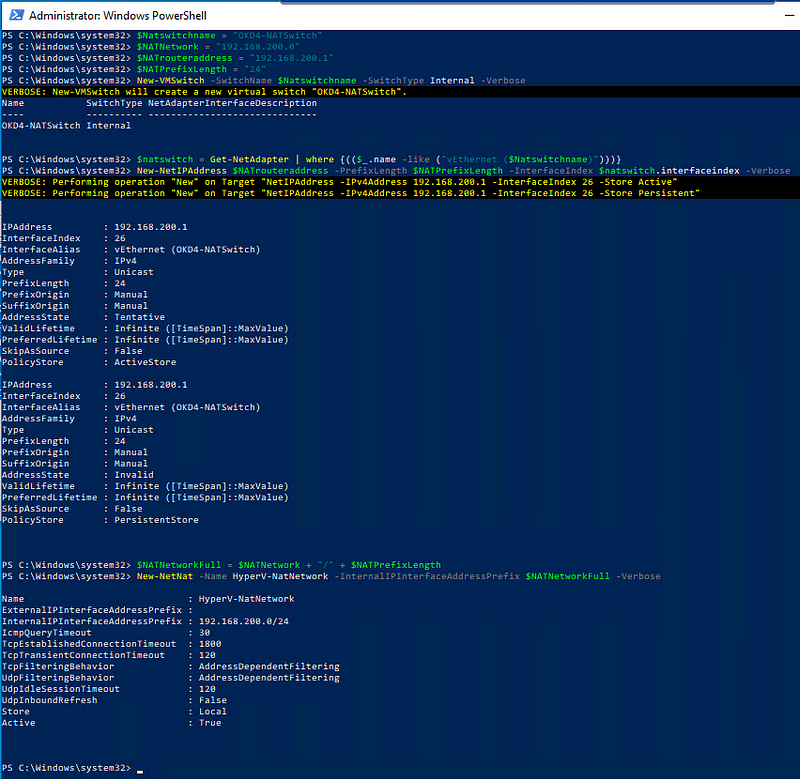
Create a NAT switch in Hyper-V using Powershell
Open a PowerShell console as Administrator and run the following commands to create a Virtual Switch:
$Natswitchname = “OKD4-NATSwitch”
$NATNetwork = “192.168.200.0”
$NATrouteraddress = “192.168.200.1”
$NATPrefixLength = “24”
New-VMSwitch –SwitchName $Natswitchname –SwitchType Internal –Verbose
$natswitch = Get-NetAdapter | where {(($_.name -like (“vEthernet ($Natswitchname)”)))}
New-NetIPAddress $NATrouteraddress -PrefixLength $NATPrefixLength -InterfaceIndex $natswitch.interfaceindex -Verbose
$NATNetworkFull = $NATNetwork + “/” + $NATPrefixLength
New-NetNat -Name HyperV-NatNetwork -InternalIPInterfaceAddressPrefix $NATNetworkFull -Verbose
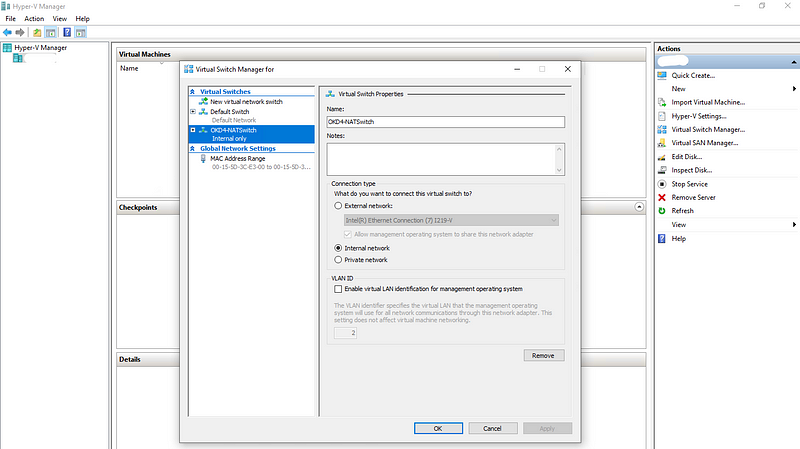
Open the Hyper-V Manager, then Virtual Switch Manager, and verify the OKD4-NATSwitch has been created.
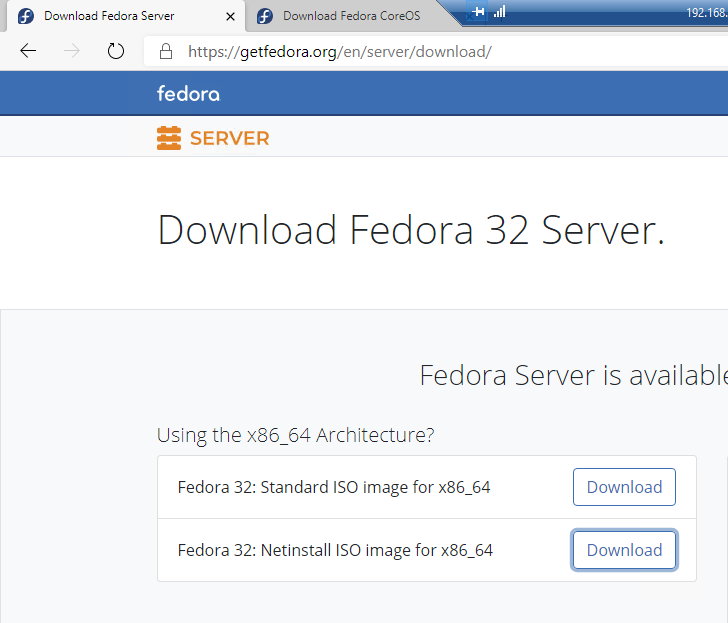
Create the okd4-services VM:
The okd-4services VM is used to host DNS, haproxy, DHCP, and web services.
Download the Fedora Server Standard ISO.
Open the Hyper-V Manager and create a new Virtual Machine.
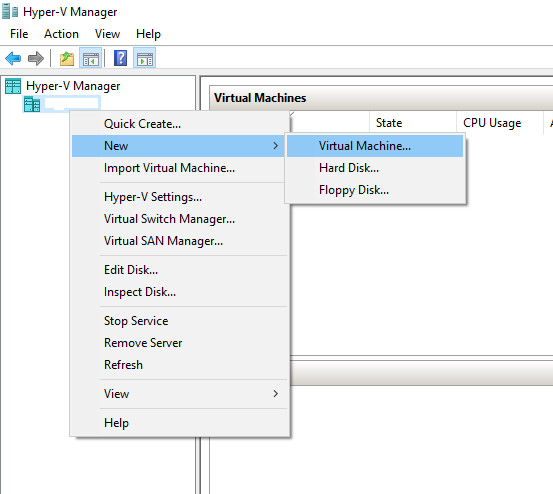
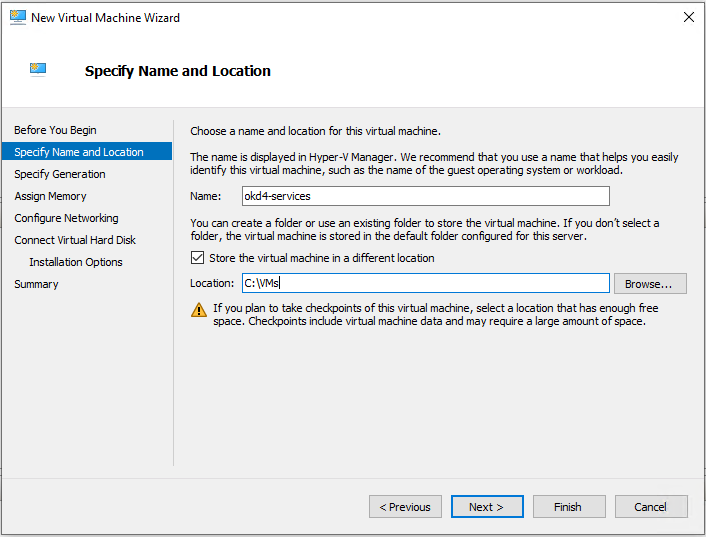
Choose a name for the VM and select the location.
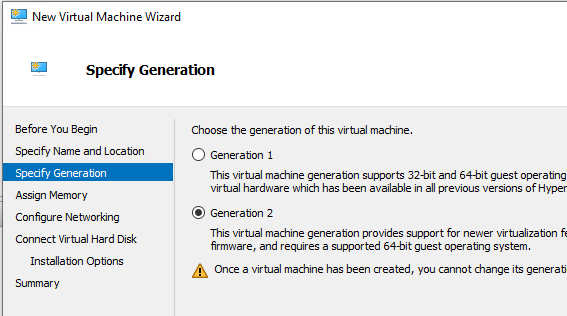
Choose Generation 2.
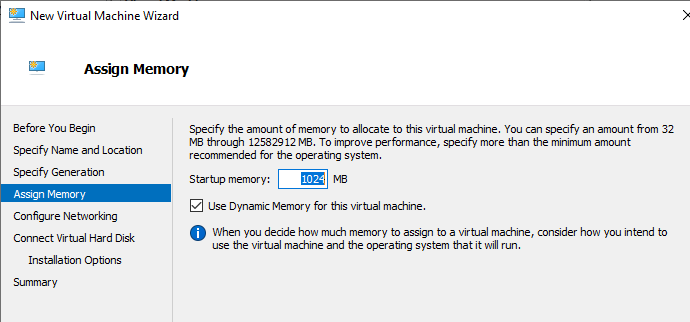
Set the Startup Memory to 1024 MB.
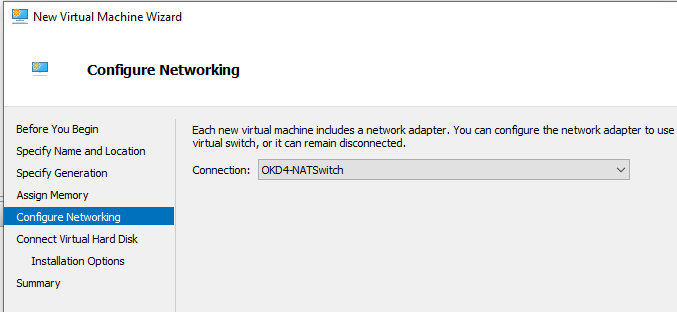
Select the OKD4-NATSwitch connection.
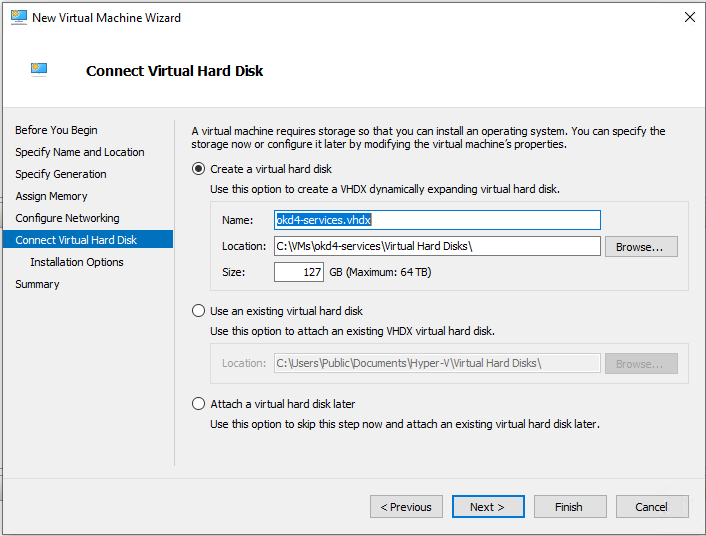
Create a virtual hard disk. I used the defaults.
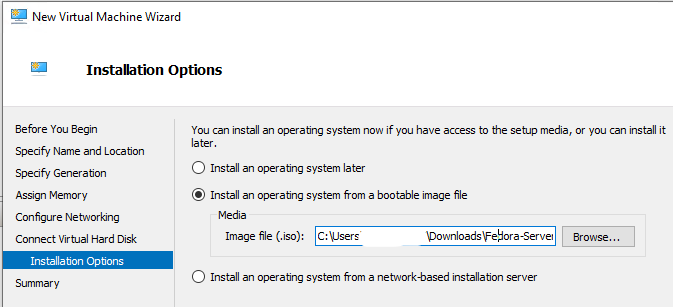
Select to “Install … from a bootable image file” and Browse to your Fedora Server ISO. Then click finish.
Edit the VM settings and change the boot order to HD, DVD, Network.

Disable Secure Boot.
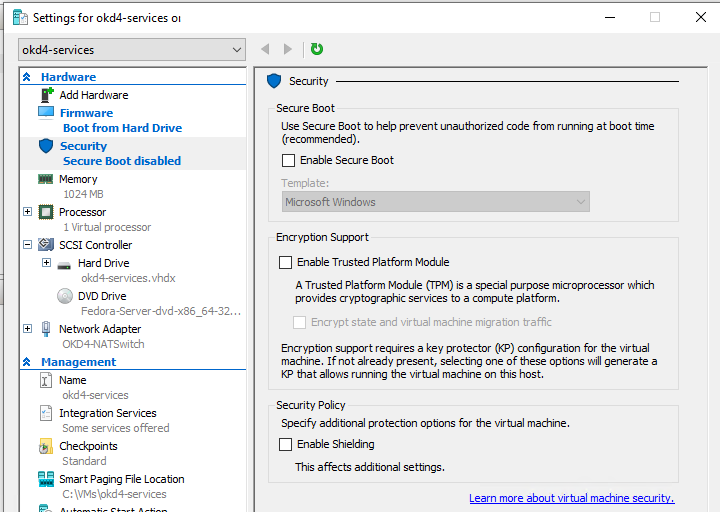
Change your Virtual Processors to “2”.
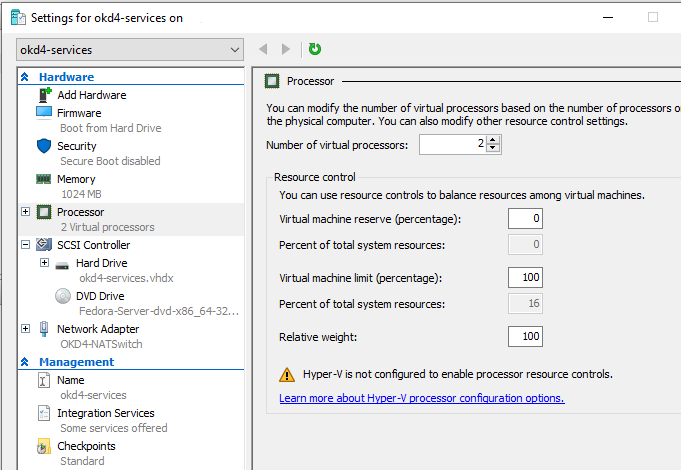
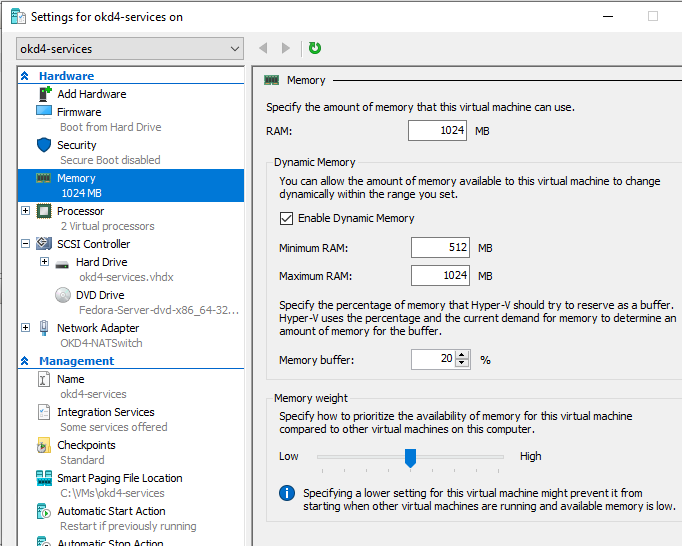
Change your Dynamic Memory to Min 512MB and Max 1024MB. Then start the VM.
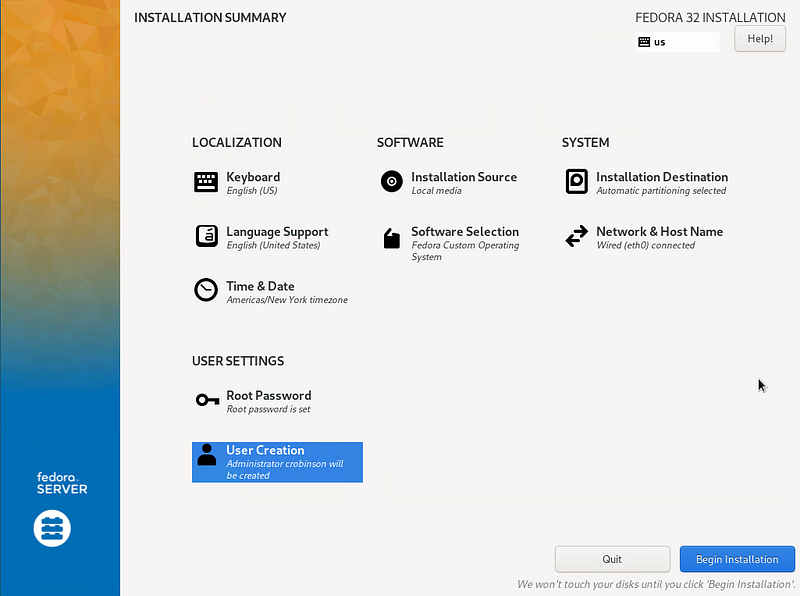
Install Fedora Server 32 on the okd4-services VM:
Run through the installation and choose your Installation Destination.
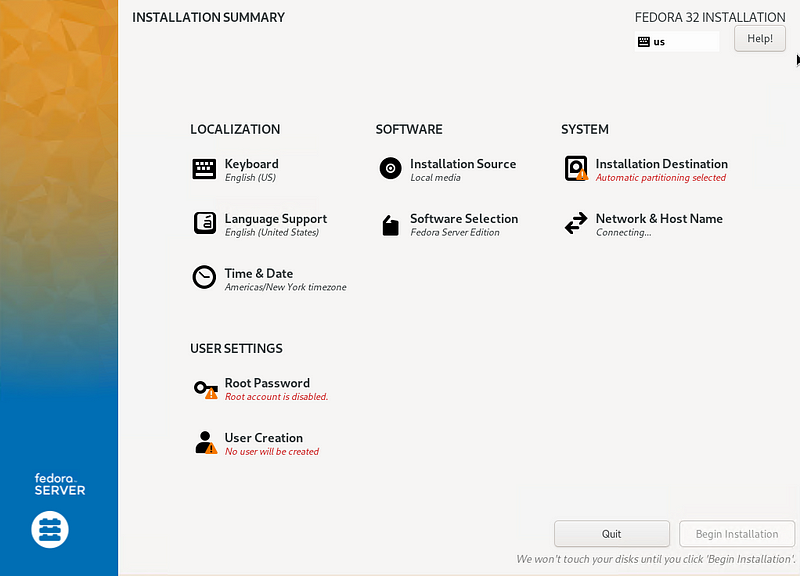
For Software Selection, choose “Fedora Custom Operating System” and include the “Guest Agents” add-on.

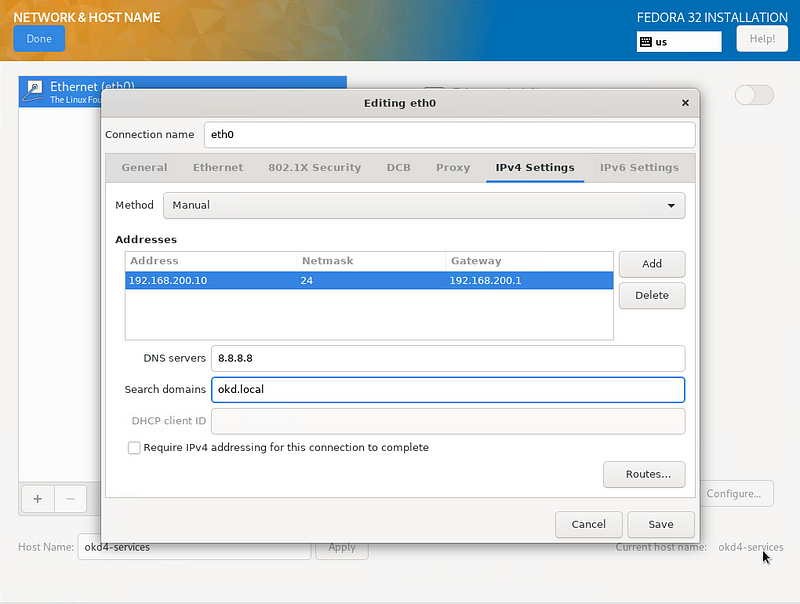
Enable the NIC connected to the VM Network and set the hostname as okd4-services, then click Apply. Click configure, IPv4 Settings, change the Method to “Manual” and set the IP settings as shown, then click save.
Set the Root password, and create an admin user and set the password. Click “Begin Installation” to start the install.
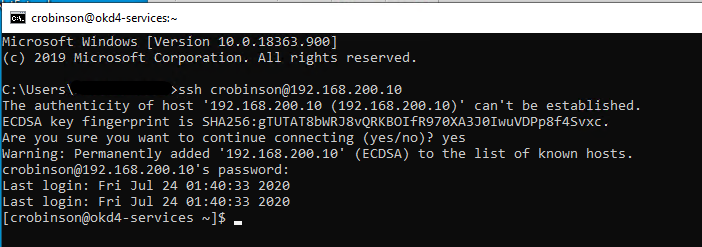
After the installation has completed open a command prompt and SSH to the okd4-services VM.
ssh 192.168.200.10
Install the additional packages, update the OS, and reboot.
sudo dnf install -y git wget vim
sudo dnf update -y  && sudo systemctl reboot
Configure okd4-services VM to host various services:
The okd4-services VM is used to provide DHCP, DNS, NFS exports, web server, and load balancing.
Open a terminal on the okd4-services VM and clone the okd4-snc-hyperv repo that contains the DHCP, DNS, HAProxy, and install-conf.yaml example files:
cd
git clone https://github.com/cragr/okd4-snc-hyperv.git
cd okd4-snc-hyperv
Install dhcpd (DHCP)
sudo dnf -y install dhcp-server
sudo cp dhcpd.conf /etc/dhcp/
sudo systemctl enable --now dhcpd
sudo firewall-cmd --add-service=dhcp --permanent
sudo firewall-cmd --reload
Install bind (DNS)
sudo dnf -y install bind bind-utils
Copy the named config files and zones:
sudo cp named.conf /etc/named.conf
sudo cp named.conf.local /etc/named/
sudo mkdir /etc/named/zones
sudo cp db* /etc/named/zones
Enable and start named:
sudo systemctl enable named
sudo systemctl start named
sudo systemctl status named
Create firewall rules:
sudo firewall-cmd --permanent --add-port=53/udp
sudo firewall-cmd --reload
Change the DNS on the okd4-services VM to 127.0.0.1:
sudo nmcli connection modify eth0 ipv4.dns "127.0.0.1"
Restart the network services on the okd4-services VM:
sudo systemctl restart NetworkManager
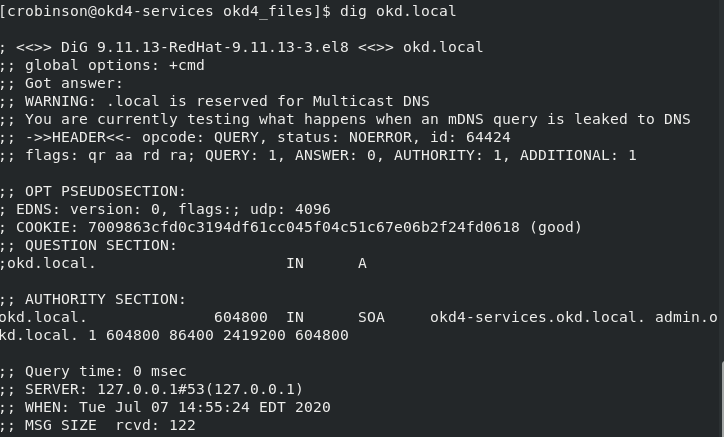
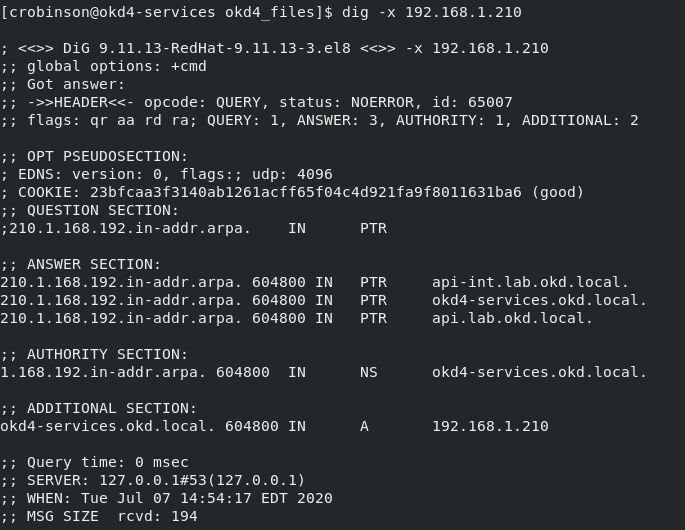
Test DNS on the okd4-services.
dig okd.local
dig –x 192.168.200.10
With DNS working correctly, you should see the following results:
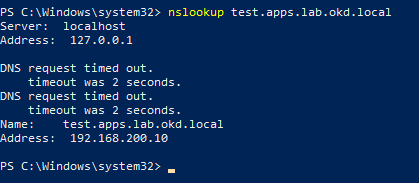
In an elevated Powershell window set the DNS on the HyperV-NATSwitch to match the okd4-services IP, 192.168.200.10 so you can resolve the DNS entries.
Get-NetIpInterface ‘*(OKD4-NATSwitch)’ | Set-DnsClientServerAddress -ServerAddress ‘192.168.200.10’
Ensure you are able to nslookup test.apps.lab.okd.local
Install HAProxy:
In the okd4-services terminal run:
sudo dnf install haproxy -y
Copy haproxy config from the git okd4_files directory :
sudo cp haproxy.cfg /etc/haproxy/haproxy.cfg
Start, enable, and verify HA Proxy service:
sudo setsebool -P haproxy_connect_any 1
sudo systemctl enable haproxy
sudo systemctl start haproxy
sudo systemctl status haproxy
Add OKD firewall ports:
sudo firewall-cmd --permanent --add-port=6443/tcp
sudo firewall-cmd --permanent --add-port=22623/tcp
sudo firewall-cmd --permanent --add-service=http
sudo firewall-cmd --permanent --add-service=https
sudo firewall-cmd --reload
Install Apache/HTTPD
sudo dnf install -y httpd
Change httpd to listen port to 8080:
sudo sed -i 's/Listen 80/Listen 8080/' /etc/httpd/conf/httpd.conf
Enable and Start httpd service/Allow port 8080 on the firewall:
sudo setsebool -P httpd_read_user_content 1
sudo systemctl enable httpd
sudo systemctl start httpd
sudo firewall-cmd --permanent --add-port=8080/tcp
sudo firewall-cmd --reload
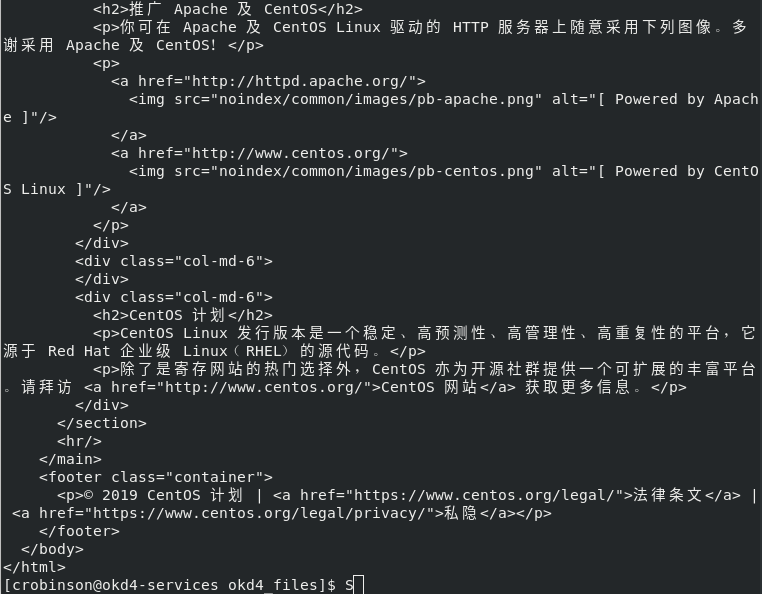
Test the webserver:
curl localhost:8080
A successful curl should look like this:
Download the openshift-installer and oc client:
SSH to the okd4-services VM
To download the latest oc client and openshift-install binaries, you need to use an existing version of the oc client.
Download the 4.5 version of the oc client and openshift-install from the OKD releases page. Example:
cd
wget https://github.com/openshift/okd/releases/download/4.5.0-0.okd-2020-07-29-070316/openshift-client-linux-4.5.0-0.okd-2020-07-29-070316.tar.gz
wget https://github.com/openshift/okd/releases/download/4.5.0-0.okd-2020-07-29-070316/openshift-install-linux-4.5.0-0.okd-2020-07-29-070316.tar.gz
Extract the okd version of the oc client and openshift-install:
tar -zxvf openshift-client-linux-4.5.0-0.okd-2020-07-29-070316.tar.gz
tar -zxvf openshift-install-linux-4.5.0-0.okd-2020-07-29-070316.tar.gz
Move the kubectl, oc, and openshift-install to /usr/local/bin and show the version:
sudo mv kubectl oc openshift-install /usr/local/bin/
oc version
openshift-install version
The latest and recent releases are available at https://origin-release.svc.ci.openshift.org
Setup the openshift-installer:
In the install-config.yaml, you can either use a pull-secret from RedHat or the default of “{“auths”:{“fake”:{“auth”: “bar”}}}” as the pull-secret.
Generate an SSH key if you do not already have one.
ssh-keygen
Create an install directory and copy the install-config.yaml file:
cd
mkdir install_dir
cp okd4-snc-hyperv/install-config.yaml ./install_dir
Edit the install-config.yaml in the install_dir and add your ssh key. Backup the install-config.yaml as it will be removed when generating the manifests:
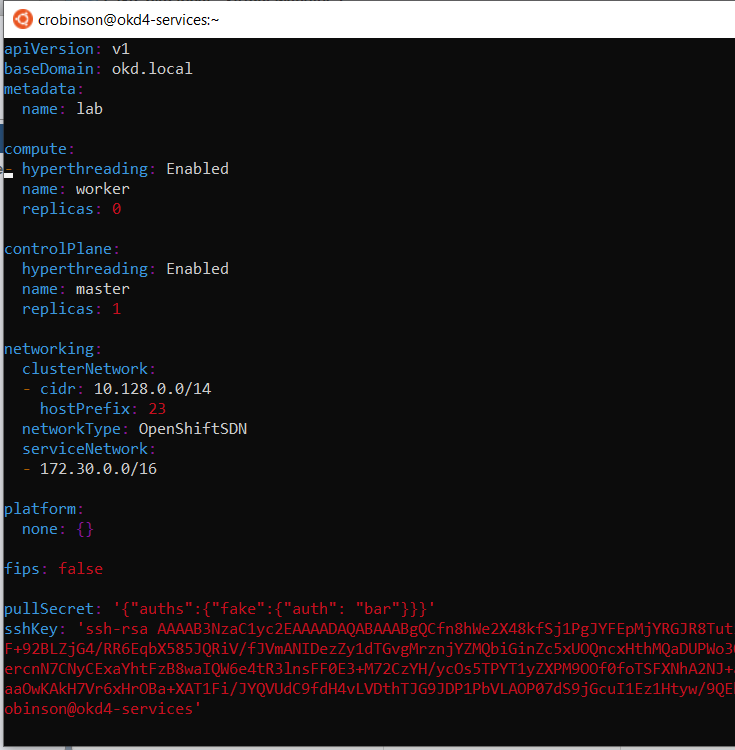
vim ./install_dir/install-config.yaml
cp ./install_dir/install-config.yaml ./install_dir/install-config.yaml.bak
Generate the Kubernetes manifests for the cluster, ignore the warning:
openshift-install create manifests --dir=install_dir/
Now you can create the ignition-configs:
openshift-install create ignition-configs --dir=install_dir/
Note: If you reuse the install_dir, make sure it is empty. Hidden files are created after generating the configs, and they should be removed before you use the same folder on a 2nd attempt.
Host ignition and Fedora CoreOS files on the webserver:
Create okd4 directory in /var/www/html:
sudo mkdir /var/www/html/okd4
Copy the install_dir contents to /var/www/html/okd4 and set permissions:
sudo cp -R install_dir/* /var/www/html/okd4/
sudo chown -R apache: /var/www/html/
sudo chmod -R 755 /var/www/html/
Test the webserver:
curl localhost:8080/okd4/metadata.json
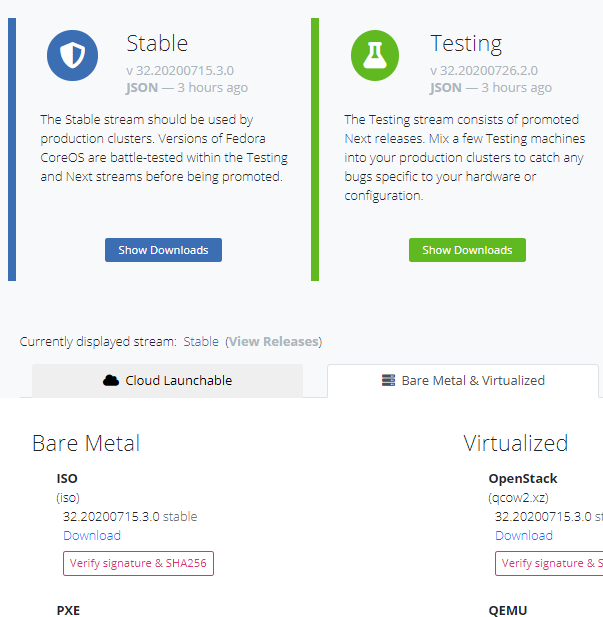
Download the Fedora CoreOS bare-metal bios image and sig files and shorten the file names:
cd /var/www/html/okd4/
sudo wget https://builds.coreos.fedoraproject.org/prod/streams/stable/builds/32.20200715.3.0/x86_64/fedora-coreos-32.20200715.3.0-metal.x86_64.raw.xz
sudo wget https://builds.coreos.fedoraproject.org/prod/streams/stable/builds/32.20200715.3.0/x86_64/fedora-coreos-32.20200715.3.0-metal.x86_64.raw.xz.sig
sudo mv fedora-coreos-32.20200715.3.0-metal.x86_64.raw.xz fcos.raw.xz
sudo mv fedora-coreos-32.20200715.3.0-metal.x86_64.raw.xz.sig fcos.raw.xz.sig
sudo chown -R apache: /var/www/html/
sudo chmod -R 755 /var/www/html/
Create bootstrap and master nodes:
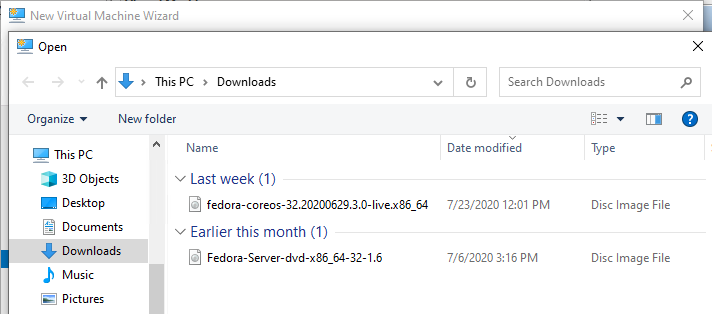
Download the Fedora CoreOS Bare Metal ISO and save it to your Downloads folder.
The latest stable version at the time of writing is 32.20200715.3.0
Create two ODK nodes (okd4-bootstrap and okd4-control-plane-1) in the Hyper-V Manager using the CPU and RAM values from the spreadsheet at the abeginning of this post:
okd4-bootstrap:
Open the Hyper-V Manager and create a new Virtual Machine.
Choose a name for the VM and select the location.
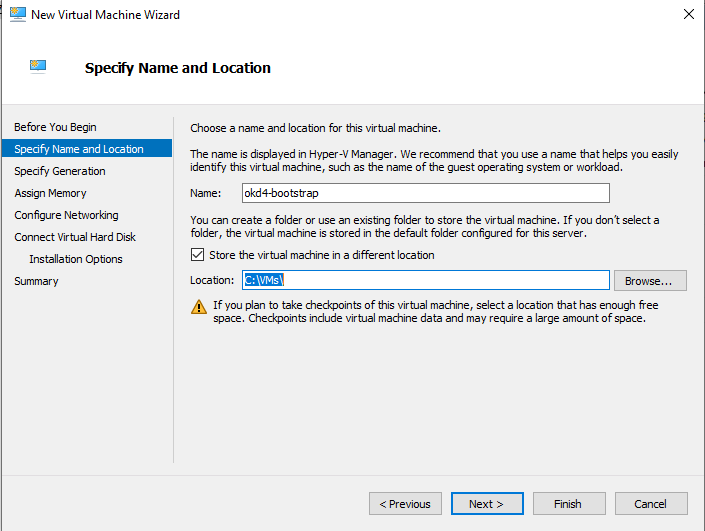
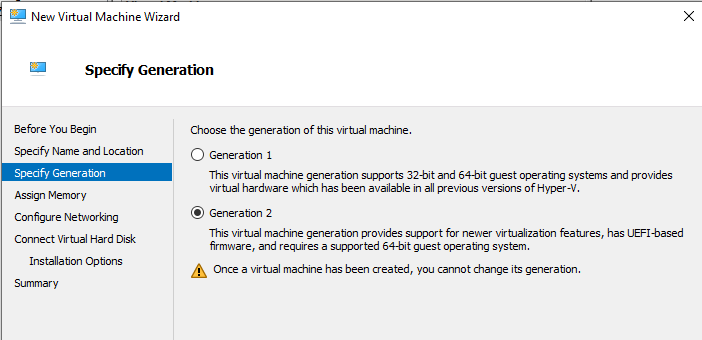
Choose Generation 2.
Use the Default settings for “Assign Memory” we will edit this later.
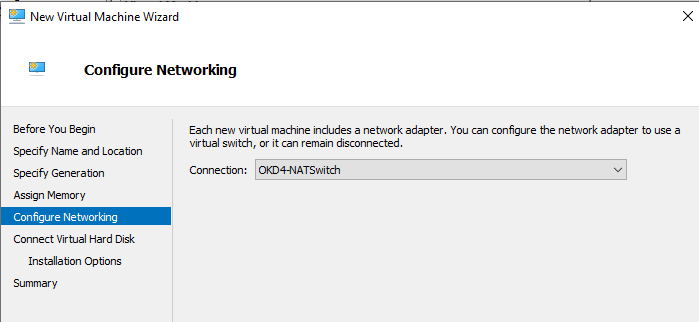
Select the OKD4-NATSwitch connection.
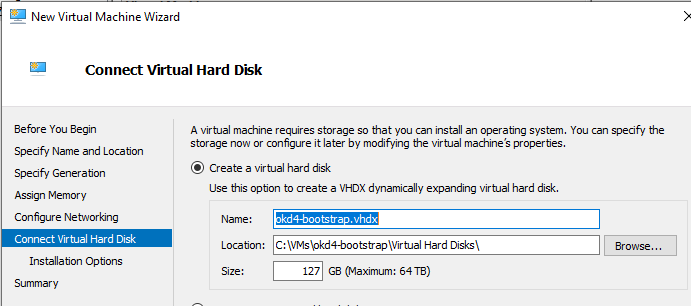
Create a virtual hard disk. I used the defaults.
Select to “Install … from a bootable image file” and Browse to your Fedora CoreOS ISO. Then click finish.
Edit the VM by selecting the VM and click on Settings …
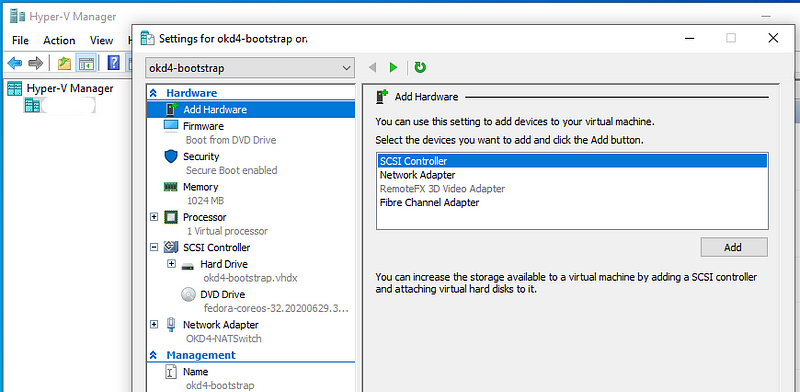
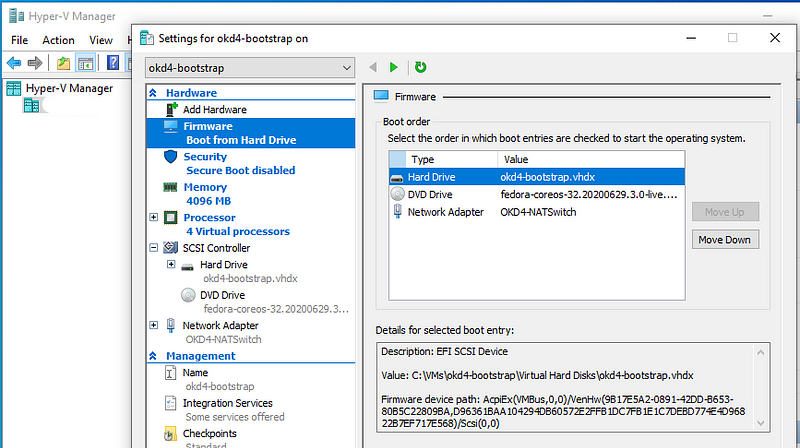
Edit the Boot order to HD, DVD, Network. Disable Secure Boot. Increase the Virtual Processors to 4.
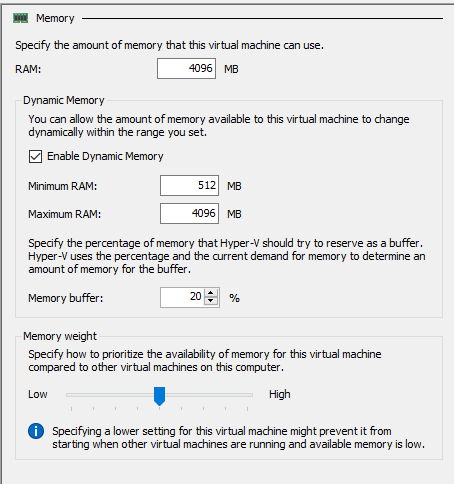
Edit the Memory to a Min of 512MB and Max of 4096 MB
Next create the okd4-control-plane-1 VM.
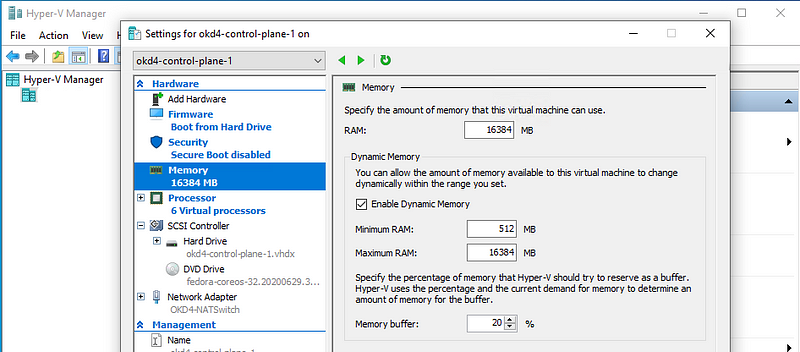
okd4-control-plane-1
Create the okd4-control-plane-1 VM using the same steps as the okd4-bootstrap VM with the exception of increasing the CPUs to 4 or higher and the Memory to 16384 MB.
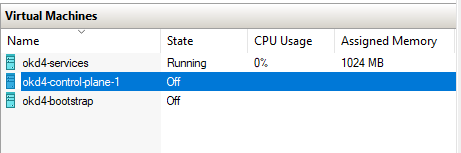
You should end up with the following VMs:
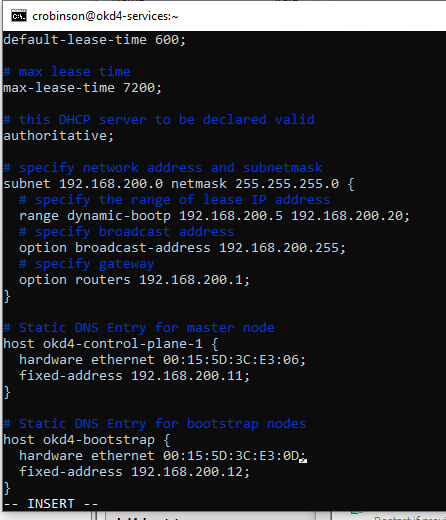
Setting static DHCP leases:
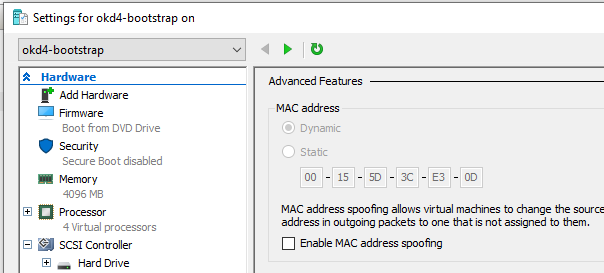
Power on the odk4-bootstrap VM and okd4-control-plane-1 nodes, go to the VM settings, Network Adapter, Advanced Features, and note the Mac Addresses.
Update the hardware ethernet address for both nodes.
Restart the dhcpd services on the okd4-services node.
sudo systemctl restart dhcpd
Start the bootstrap process:
Reset the VM and allow it to boot.
Verify it booted with the correct IP address:
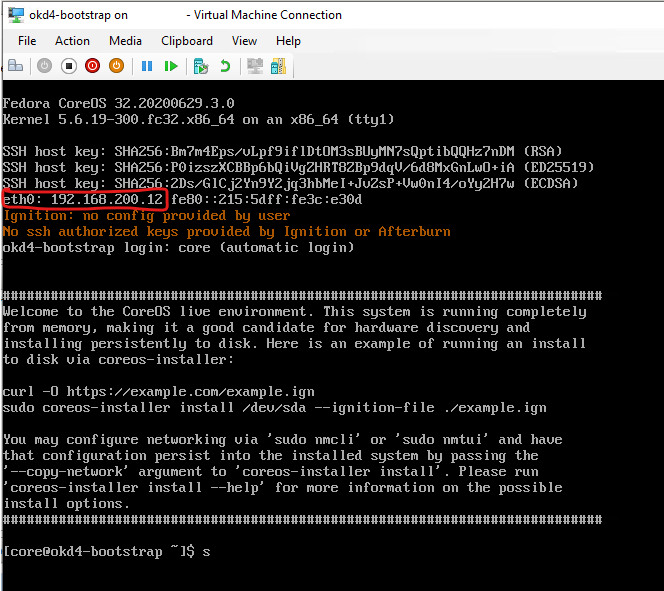
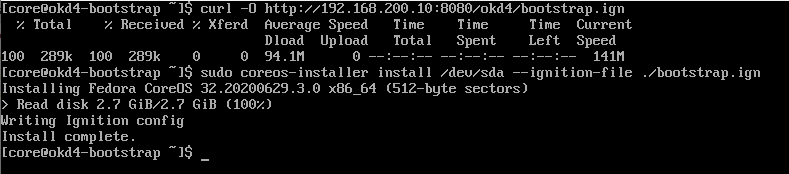
Download the ignition file and start the installer using the bootstrap.ign
curl -O http://192.168.200.10:8080/okd4/bootstrap.ign
sudo coreos-installer install /dev/sda --ignition-file ./bootstrap.ign
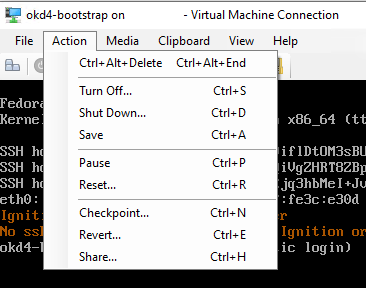
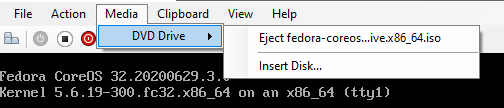
Once the install has completed, Power off the VM and Eject the iso.
Start the VM. If successful the bootstrap process has begun.

Starting the control-plane-1 node:
Repeat the same steps from the bootstrap node with the exception of using the master.ign
curl -O http://192.168.200.10:8080/okd4/bootstrap.ign
sudo coreos-installer install /dev/sda --ignition-file ./master.ign
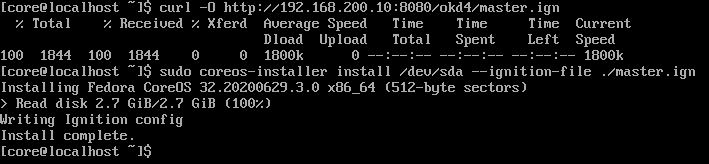
Once the install has completed, Power off the VM and Eject the iso.
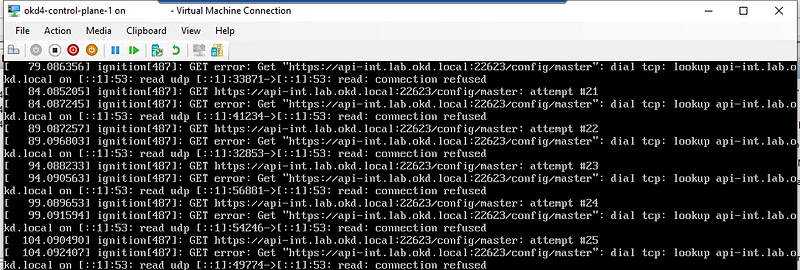
Start the VM.
The control-plane will appear to show an error until the bootstrap progresses. This is normal, just be patient.
Monitor the bootstrap installation:
You can monitor the bootstrap process from the okd4-services node:
openshift-install --dir=install_dir/ wait-for bootstrap-complete --log-level=debug
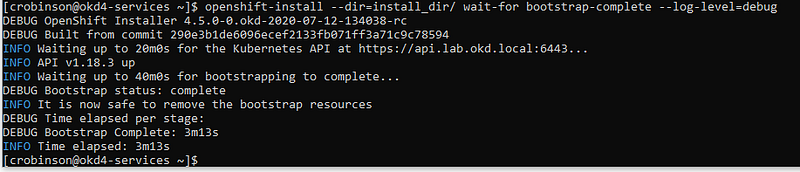
Once the bootstrap process is complete, which can take upwards of 30 minutes, you can shutdown your bootstrap node. Now is a good time to edit the /etc/haproxy/haproxy.cfg, comment out the bootstrap node, and reload the haproxy service.
sudo sed -i '/ okd4-bootstrap /s/^/#/' /etc/haproxy/haproxy.cfg
sudo systemctl reload haproxy
Login to the cluster and check the status:
Now that the control-plane node is online, you should be able to login with the oc client. Use the following commands to log in and check the status of your cluster:
export KUBECONFIG=~/install_dir/auth/kubeconfig
oc whoami
oc get nodes


Check the status of the cluster operators.
oc get clusteroperators
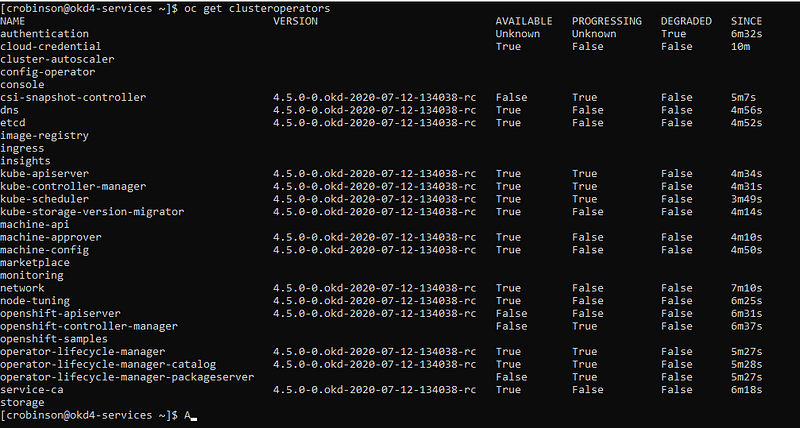
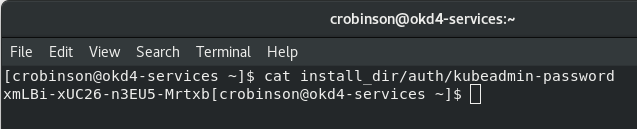
Once the console operator is available login to the web console.Get your kubeadmin password from the install_dir/auth folder:
cat install_dir/auth/kubeadmin-password
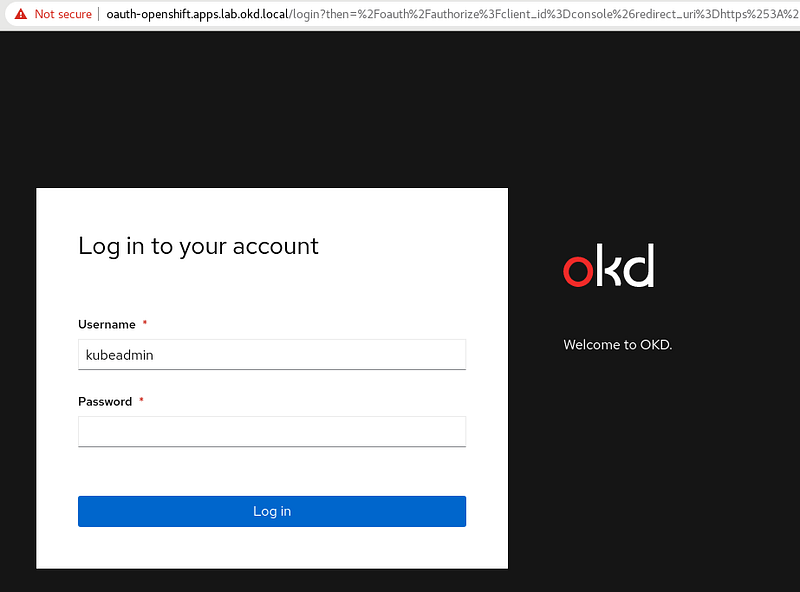
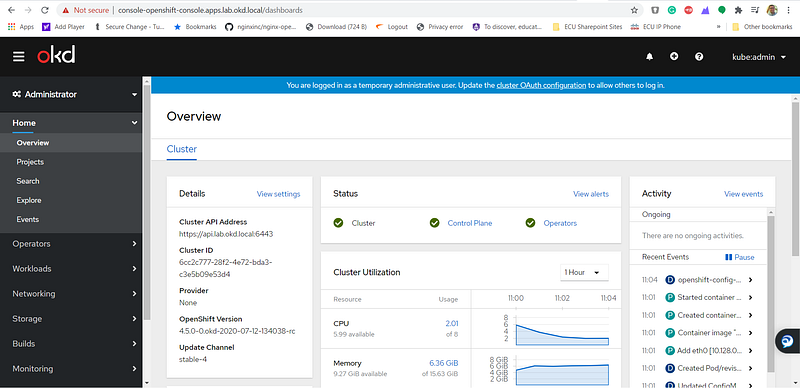
Open your web browser to https://console-openshift-console.apps.lab.okd.local/ and login as kubeadmin with the password from above:
The cluster status may still say upgrading, and it continues to finish the installation.
Persistent Storage:
We need to create some persistent storage for our registry before we can complete this project. Let’s configure our okd4-services VM as an NFS server and use it for persistent storage.
Login to your okd4-services VM and begin to set up an NFS server. The following commands install the necessary packages, enable services, and configure file and folder permissions.
sudo dnf install -y nfs-utils
sudo systemctl enable nfs-server rpcbind
sudo systemctl start nfs-server rpcbind
sudo mkdir -p /var/nfsshare/registry
sudo chmod -R 777 /var/nfsshare
sudo chown -R nobody:nobody /var/nfsshare
Create an NFS Export
Add this line in the new /etc/exports file “/var/nfsshare 192.168.200.0/24(rw,sync,no_root_squash,no_all_squash,no_wdelay)”
echo '/var/nfsshare 192.168.200.0/24(rw,sync,no_root_squash,no_all_squash,no_wdelay)' | sudo tee /etc/exports

Restart the nfs-server service and add firewall rules:
sudo setsebool -P nfs_export_all_rw 1
sudo systemctl restart nfs-server
sudo firewall-cmd --permanent --zone=public --add-service mountd
sudo firewall-cmd --permanent --zone=public --add-service rpc-bind
sudo firewall-cmd --permanent --zone=public --add-service nfs
sudo firewall-cmd --reload
Registry configuration:
Create a persistent volume on the NFS share. Use the registry_py.yaml in okd4_files folder from the git repo:
oc create -f okd4-snc-hyperv/registry_pv.yaml
oc get pv

Edit the image-registry operator:
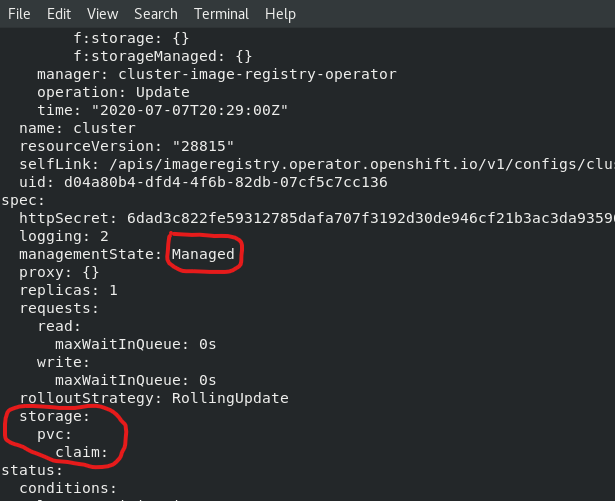
oc edit configs.imageregistry.operator.openshift.io
Change the managementState: from Removed to Managed. Under storage: add the pvc: and claim: blank to attach the PV and save your changes automatically:
managementState: Managedstorage:
    pvc:
      claim:
Check your persistent volume, and it should now be claimed:
oc get pv

Check the export size, and it should be zero. In the next section, we will push to the registry, and the file size should not be zero.
du -sh /var/nfsshare/registry

In the next section, we will create a WordPress project and push it to the registry. After the push, the NFS export should show 200+ MB.
Create WordPress Project:
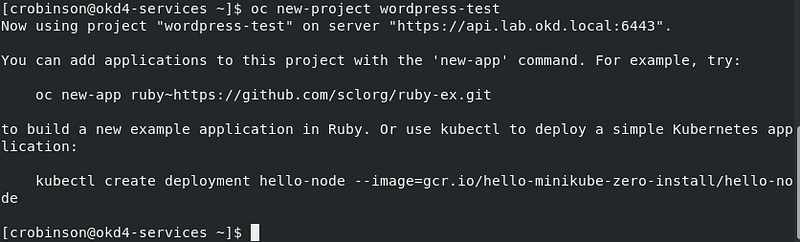
Create a new OKD project.
oc new-project wordpress-test
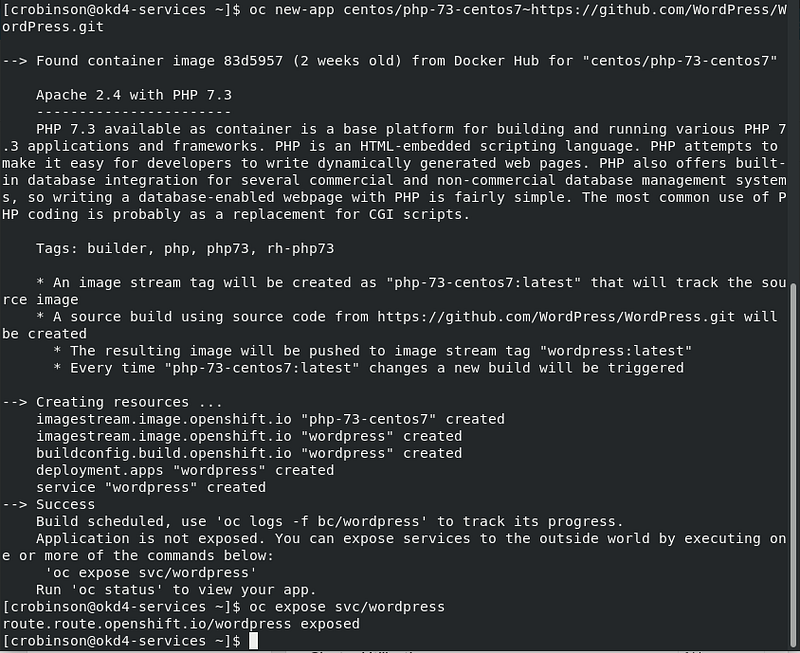
Create a new app using the centos php73 s2i image from docker hub and use the WordPress GitHub repo for the source. Expose the service to create a route.
oc new-app centos/php-73-centos7~https://github.com/WordPress/WordPress.git
oc expose svc/wordpress
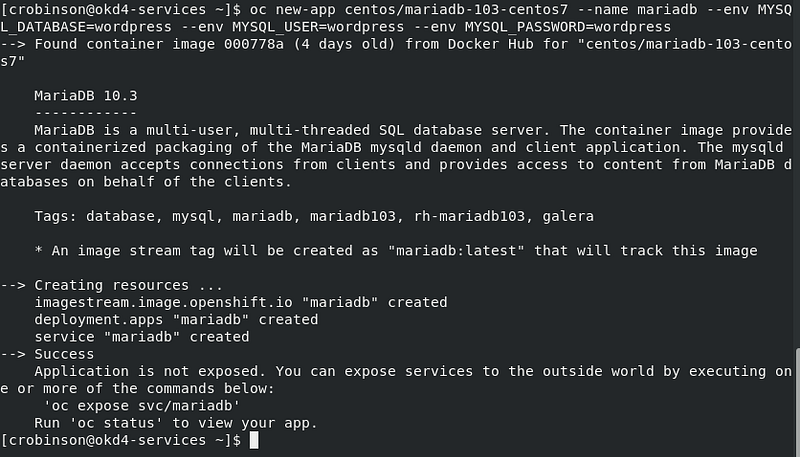
Create a new app using the centos7 MariaDB image with some environment variables:
oc new-app centos/mariadb-103-centos7 --name mariadb --env MYSQL_DATABASE=wordpress --env MYSQL_USER=wordpress --env MYSQL_PASSWORD=wordpress
Open the OpenShift console and browse to the WordPress-test project. Once the WordPress image is built and ready, it will be dark blue like the MariaDB instance show here:
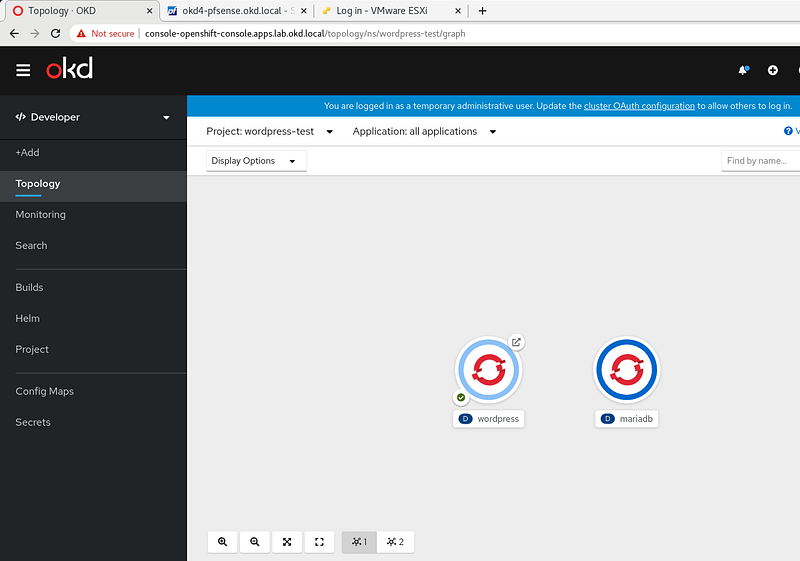
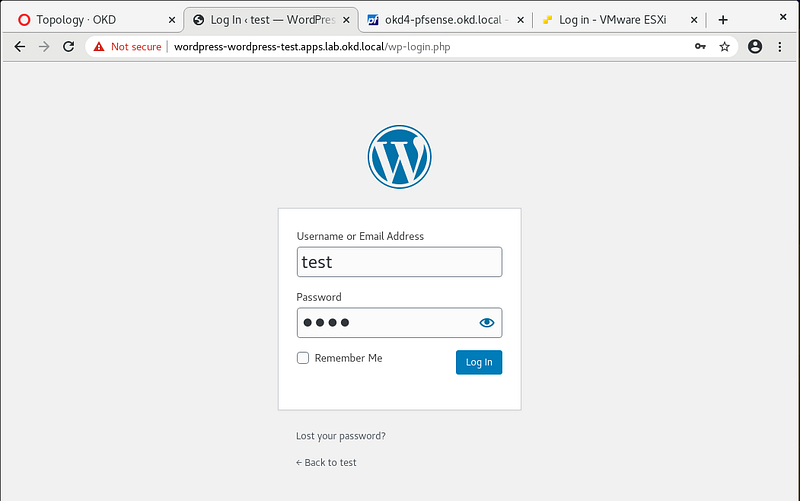
Click on the WordPress object and click on the route to open it in your web browser:
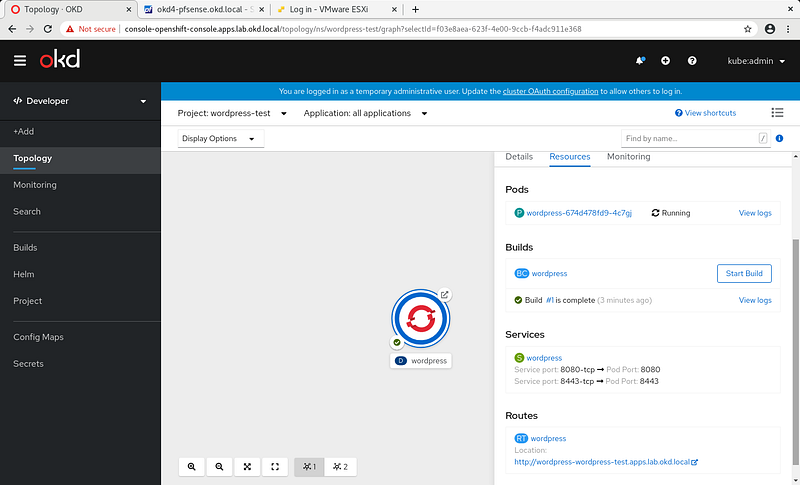
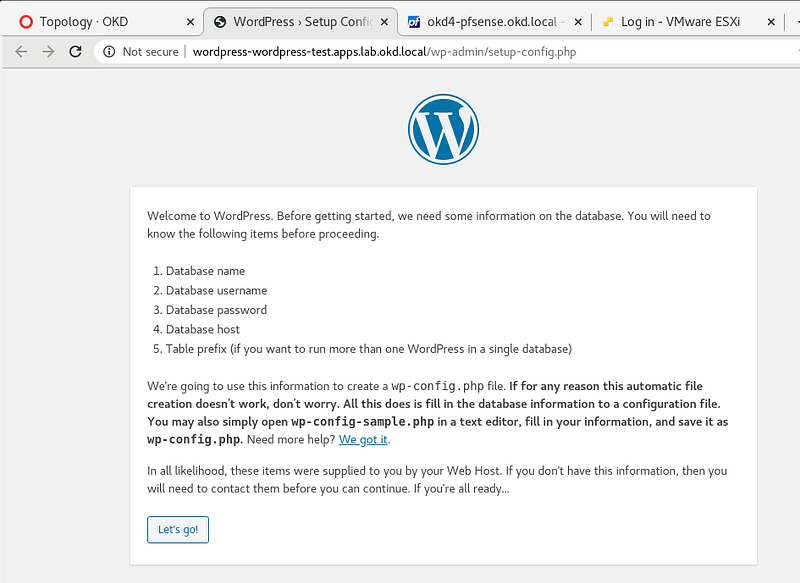
You should see the WordPress setup config, click Let’s Go.
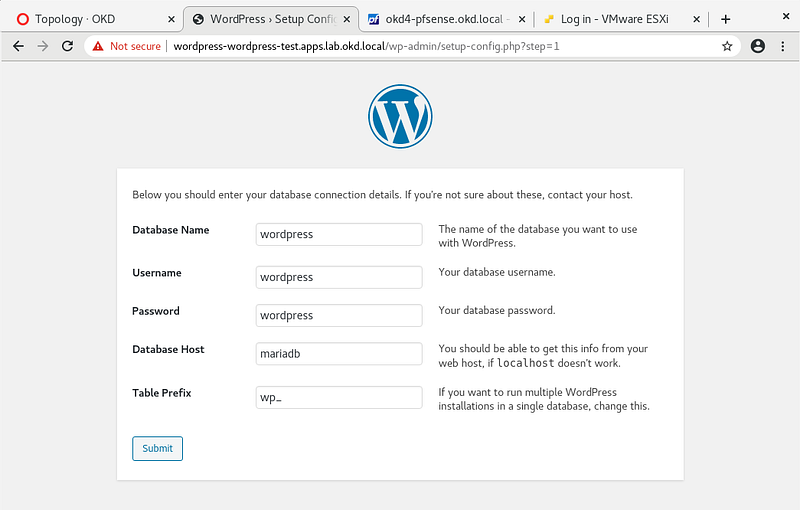
Fill in the database, username, password, and database host as pictured and run the installation:
Fill out the welcome information and click Install WordPress.
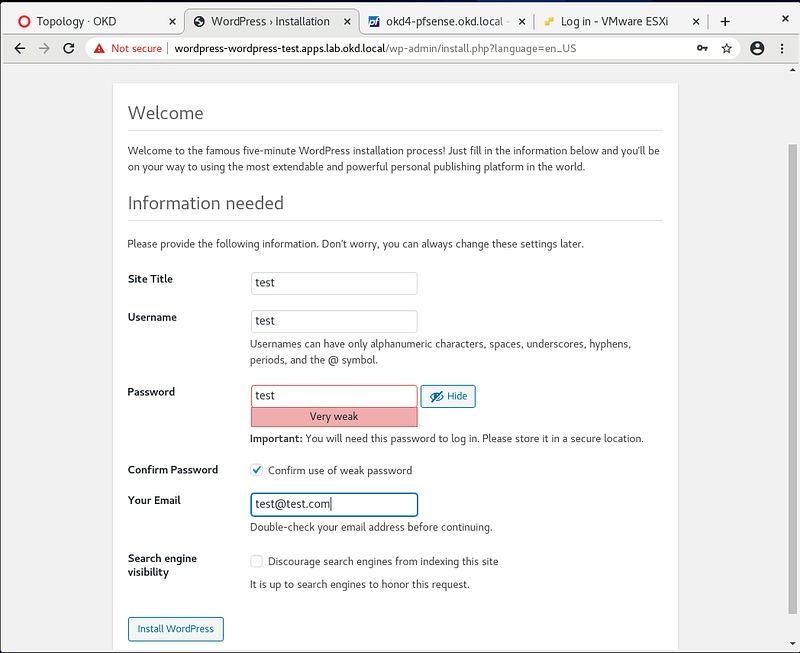
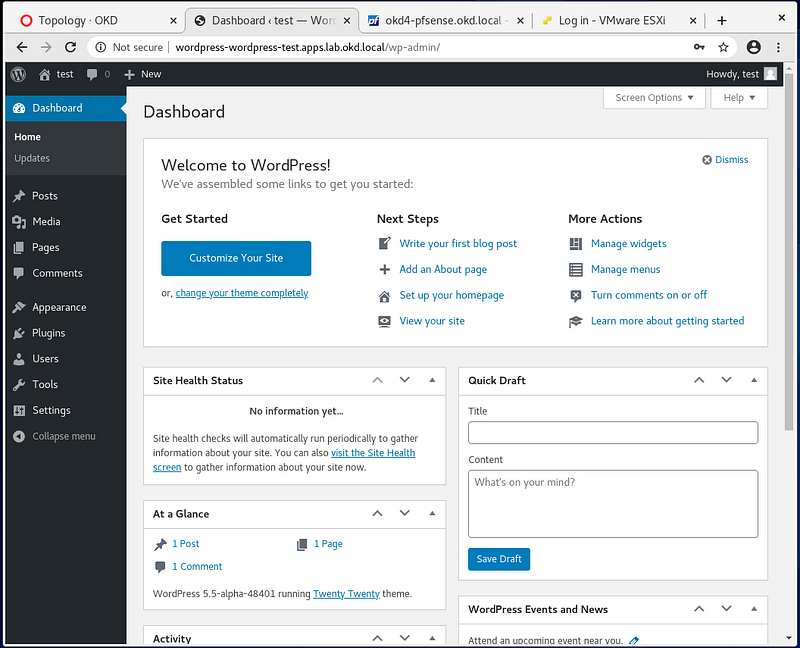
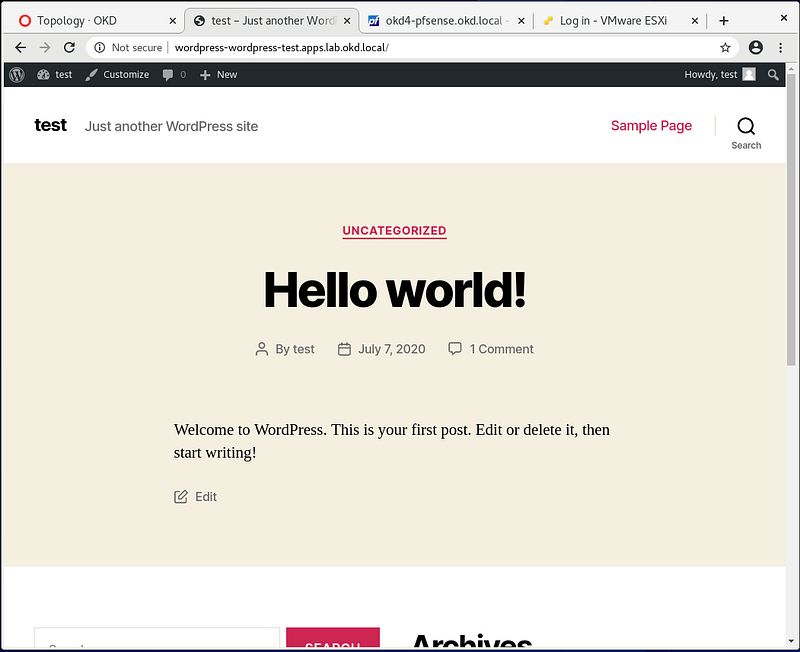
Log in, and you should have a working WordPress installation:
Check the size of your NFS export on the okd4-services VM. It should be around 300MB in size.
du -sh /var/nfsshare/registry/

You have just verified your persistent volume is working.
HTPasswd Setup:
The kubeadmin is a temporary user. The easiest way to set up a local user is with htpasswd.
cd
cd okd4-snc-hyperv
htpasswd -c -B -b users.htpasswd testuser testpassword

Create a secret in the openshift-config project using the users.htpasswd file you generated:
oc create secret generic htpass-secret --from-file=htpasswd=users.htpasswd -n openshift-config
Add the identity provider.
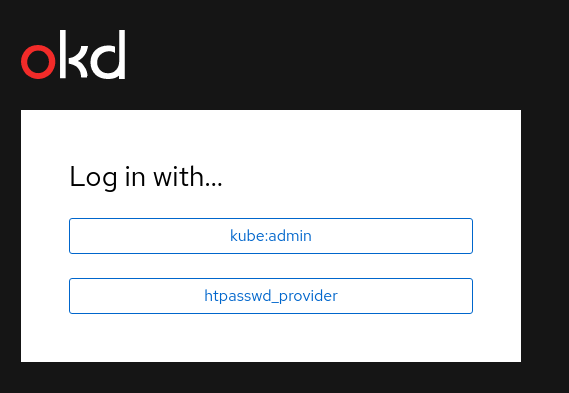
oc apply -f htpasswd_provider.yaml

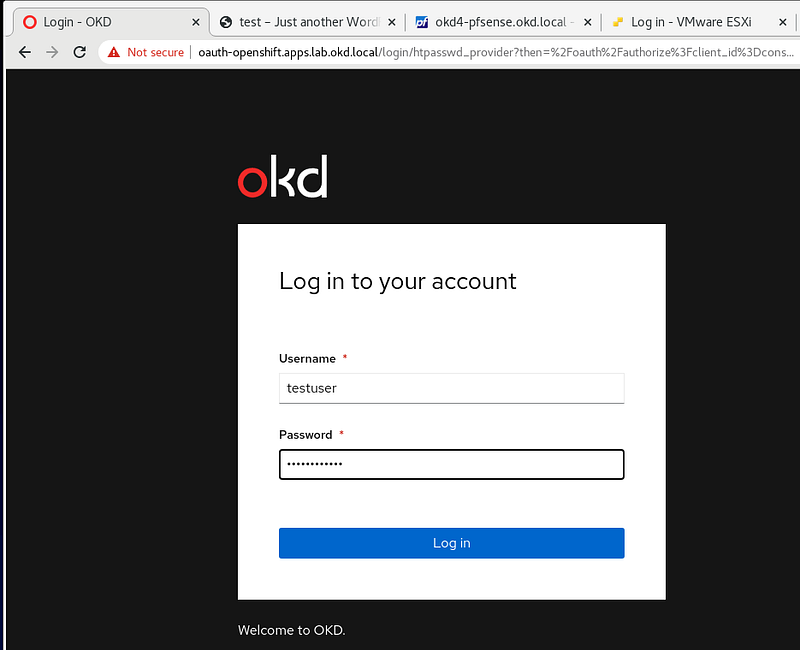
Logout of the OpenShift Console. Then select htpasswd_provider and login with testuser and testpassword credentials.
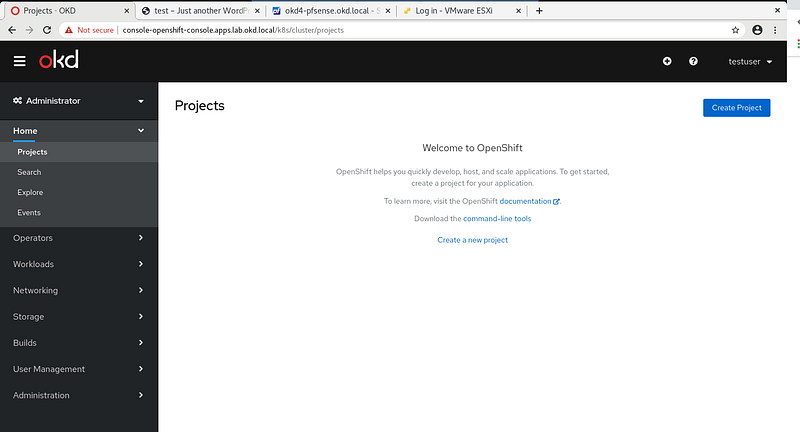
If you visit the Administrator page you should see no projects:
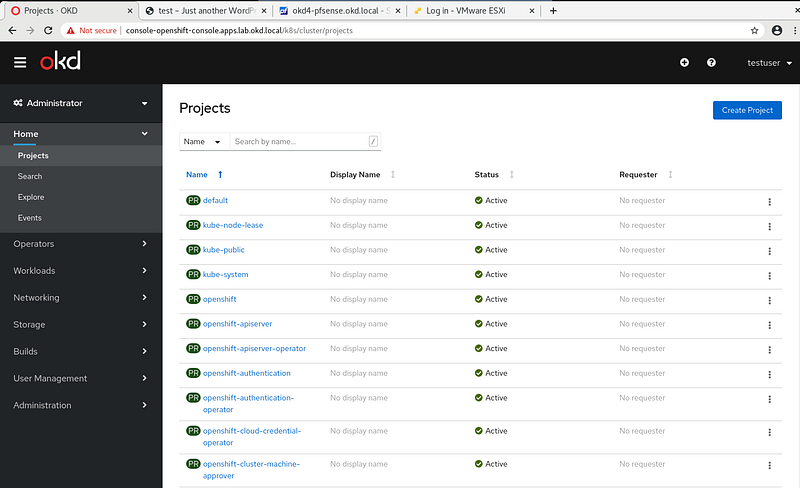
Give yourself cluster-admin access, and the projects should immediately populate:
oc adm policy add-cluster-role-to-user cluster-admin testuser
Your user should now have cluster-admin level access:
Congrats! You have created an OKD Single Node Cluster!
Hopefully, you have created an OKD single node cluster and learned a few things along the way. At this point, you should have a decent basis to tinker with OKD and continue to learn.
Here are some resources available to help you along your journey:
To report issues, use the OKD Github Repo: https://github.com/openshift/okd
For support check out the #openshift-users channel on k8s Slack
The OKD Working Group meets bi-weekly to discuss the development and next steps. The meeting schedule and location are tracked in the openshift/community repo.
Google group for okd-wg: https://groups.google.com/forum/#!forum/okd-wg